Data donation manual
A step-by-step guide to setting up a data donation study on the Next platform.
0Introduction
With data donation, participants share their own digital trace data with you, such as the data a platform like TikTok keeps about them. This manual shows you how to set this up on Next, from signing in to downloading the donated data.
How data donation works
Request the data
The participant asks the platform (e.g. TikTok) for a copy of their data. Your instructions on Next explain how.
Review and donate
A flow application extracts the relevant data on the participant's own device. The participant reviews it and decides what to donate.
Receive the data
Only the donated data is stored. You can find and export it in the Files tab of your project.
What you need
- A researcher account on next.eyra.co.
- A flow application: a .zip file with the code that reads the participant's data file and extracts the data you need. It is made for a specific platform (for example TikTok). To find out how to get a flow application, go to eyra.co/projects/data-donation and look for the Getting started section.
The steps in this manual
The example in this manual is a study called Social media study with one data donation item, TikTok data donation. Participants follow three tasks: read instructions on how to request their TikTok data, donate the data, and fill in a short questionnaire.
Everything you enter on Next is saved automatically. There is no save button for most fields.
1Sign in
-
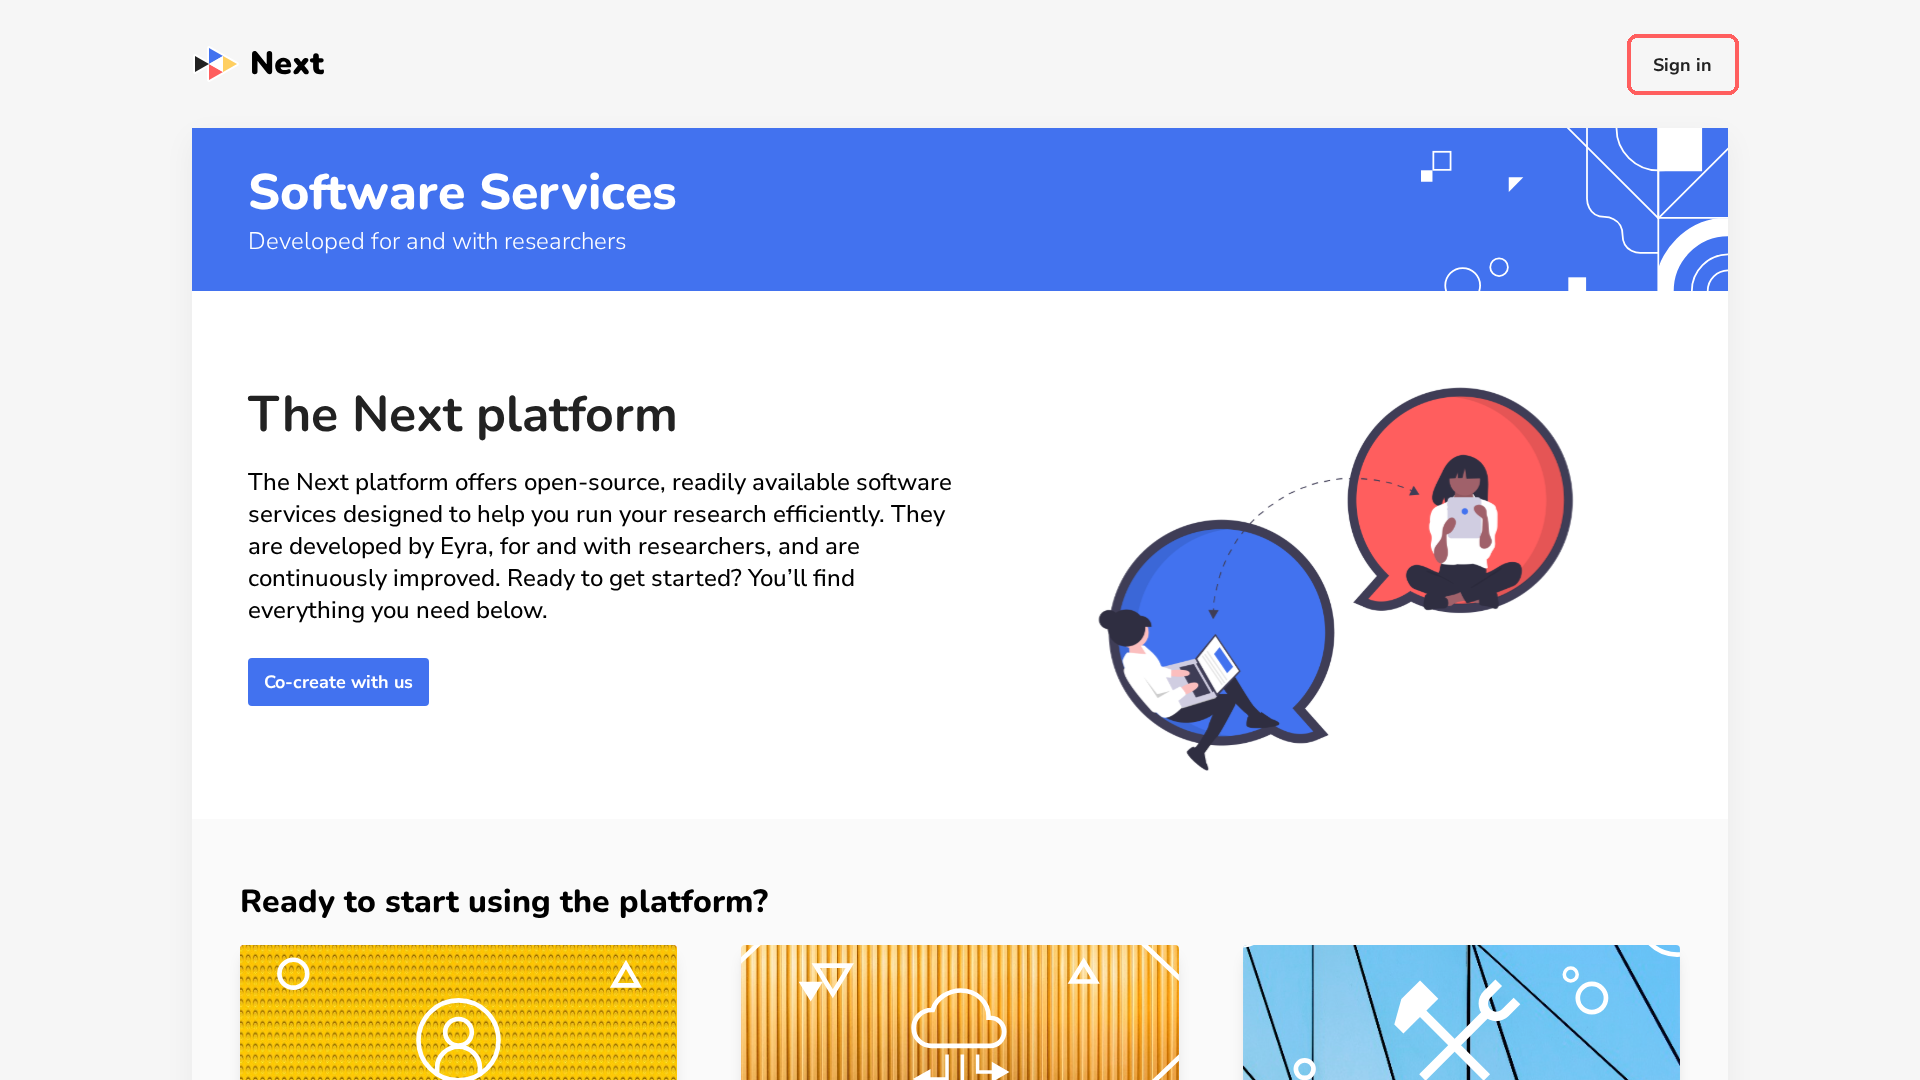
Go to next.eyra.co and click Sign in at the top right.

-
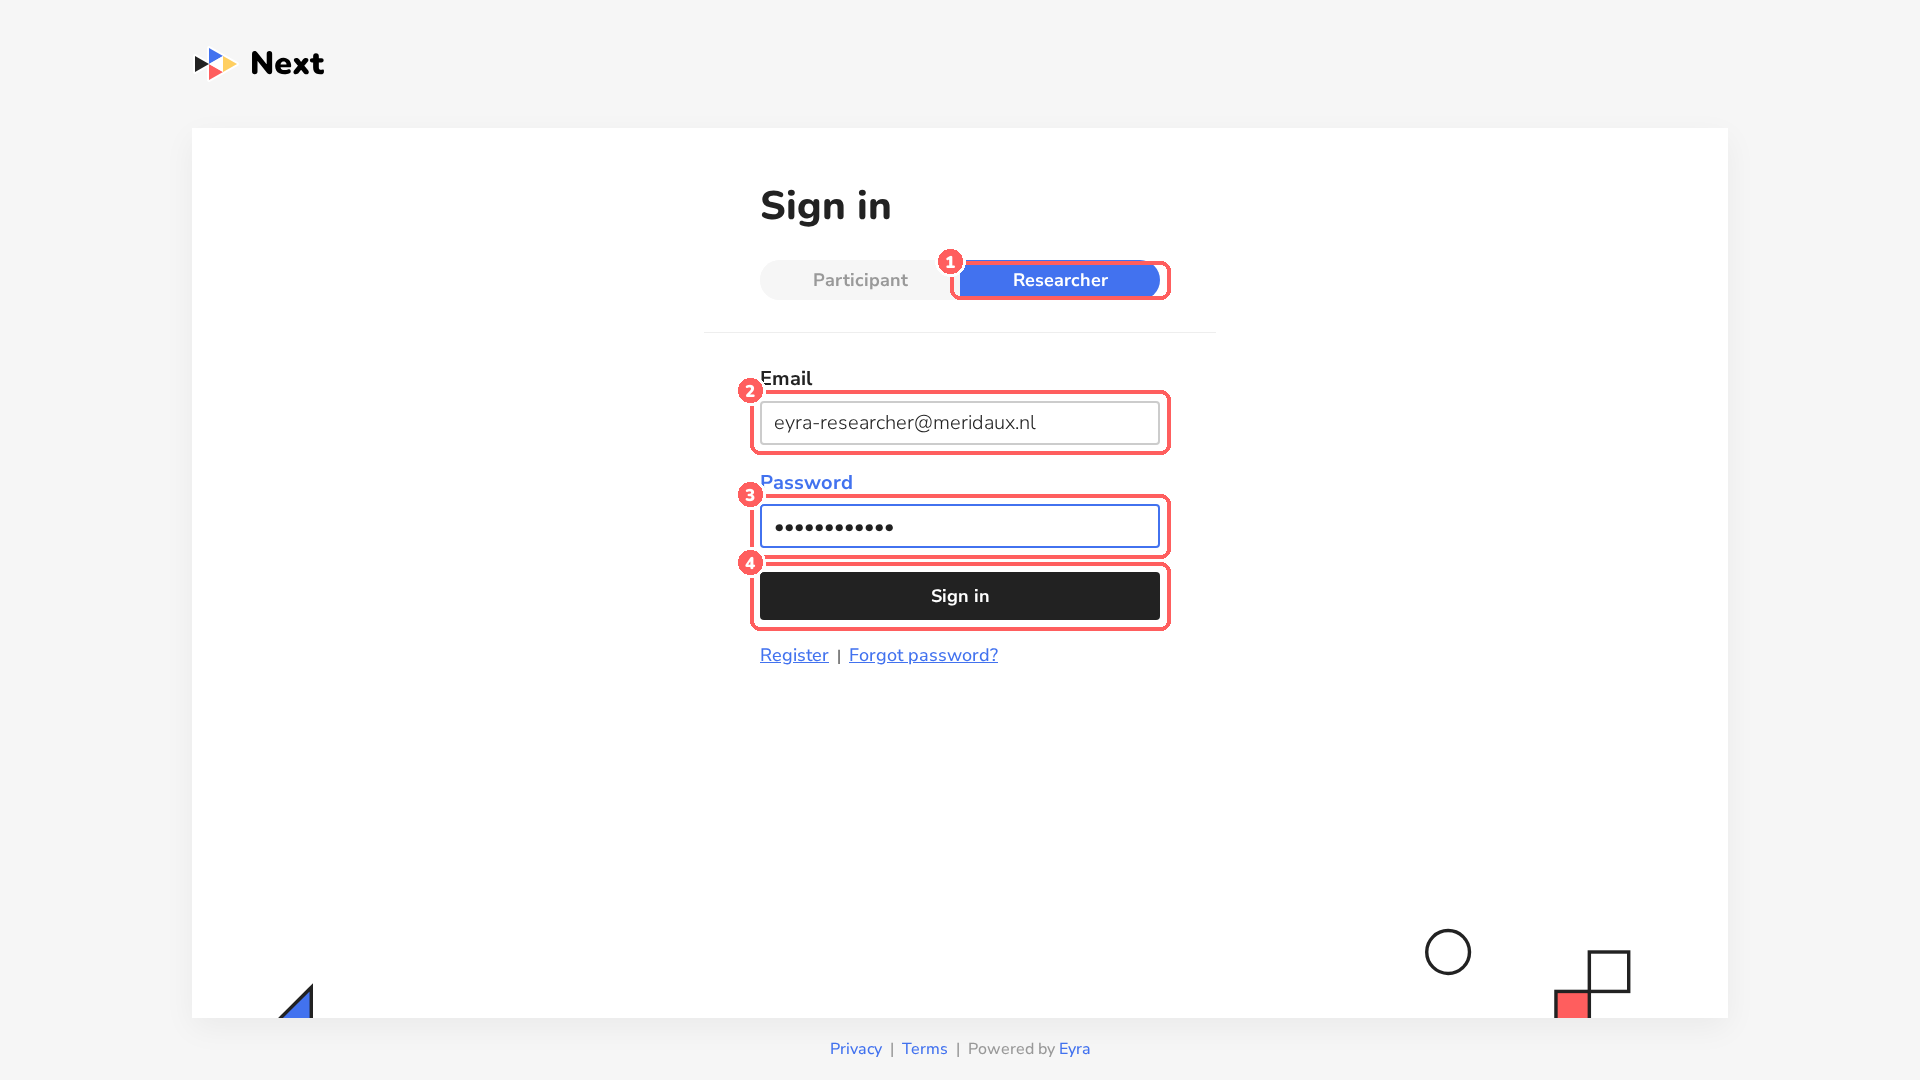
Sign in as a researcher:
- 1Select the Researcher tab.
- 2Enter your email address.
- 3Enter your password.
- 4Click Sign in.
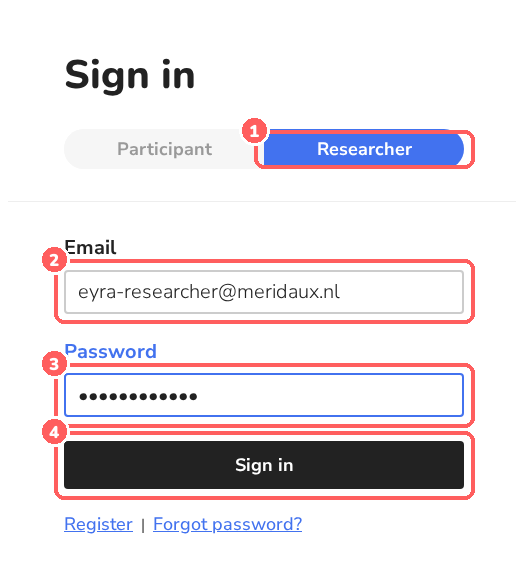
Don't have an account yet? Click Register below the form. Forgot your password? Use Forgot password?.
-
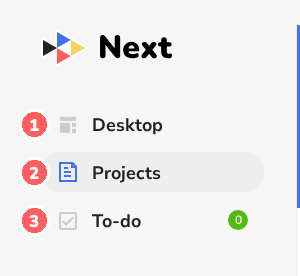
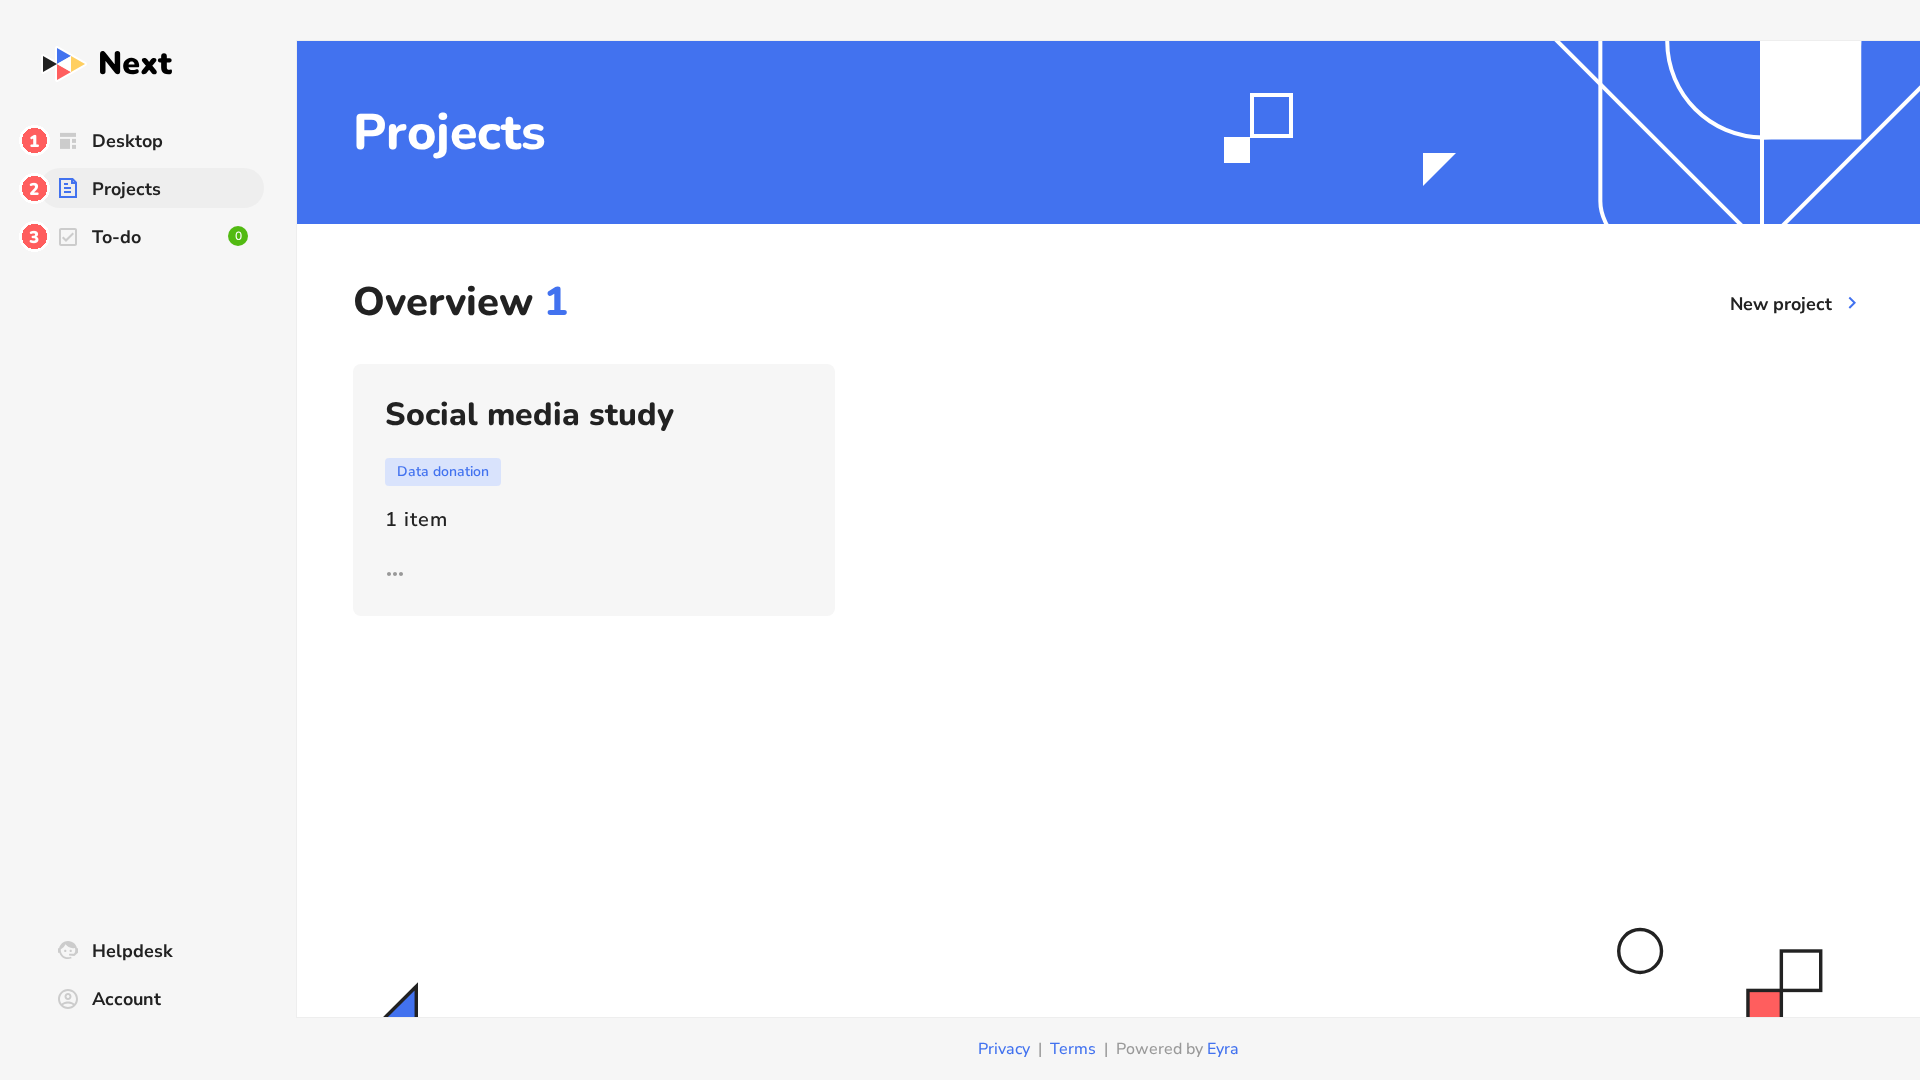
After signing in you see the Projects page. Use the menu on the left to find your way:
- 1Desktop: your personal start page.
- 2Projects: all your projects. This is where you set up your study.
- 3To-do: tasks that are waiting for you.
At the bottom left you find Helpdesk (to contact Eyra support) and Account (your account settings).
2Create a project
A project is a folder for your study. It can hold one or more items, such as a data donation.
-
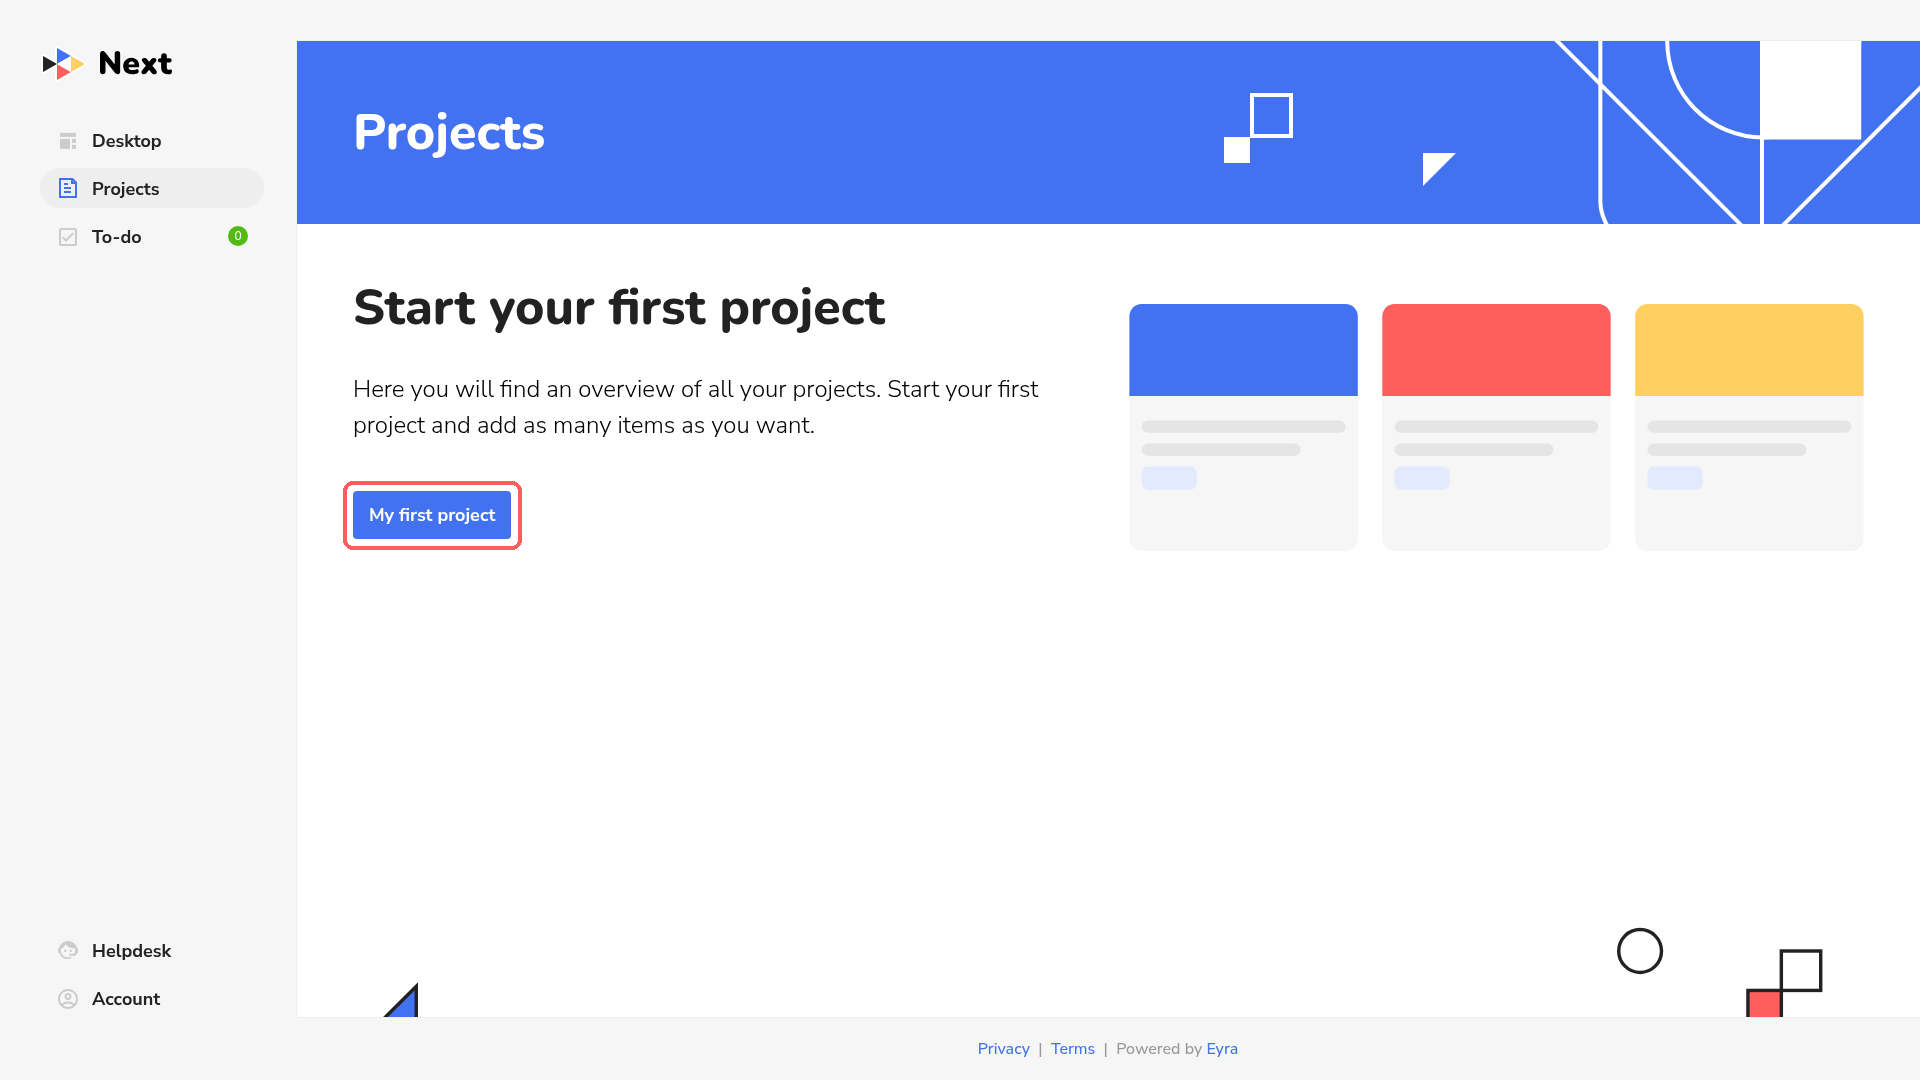
Go to Projects. If this is your first project, click My first project.
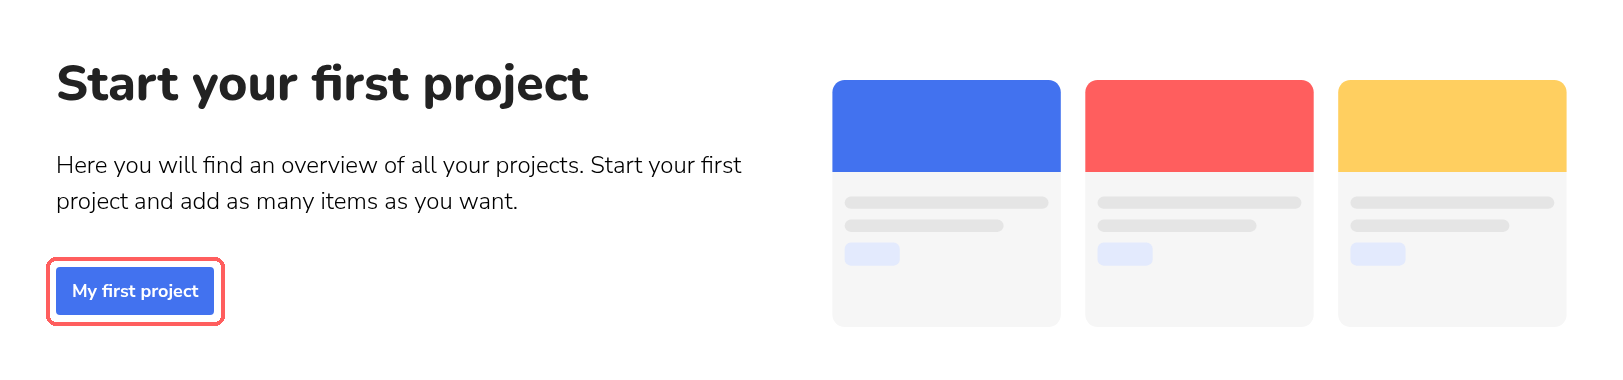
Next creates the project right away and calls it New project.
-
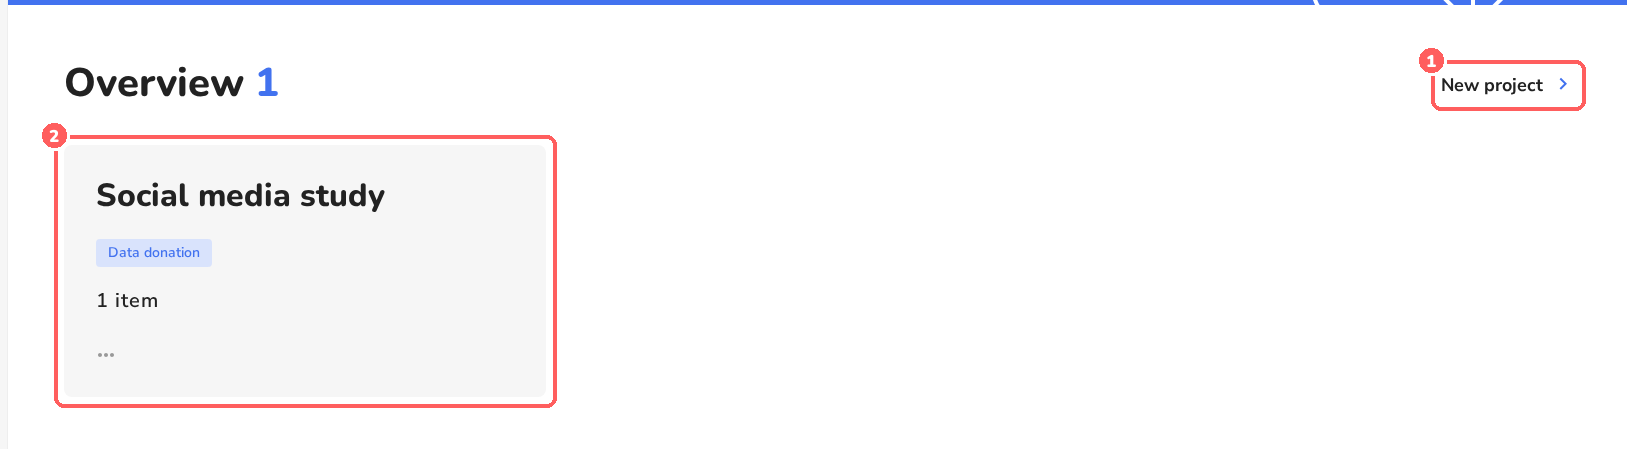
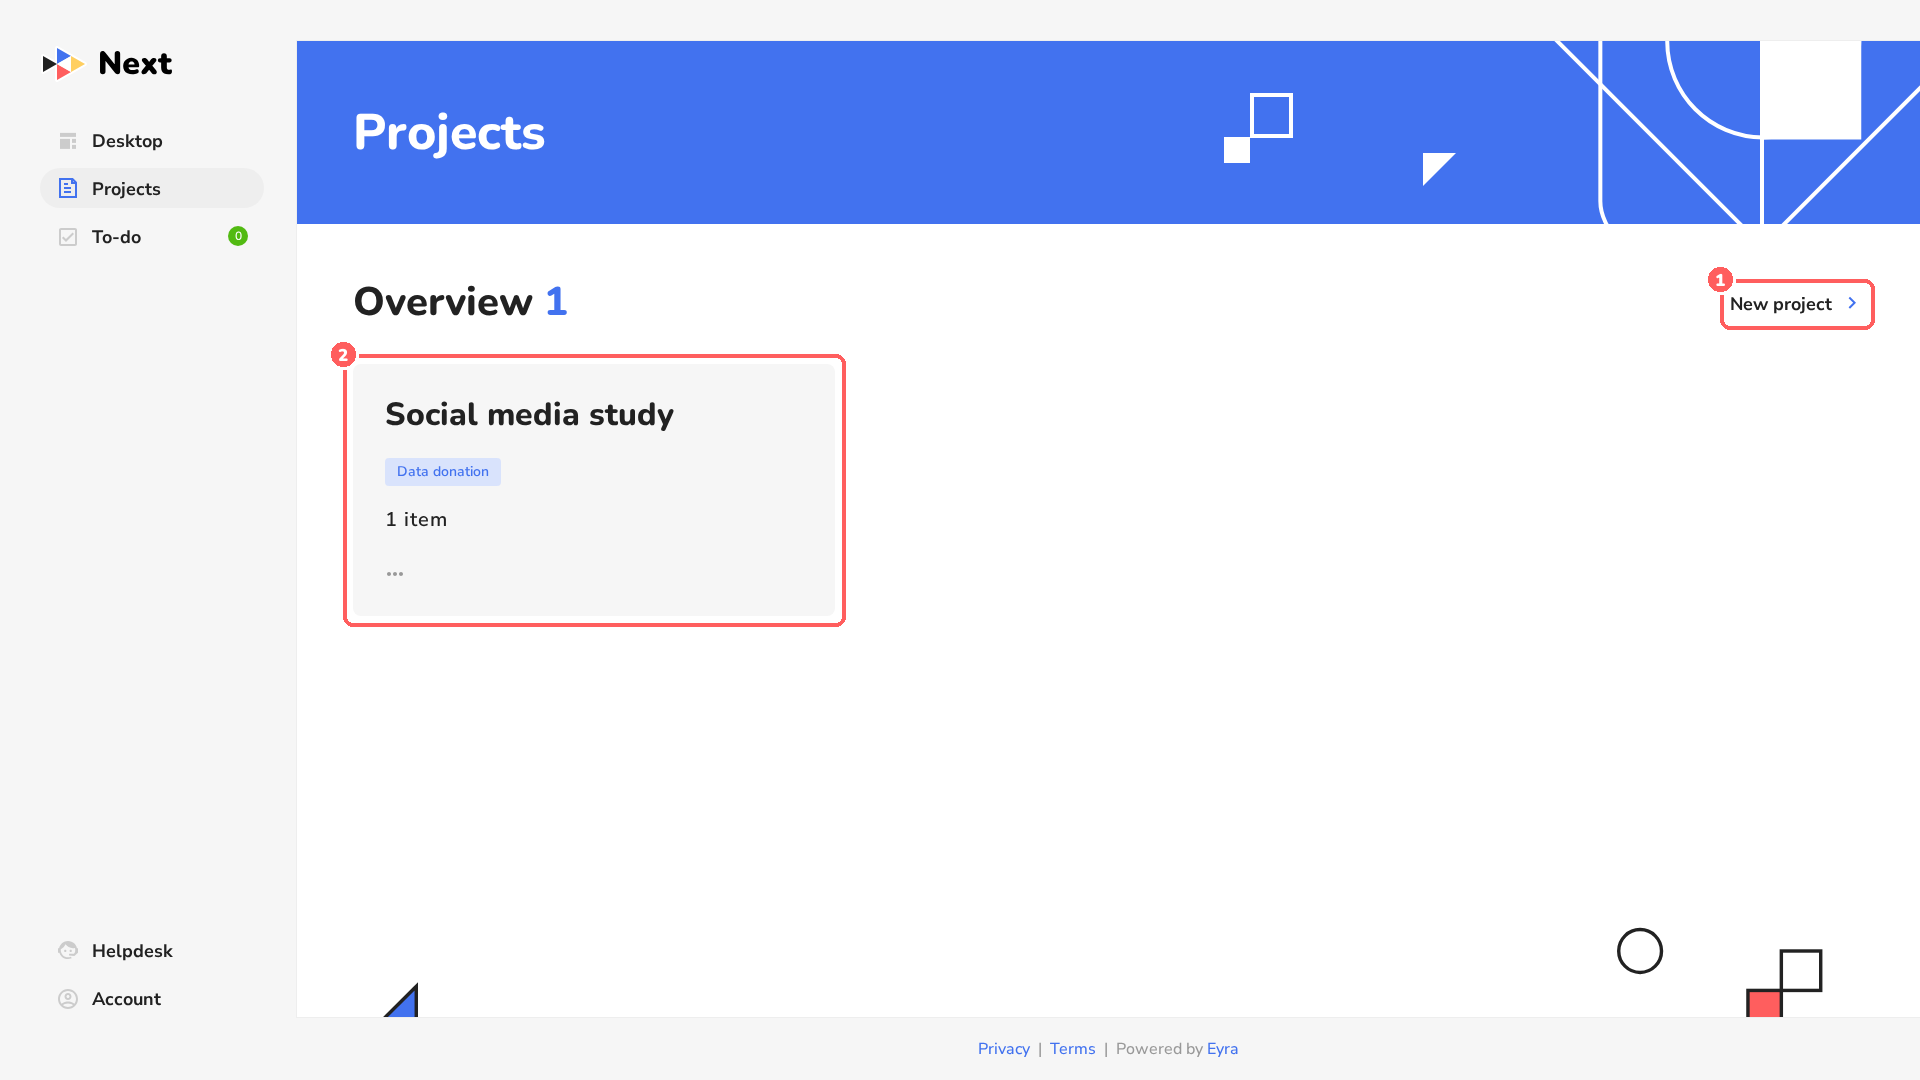
Your projects are shown as cards 2. To create another project later, click New project 1 at the top right.
-
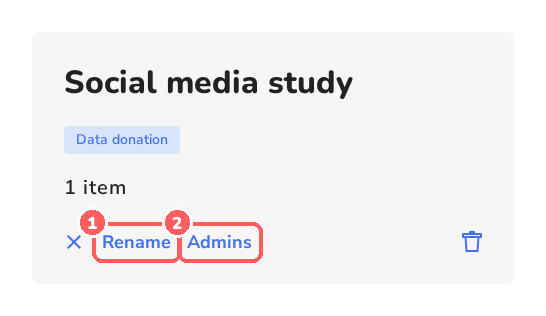
Give the project a clear name. Click the … at the bottom of the project card and choose Rename 1.
-
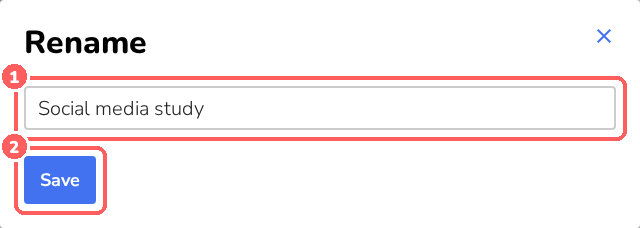
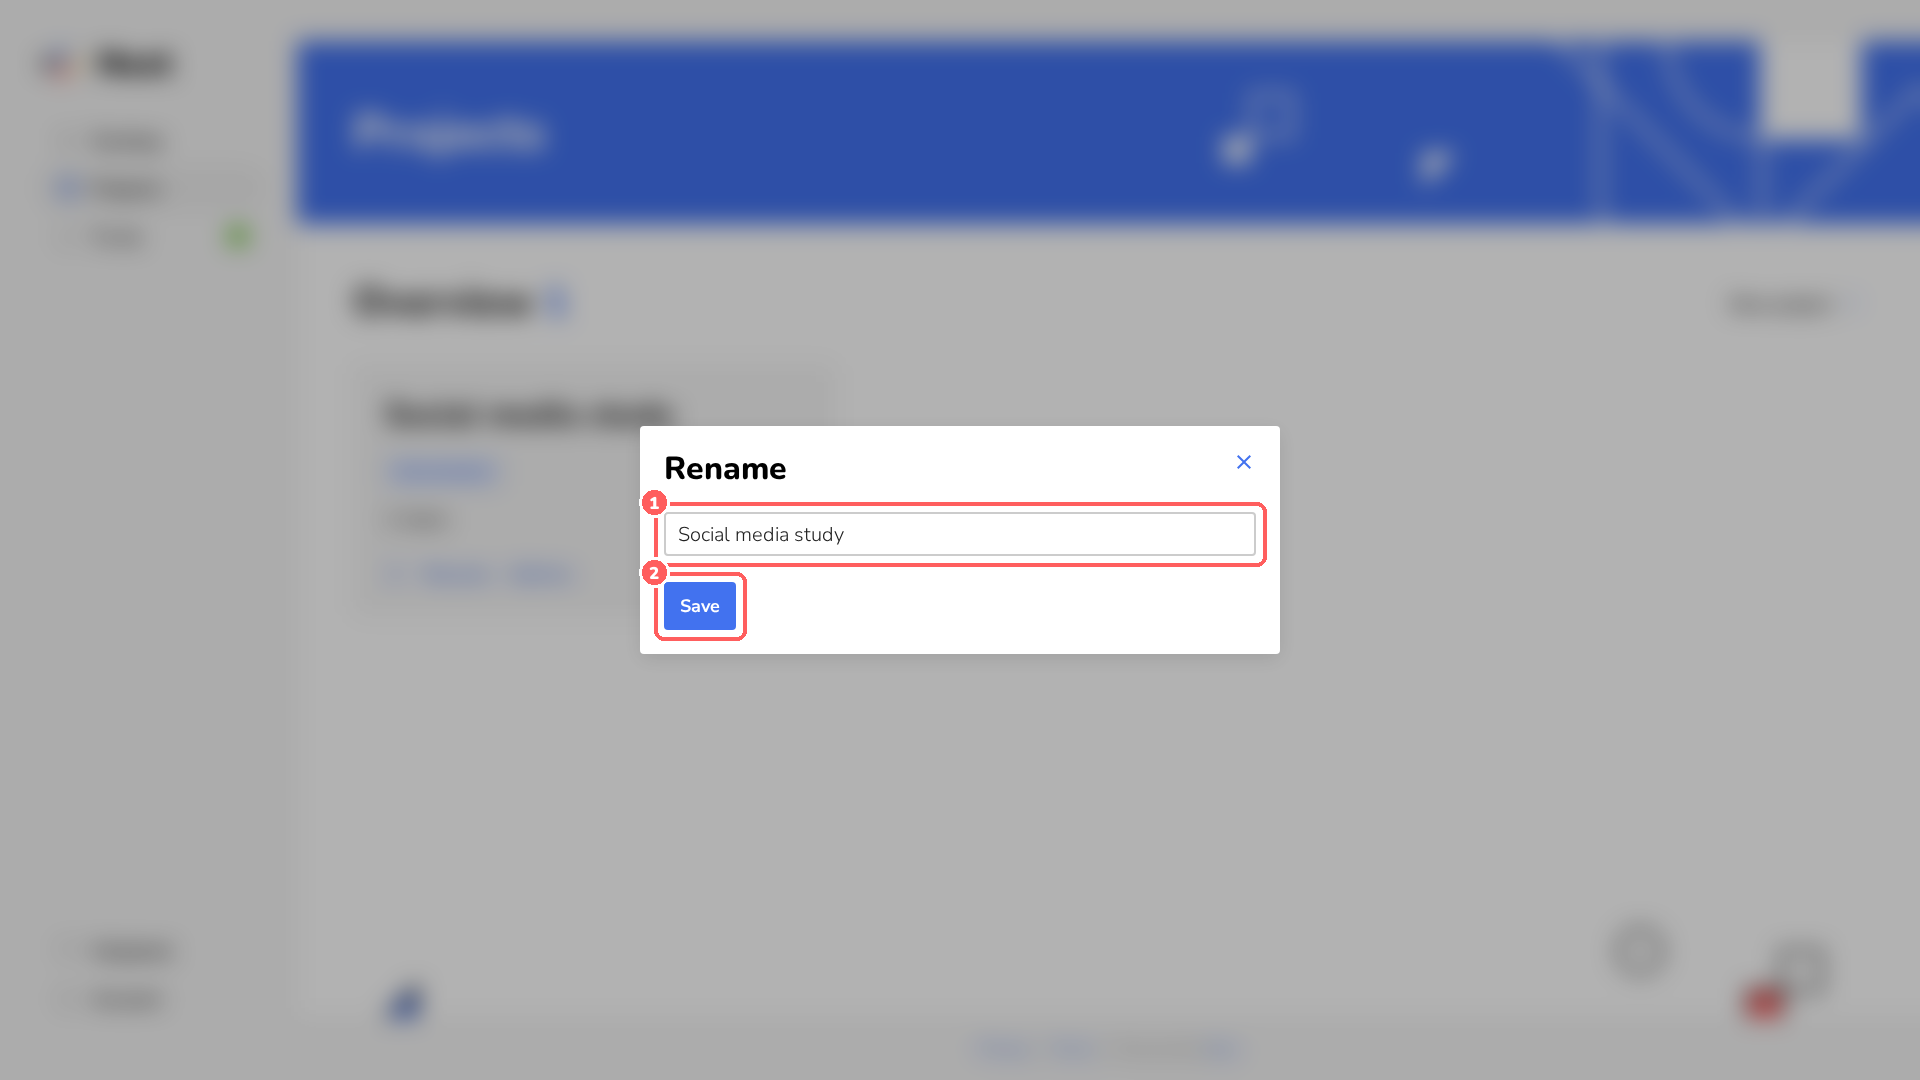
Type the new name 1 and click Save 2.
-
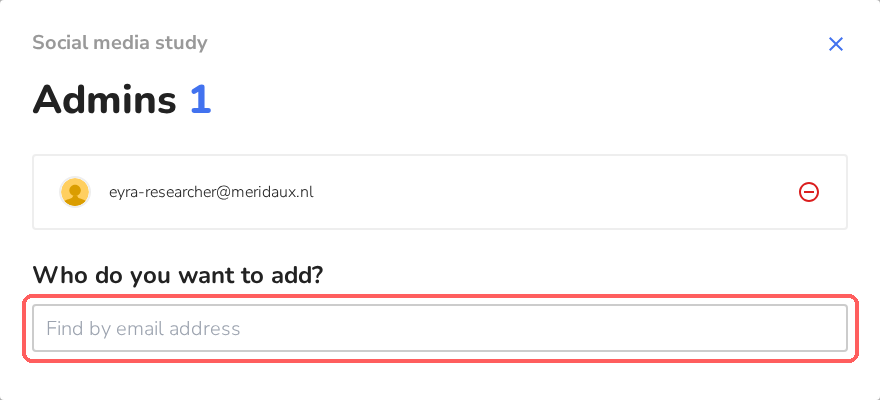
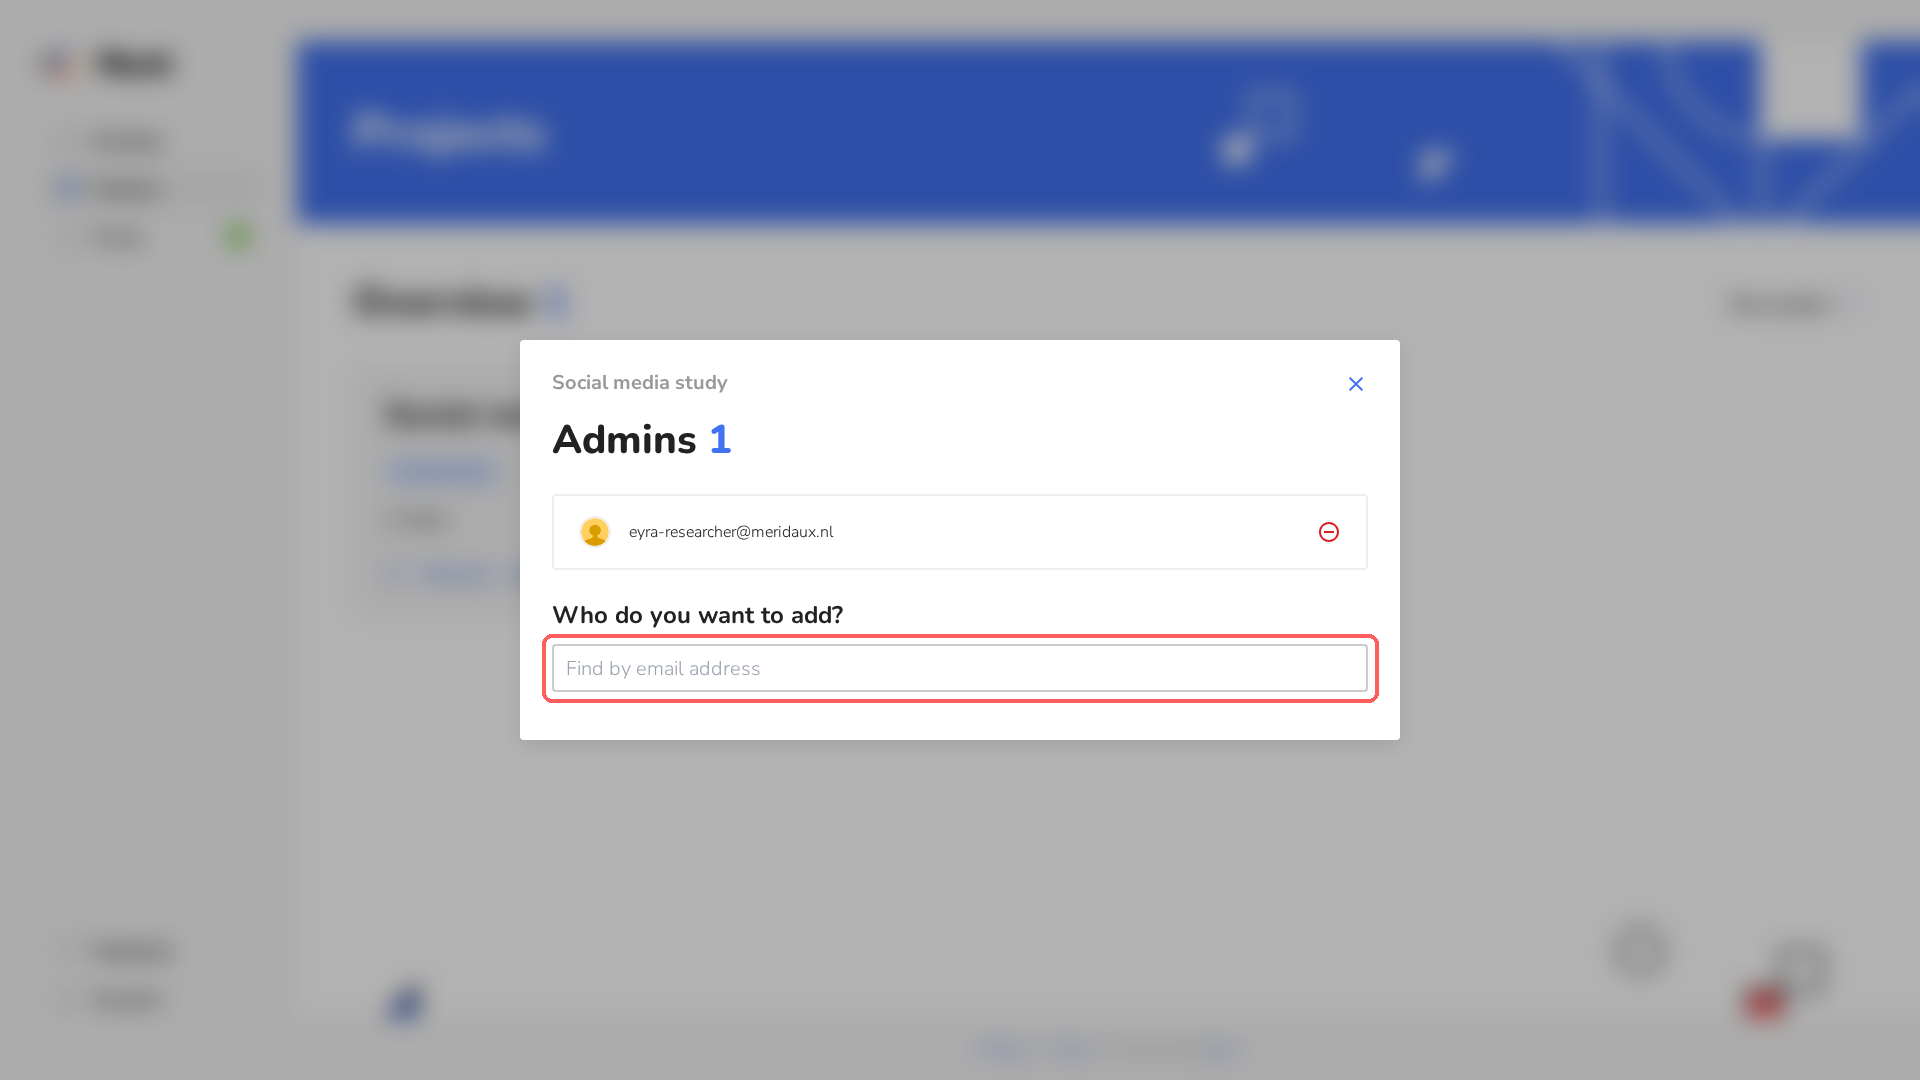
Optional: want to work on the project with colleagues? Choose Admins 2 in the same menu and search for their email address. They need a Next account.
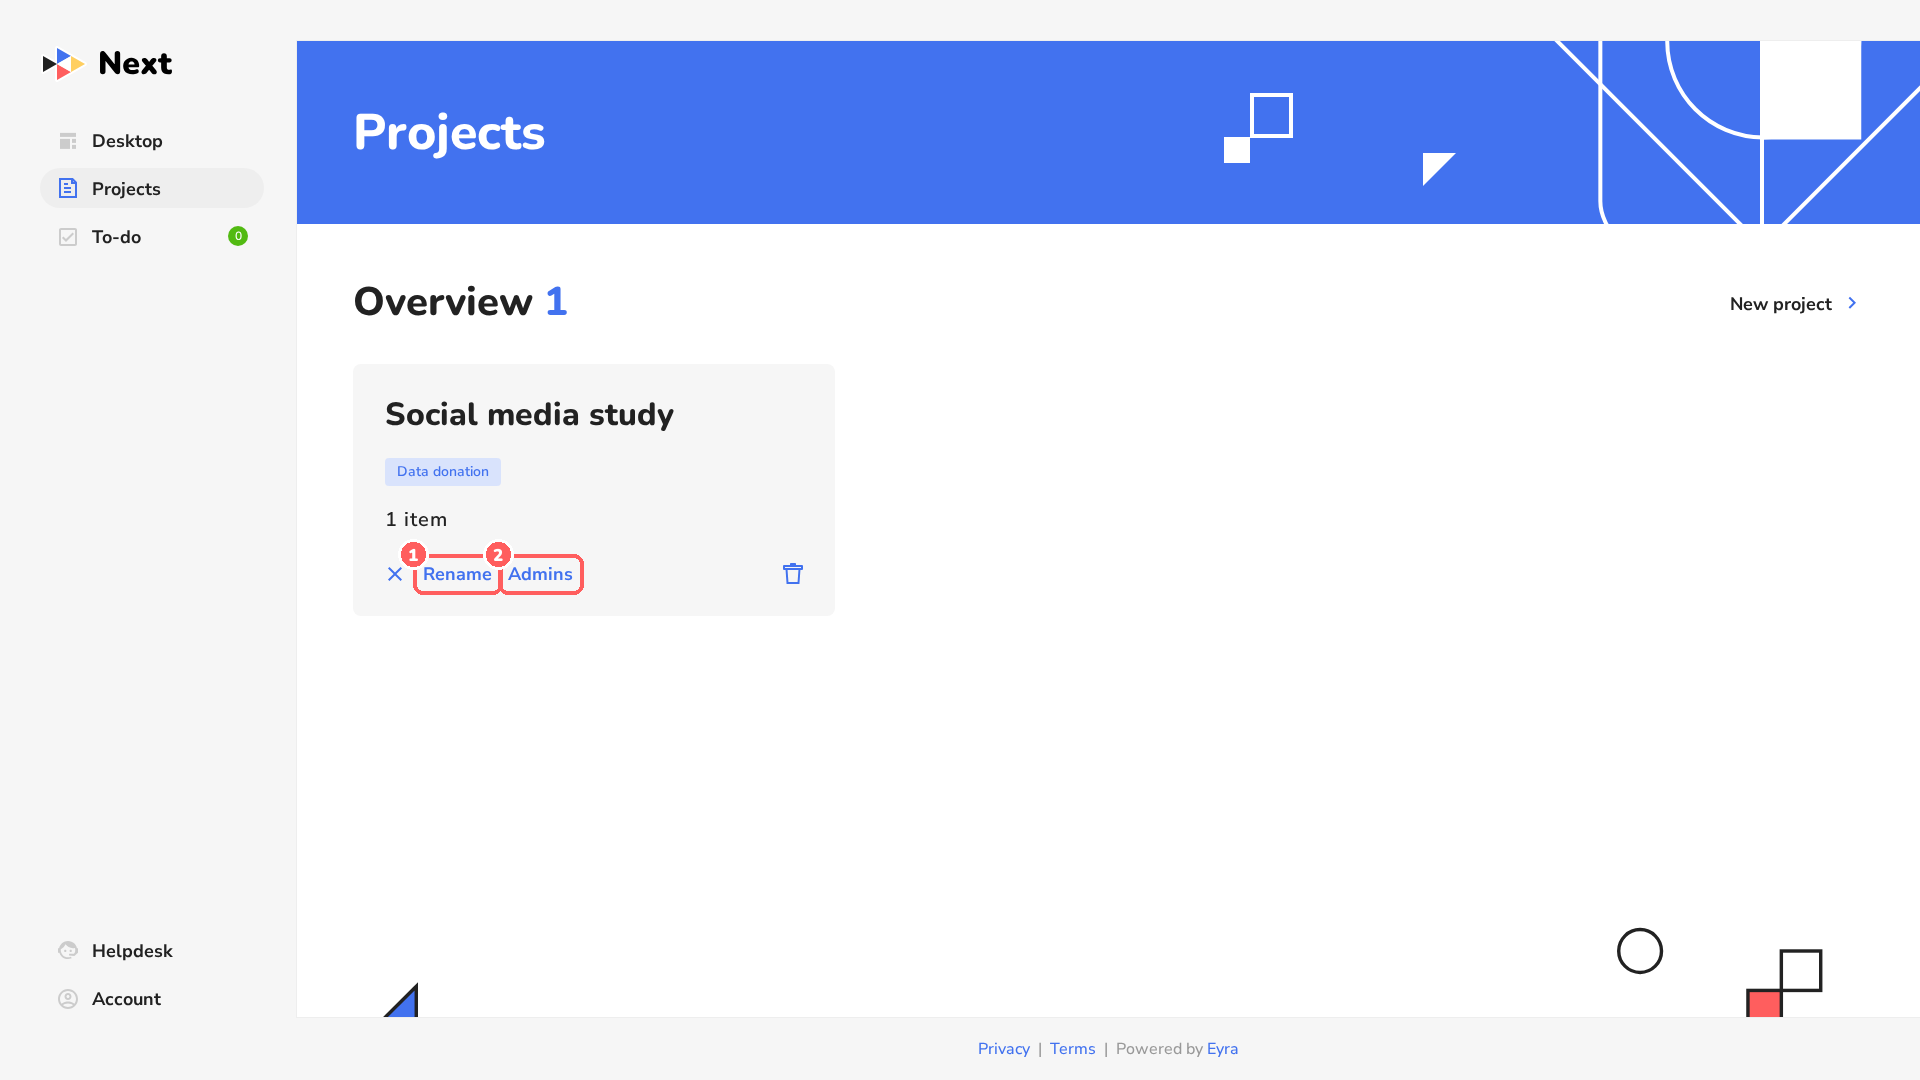
The bin icon in the card menu deletes the project. Only use it if you really want to remove the project.
3Add a data donation item
-
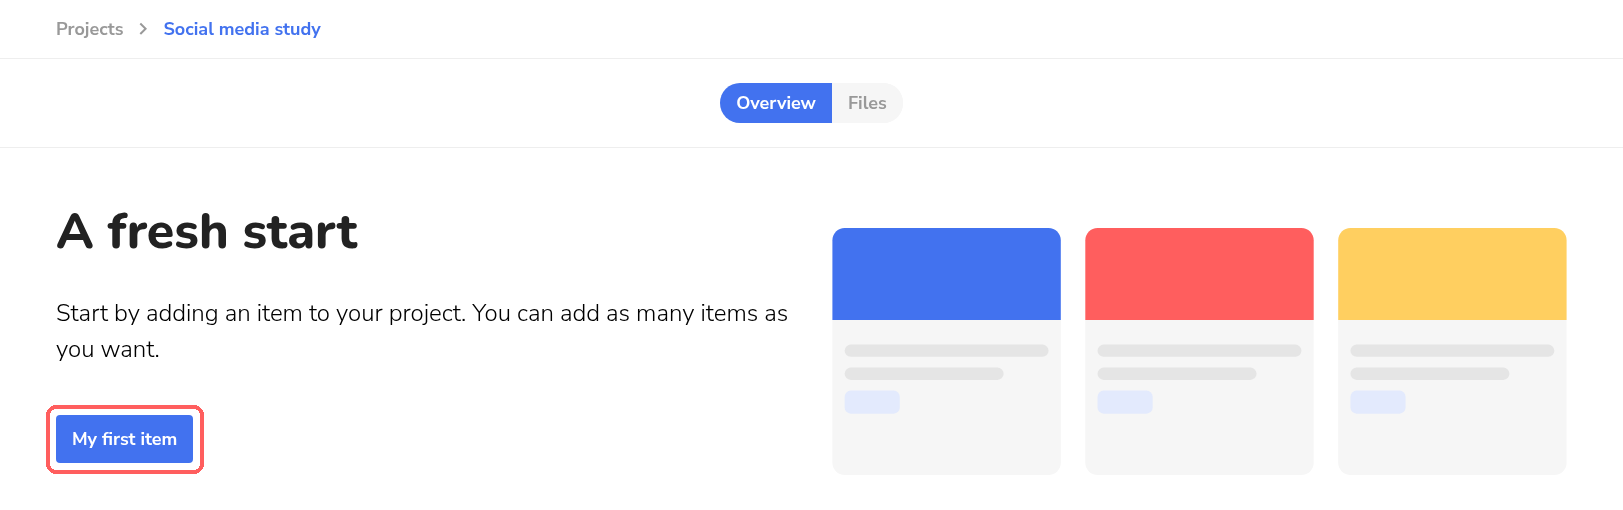
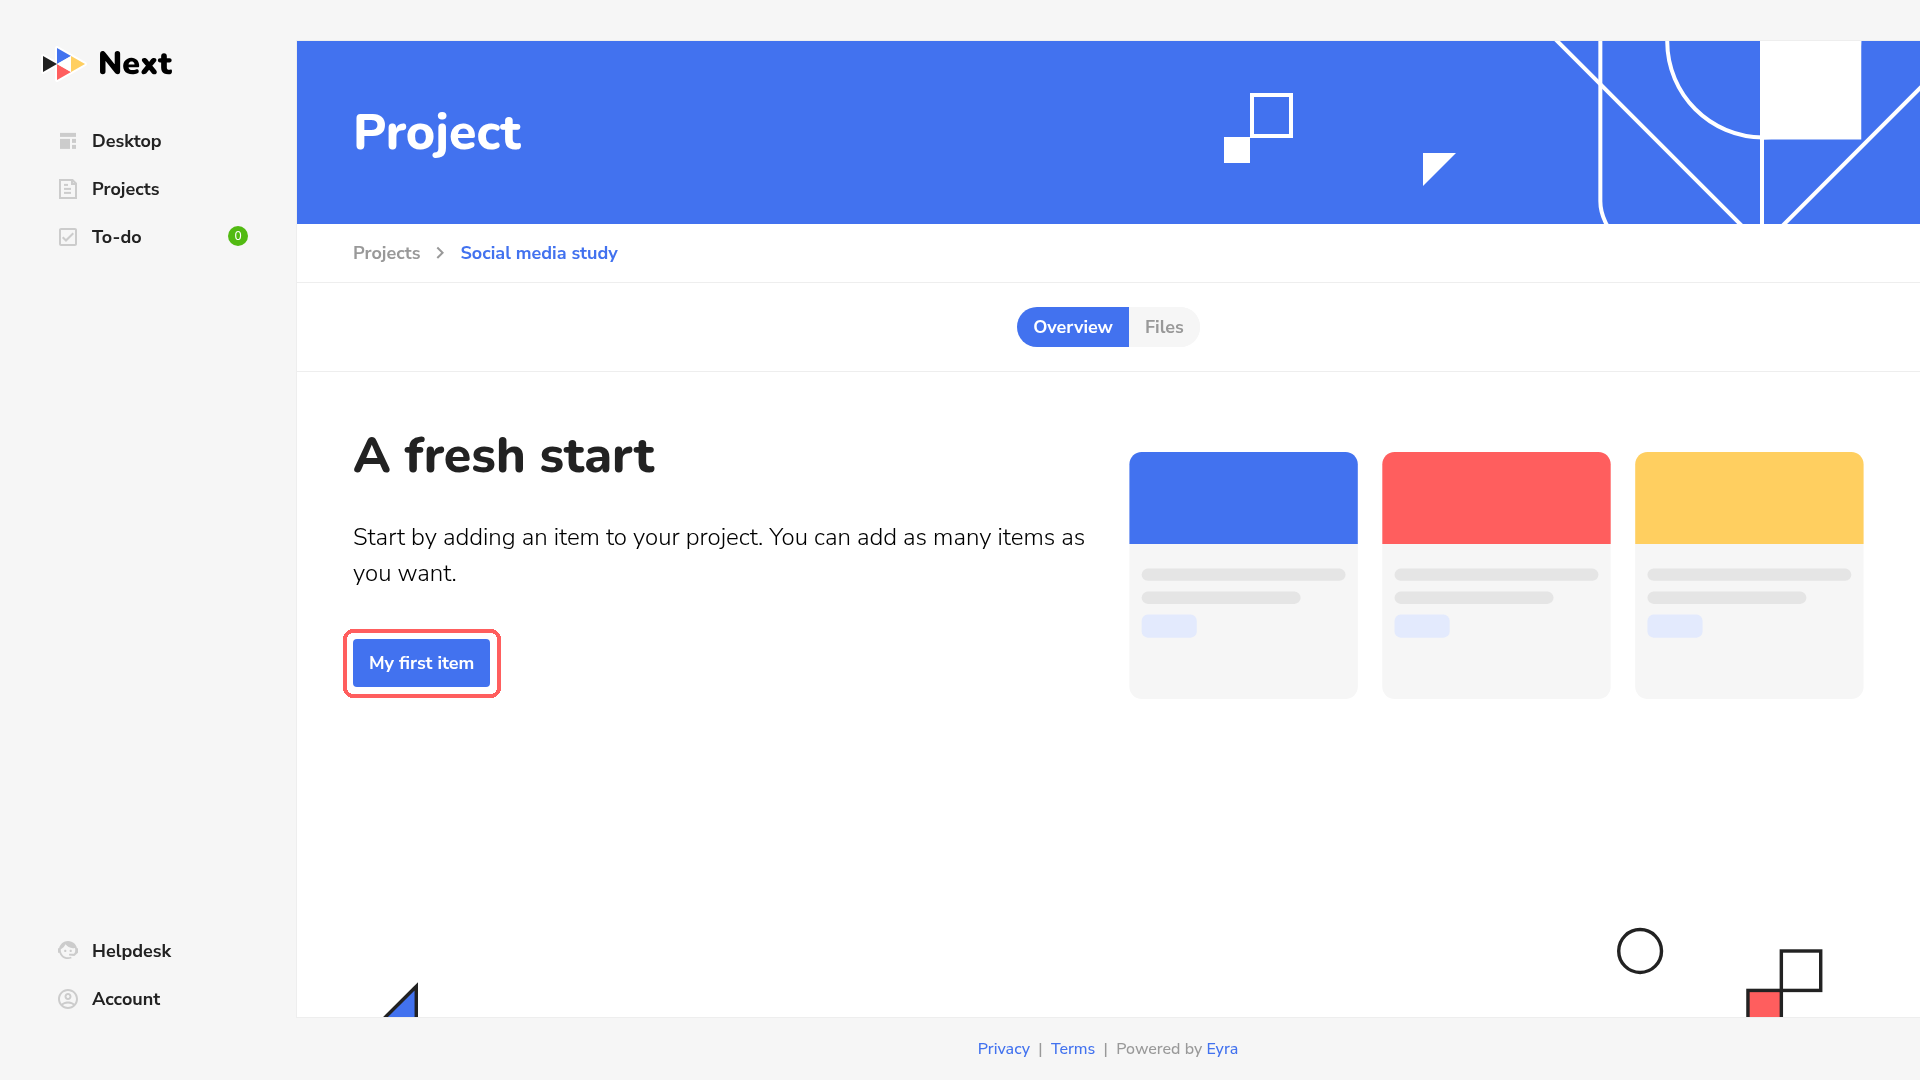
Click the project card to open it. In an empty project, click My first item.
-
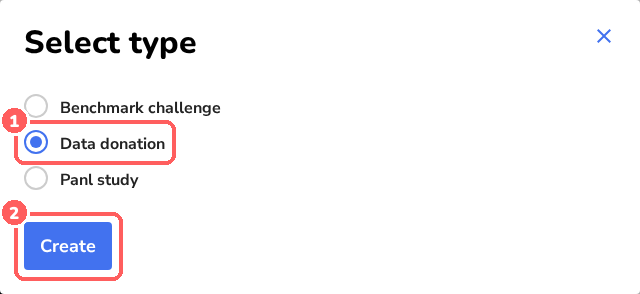
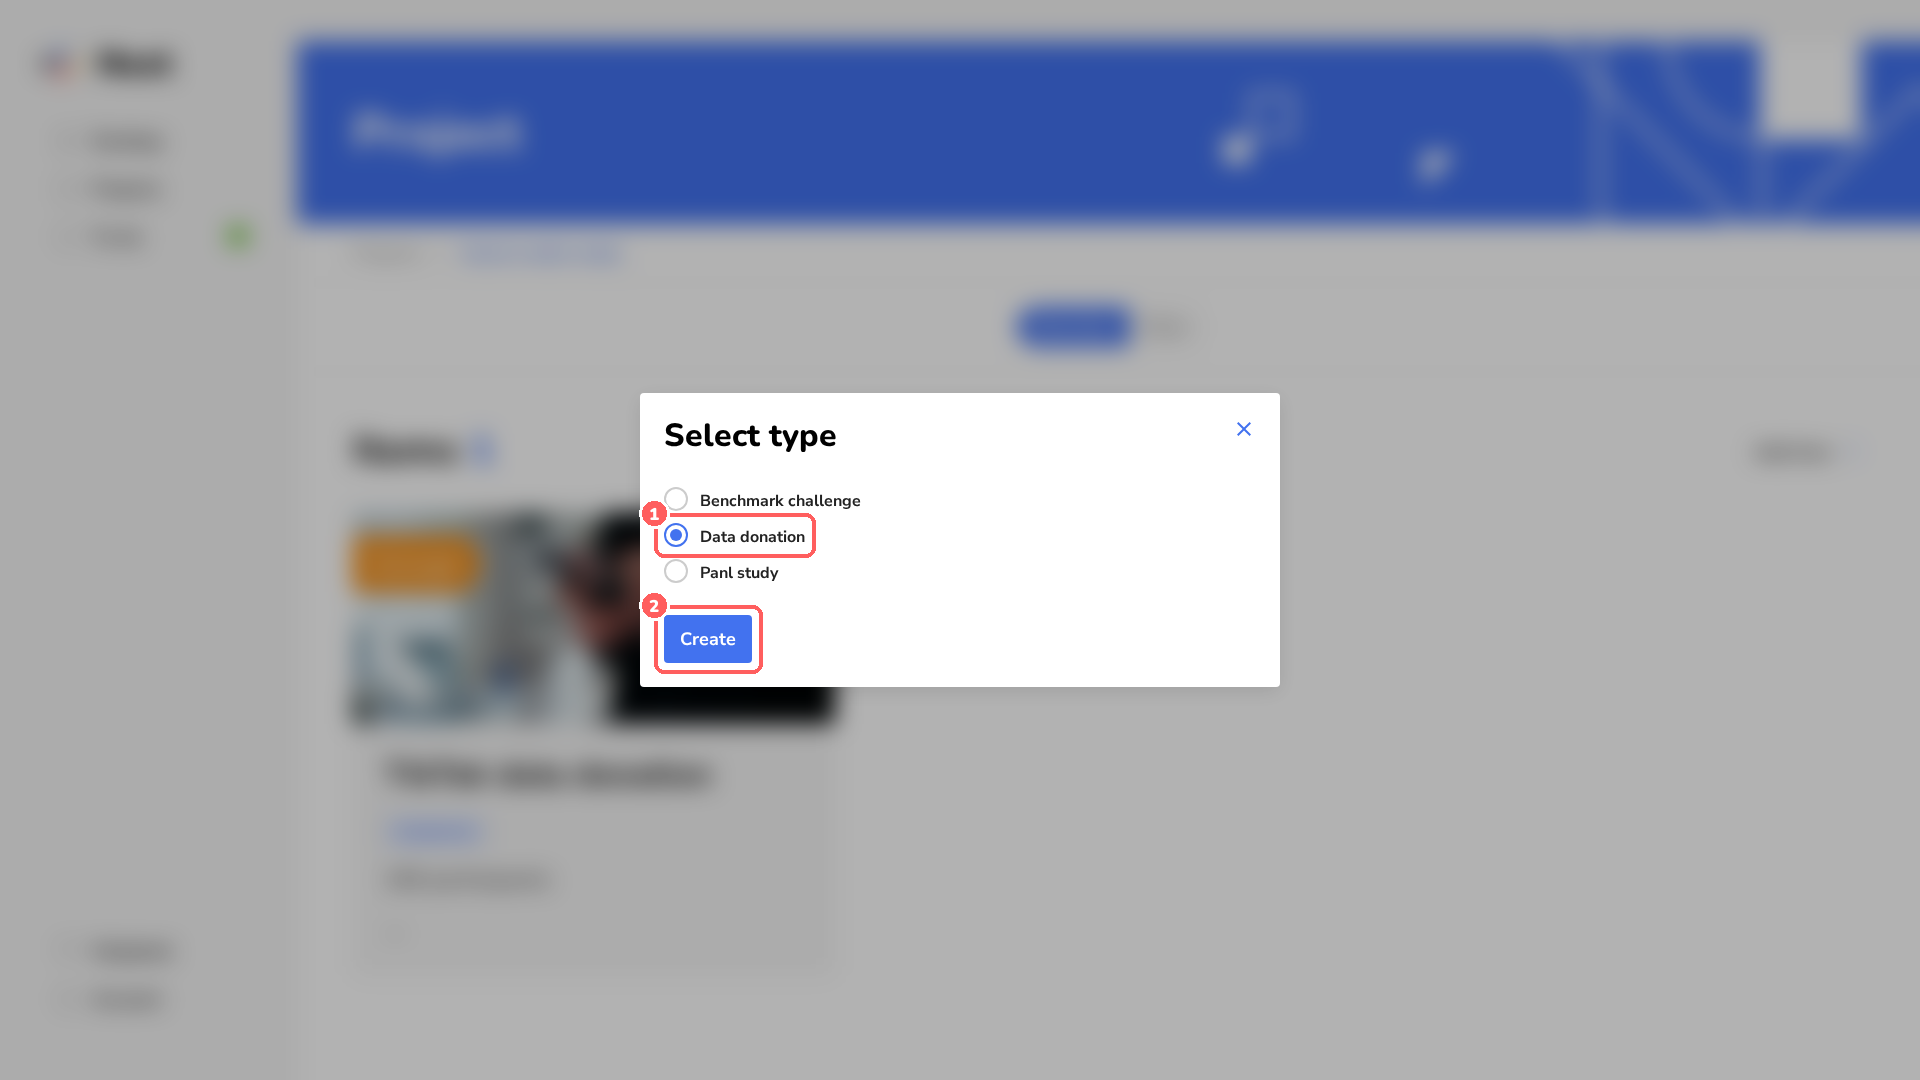
Select Data donation 1 and click Create 2.
-
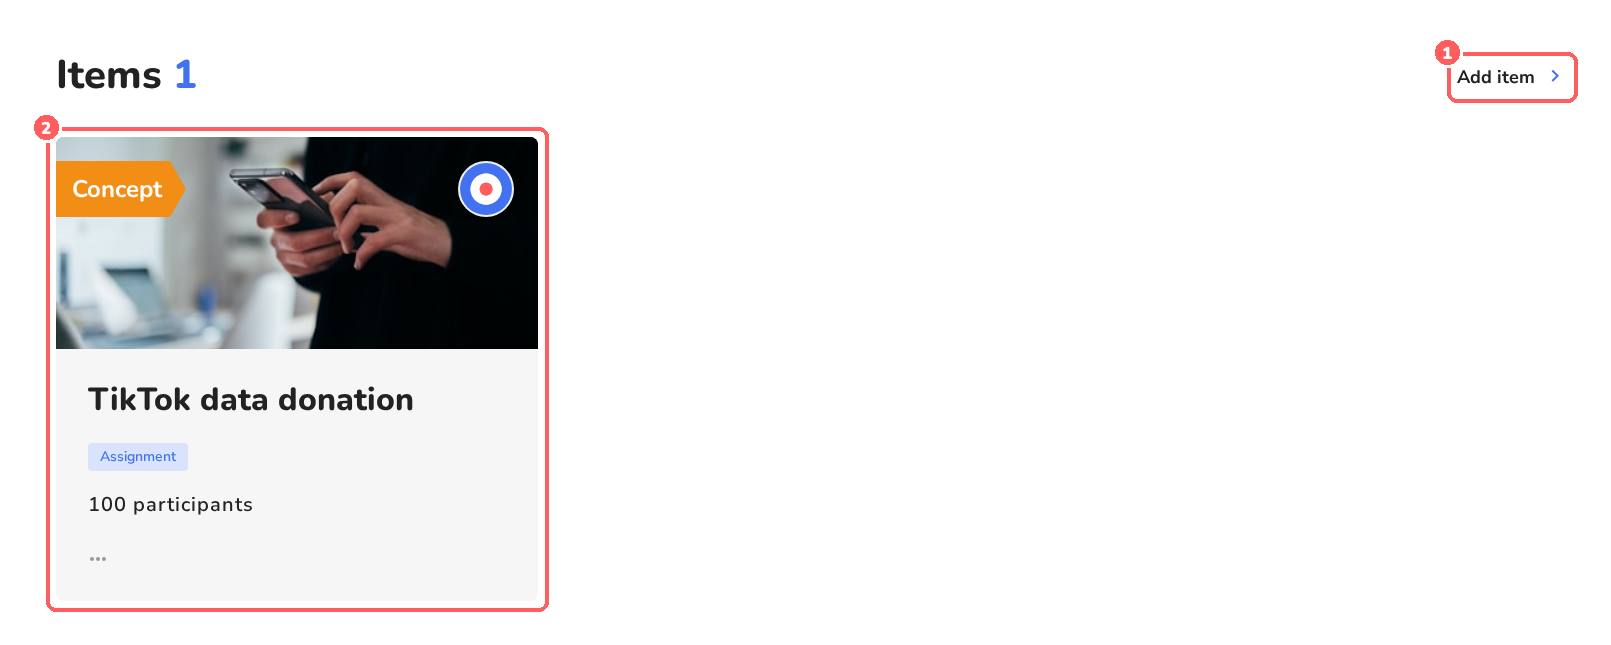
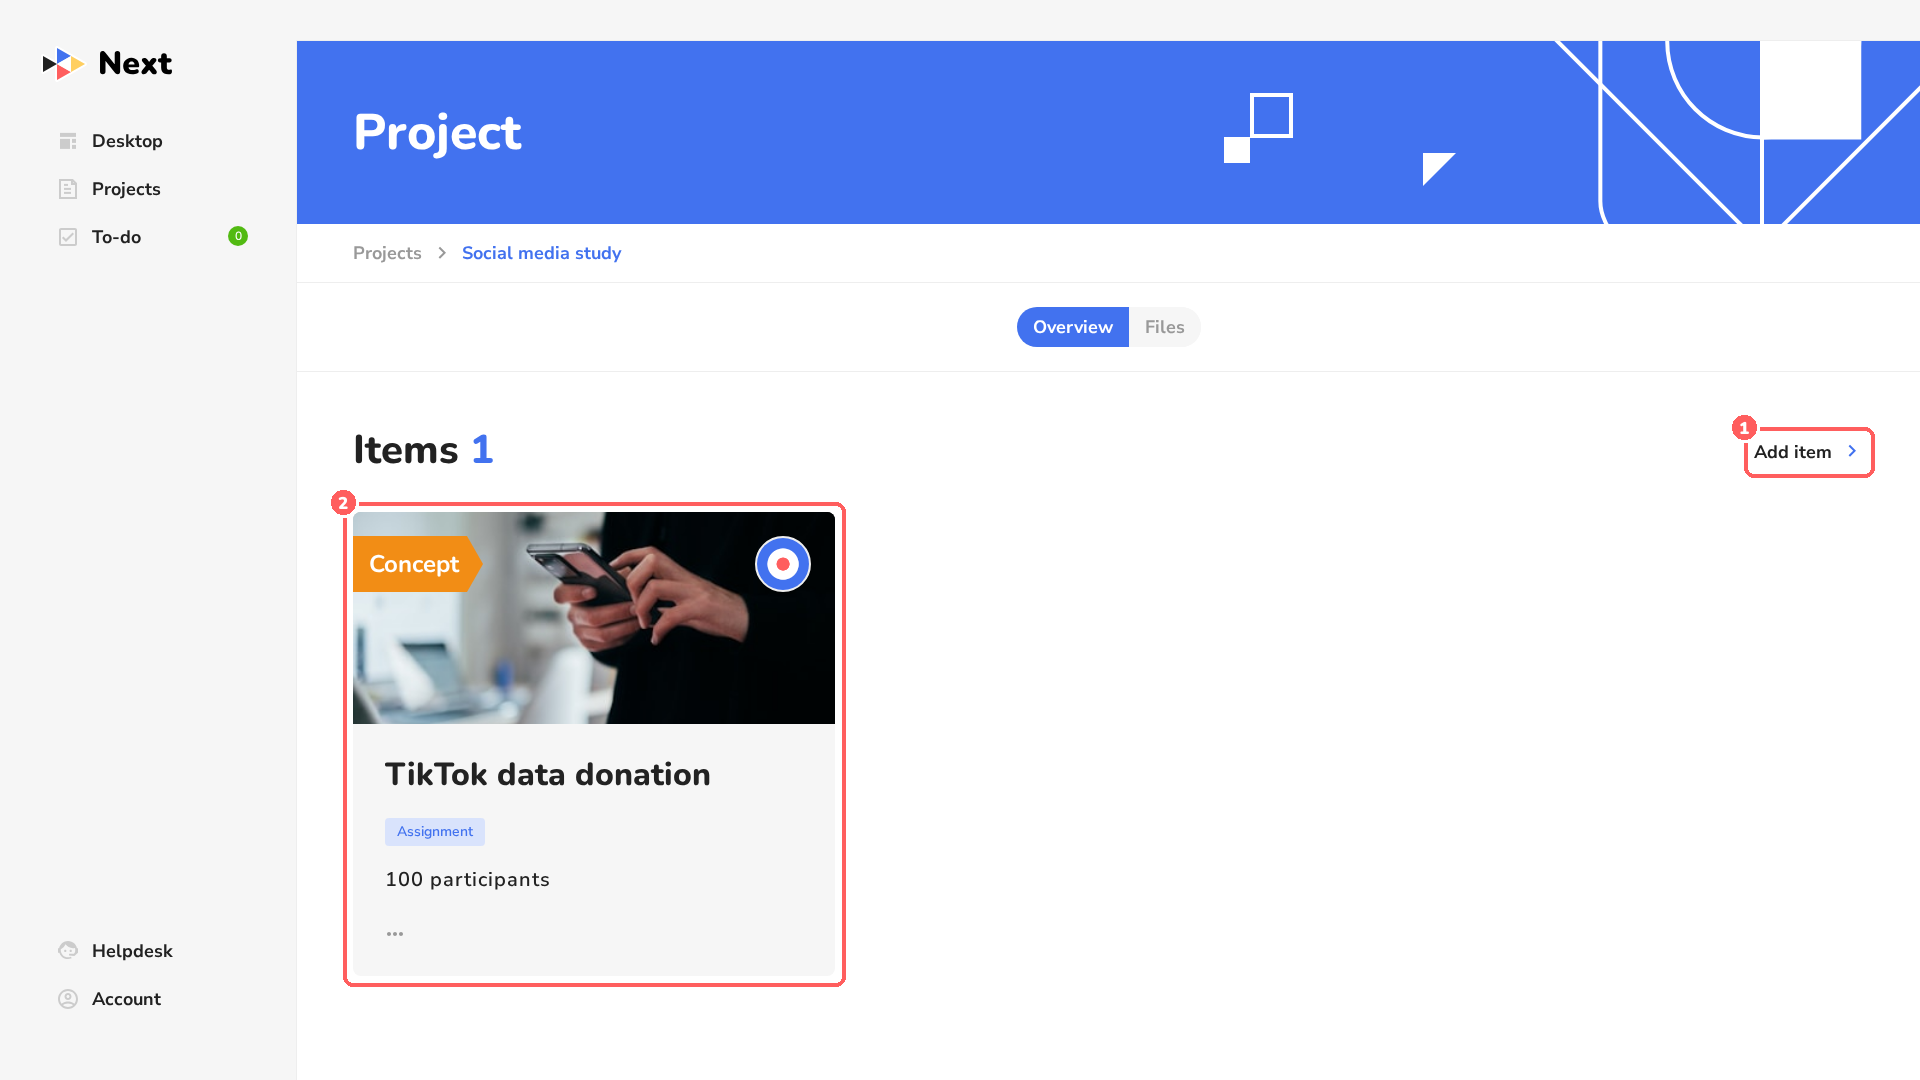
The item appears as a card 2. The orange Concept label means the item is not published yet. To add more items later, use Add item 1.
-
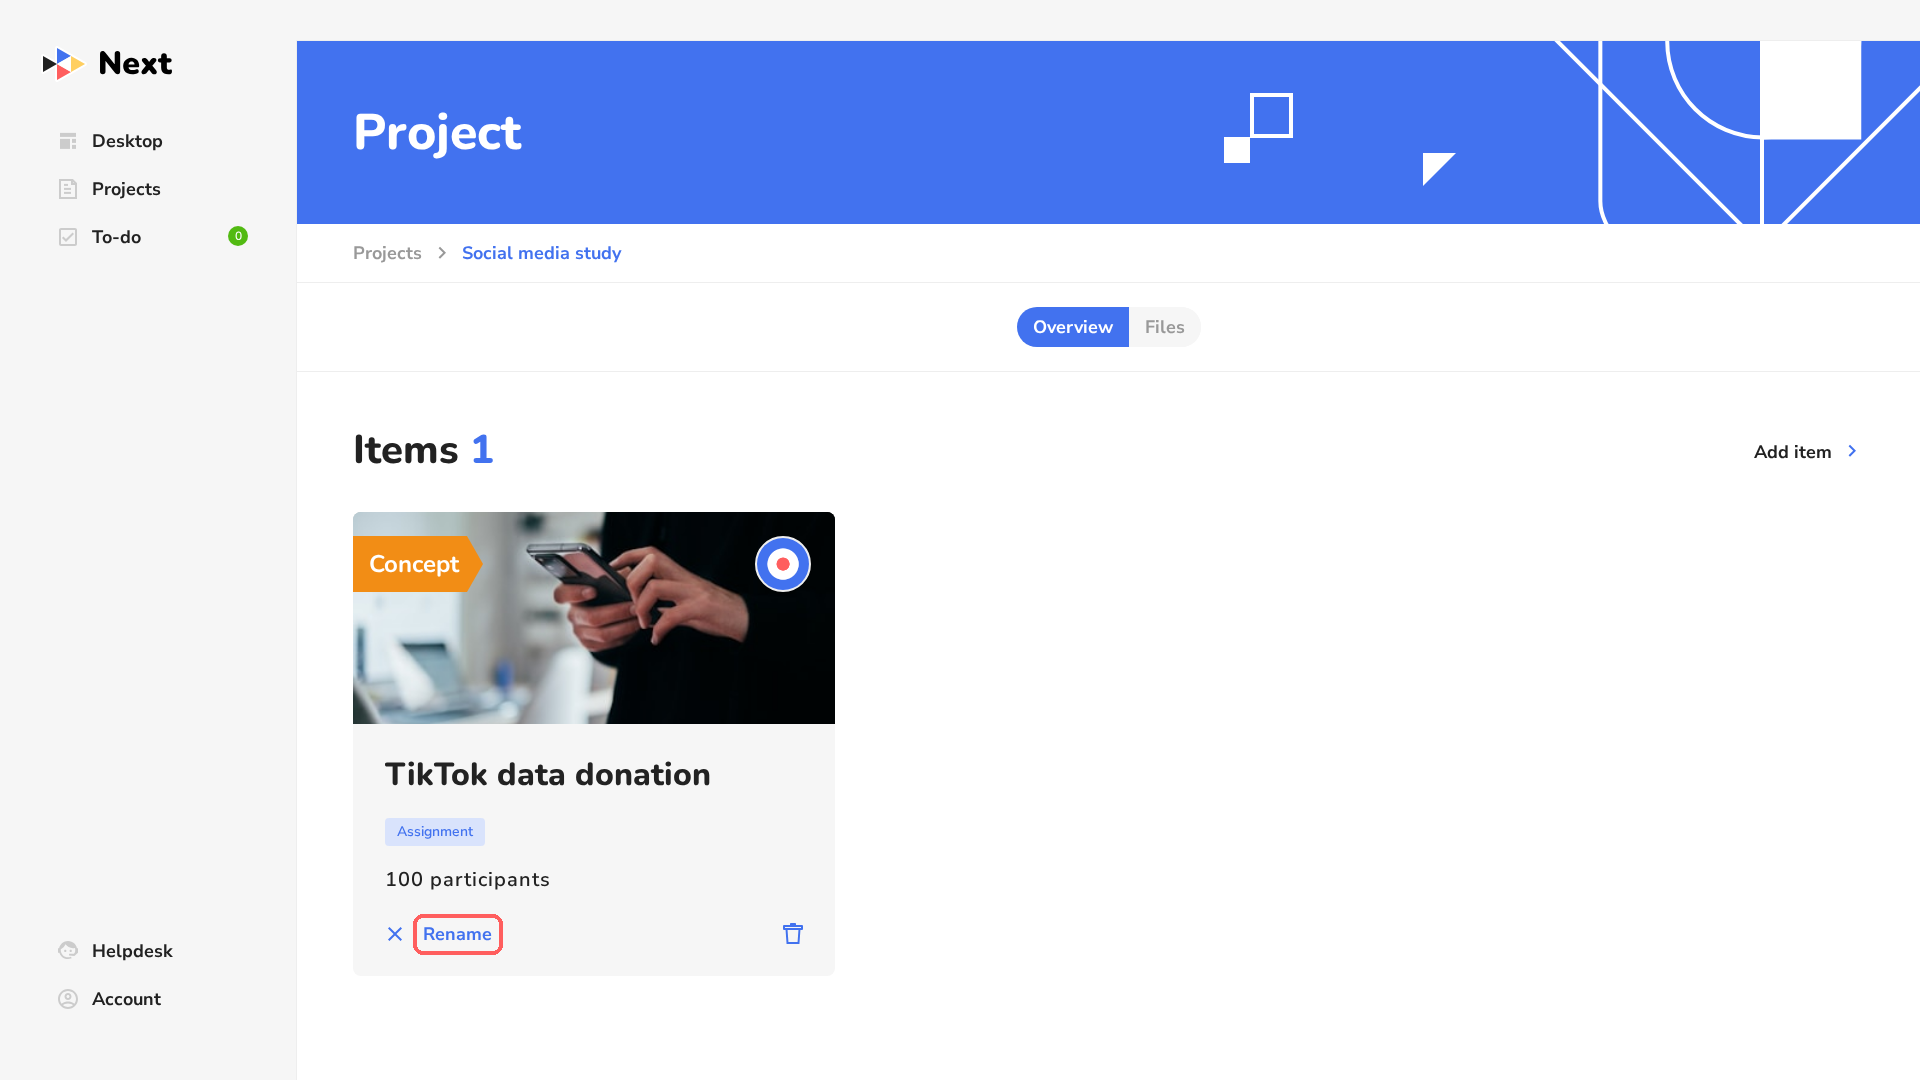
Rename the item via the … on the card and Rename, for example to TikTok data donation.
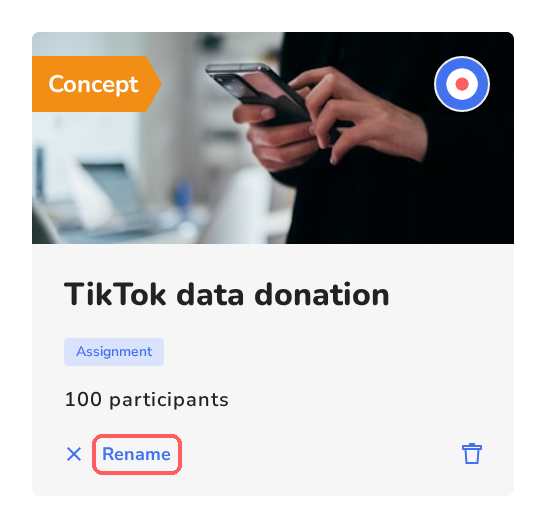
The bin icon on the card deletes the item immediately, without asking for confirmation.
-
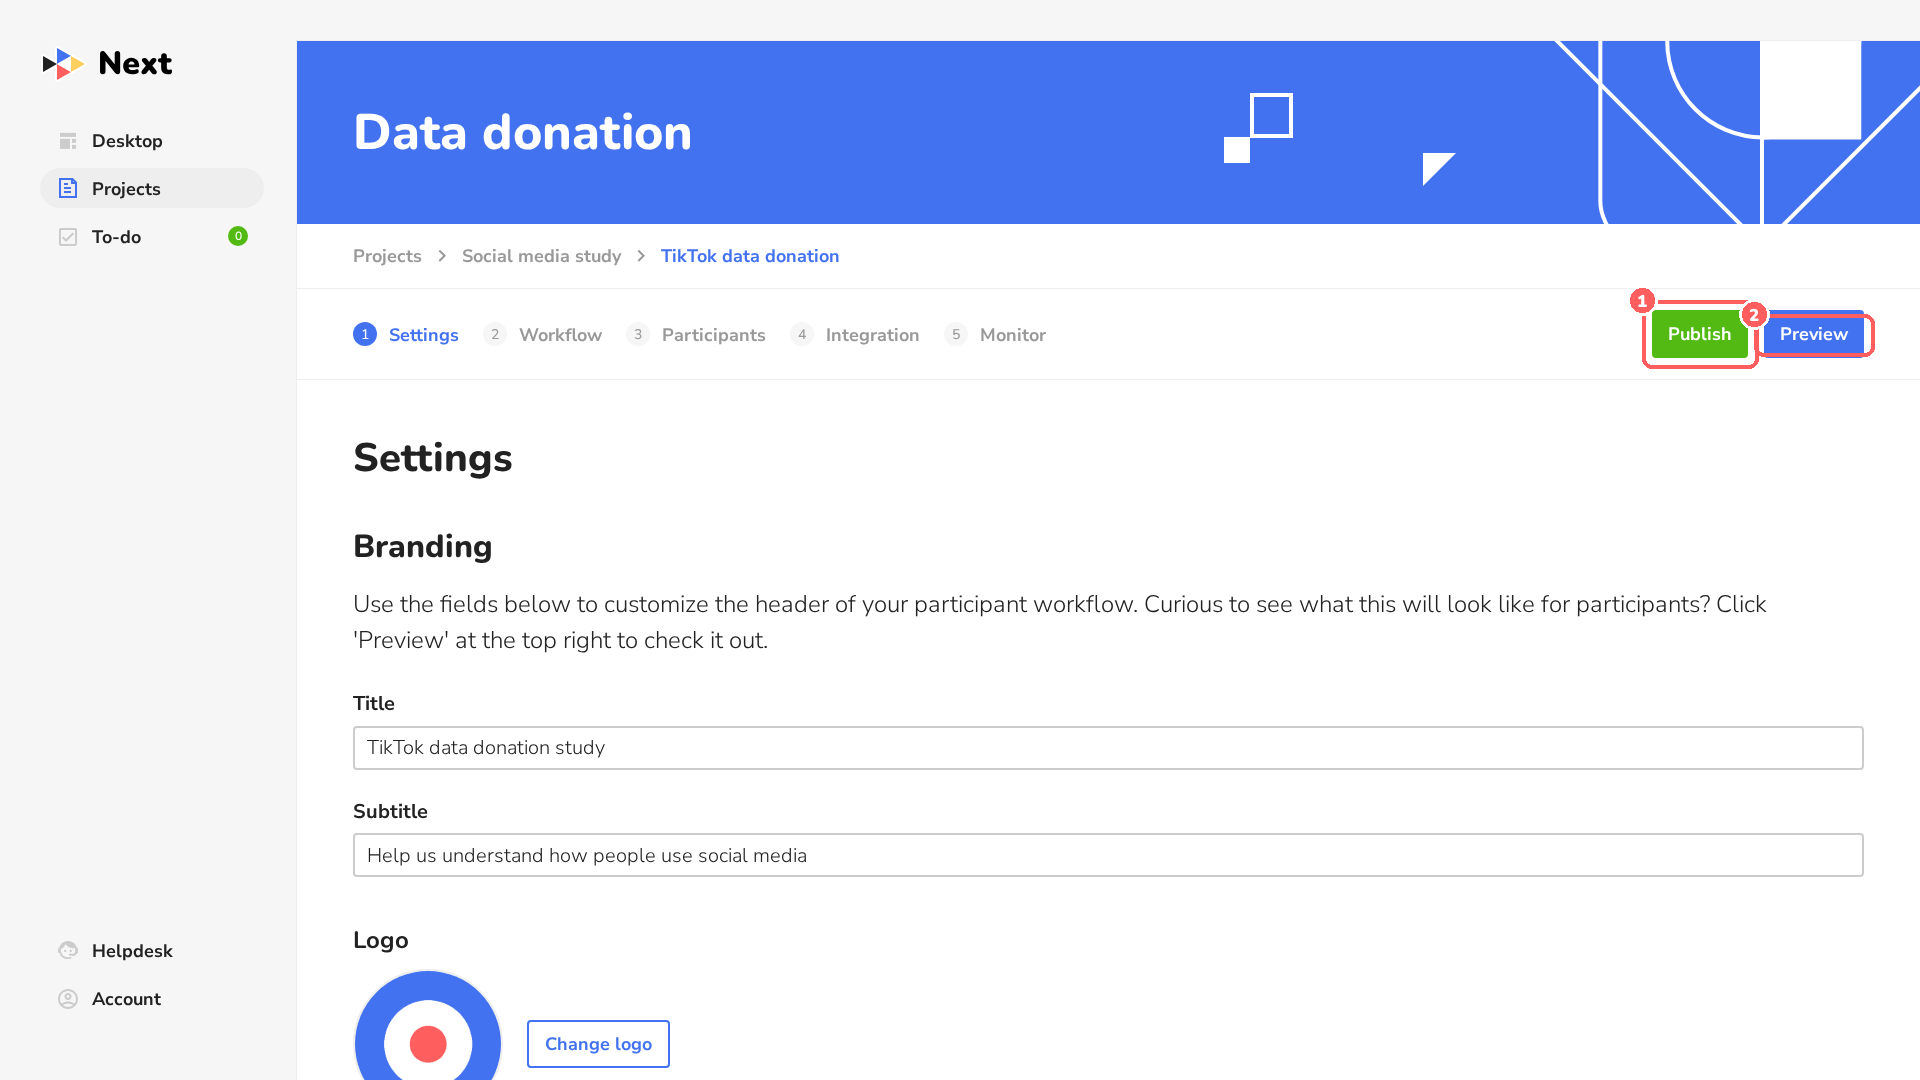
Click the card to open the item. You set up your data donation in five tabs: Settings, Workflow, Participants, Integration and Monitor. The chapters below follow these tabs. At the top right you find Publish 1 and Preview 2.

Each tab ends with a button that takes you to the next tab (e.g. Go to Workflow).
4Settings
In the Settings tab you decide what participants see around the tasks: the header, an about page, a privacy statement, a consent form and a helpdesk page.
Branding
-
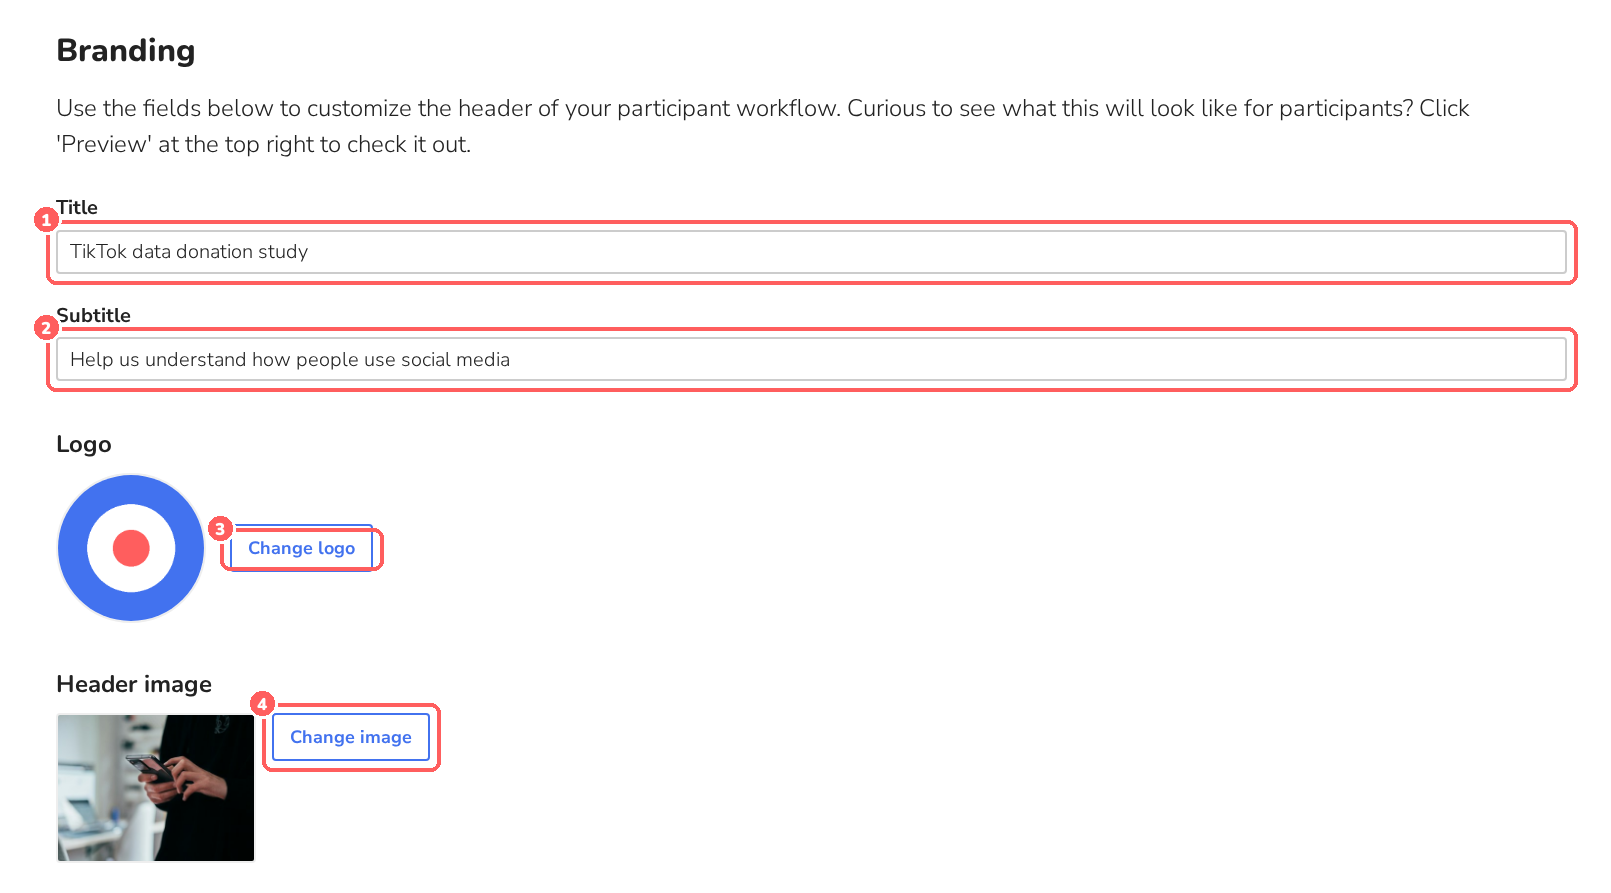
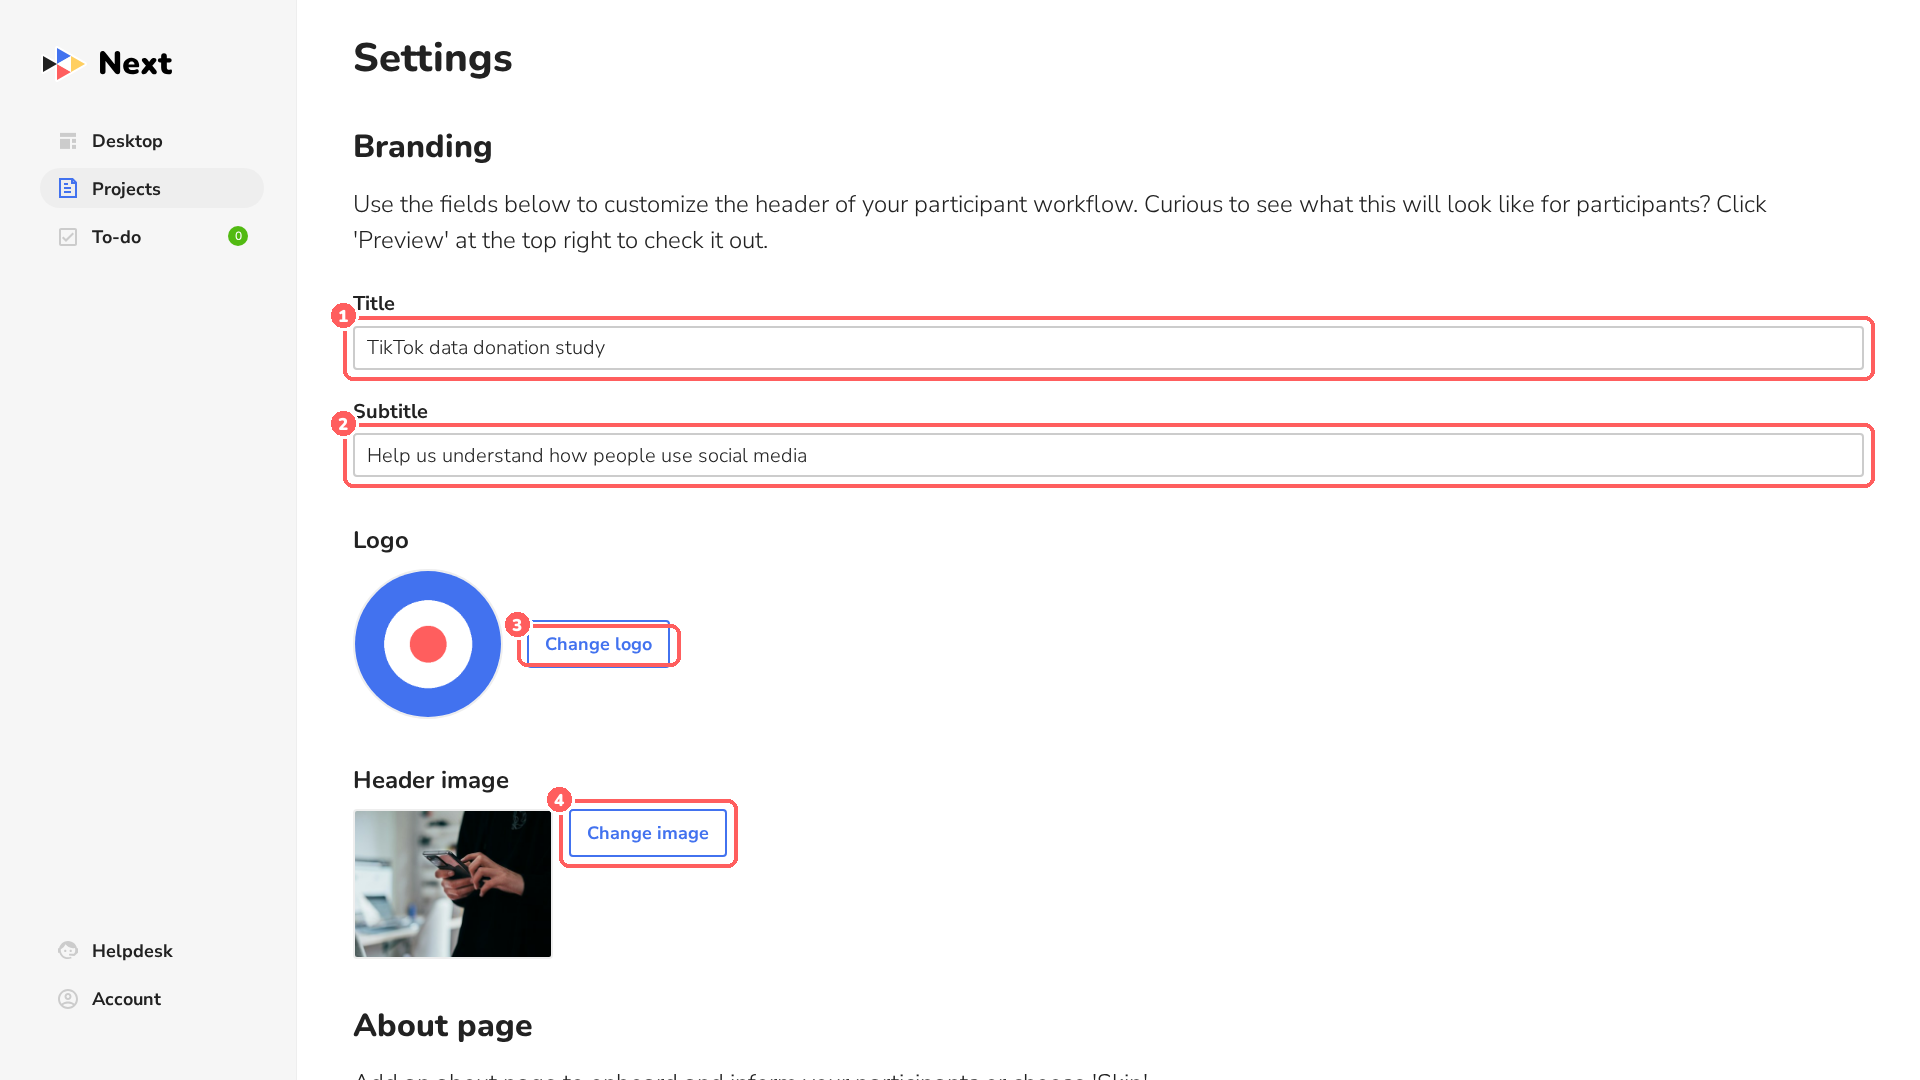
Fill in the header of the participant pages:
- 1Title: the name of your study.
- 2Subtitle: a short description.
- 3Upload logo: the logo of your university or research group.
- 4Change image: the image in the background of the header.
-
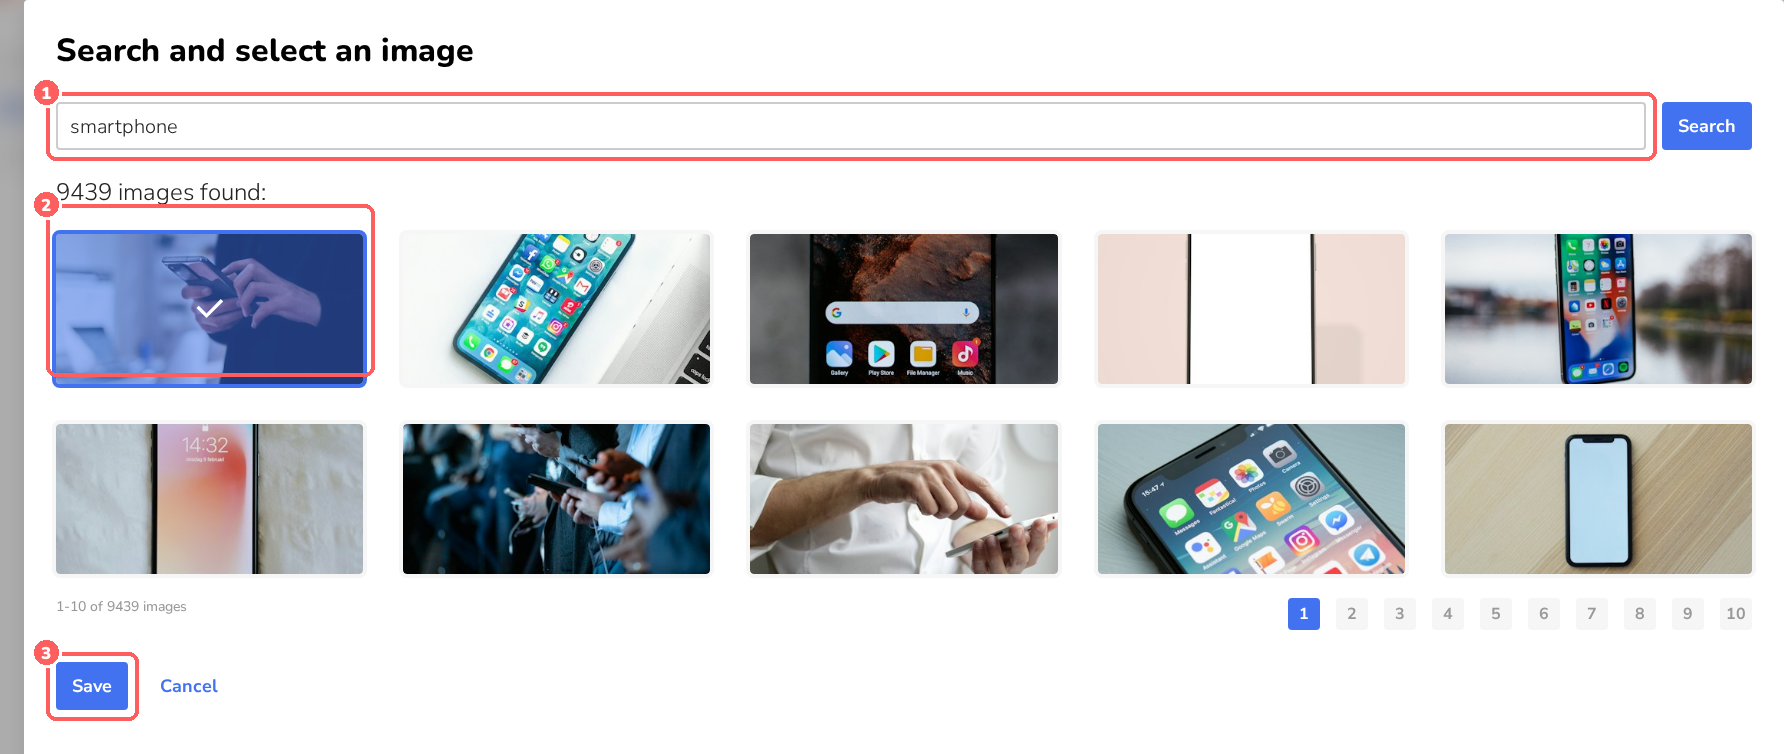
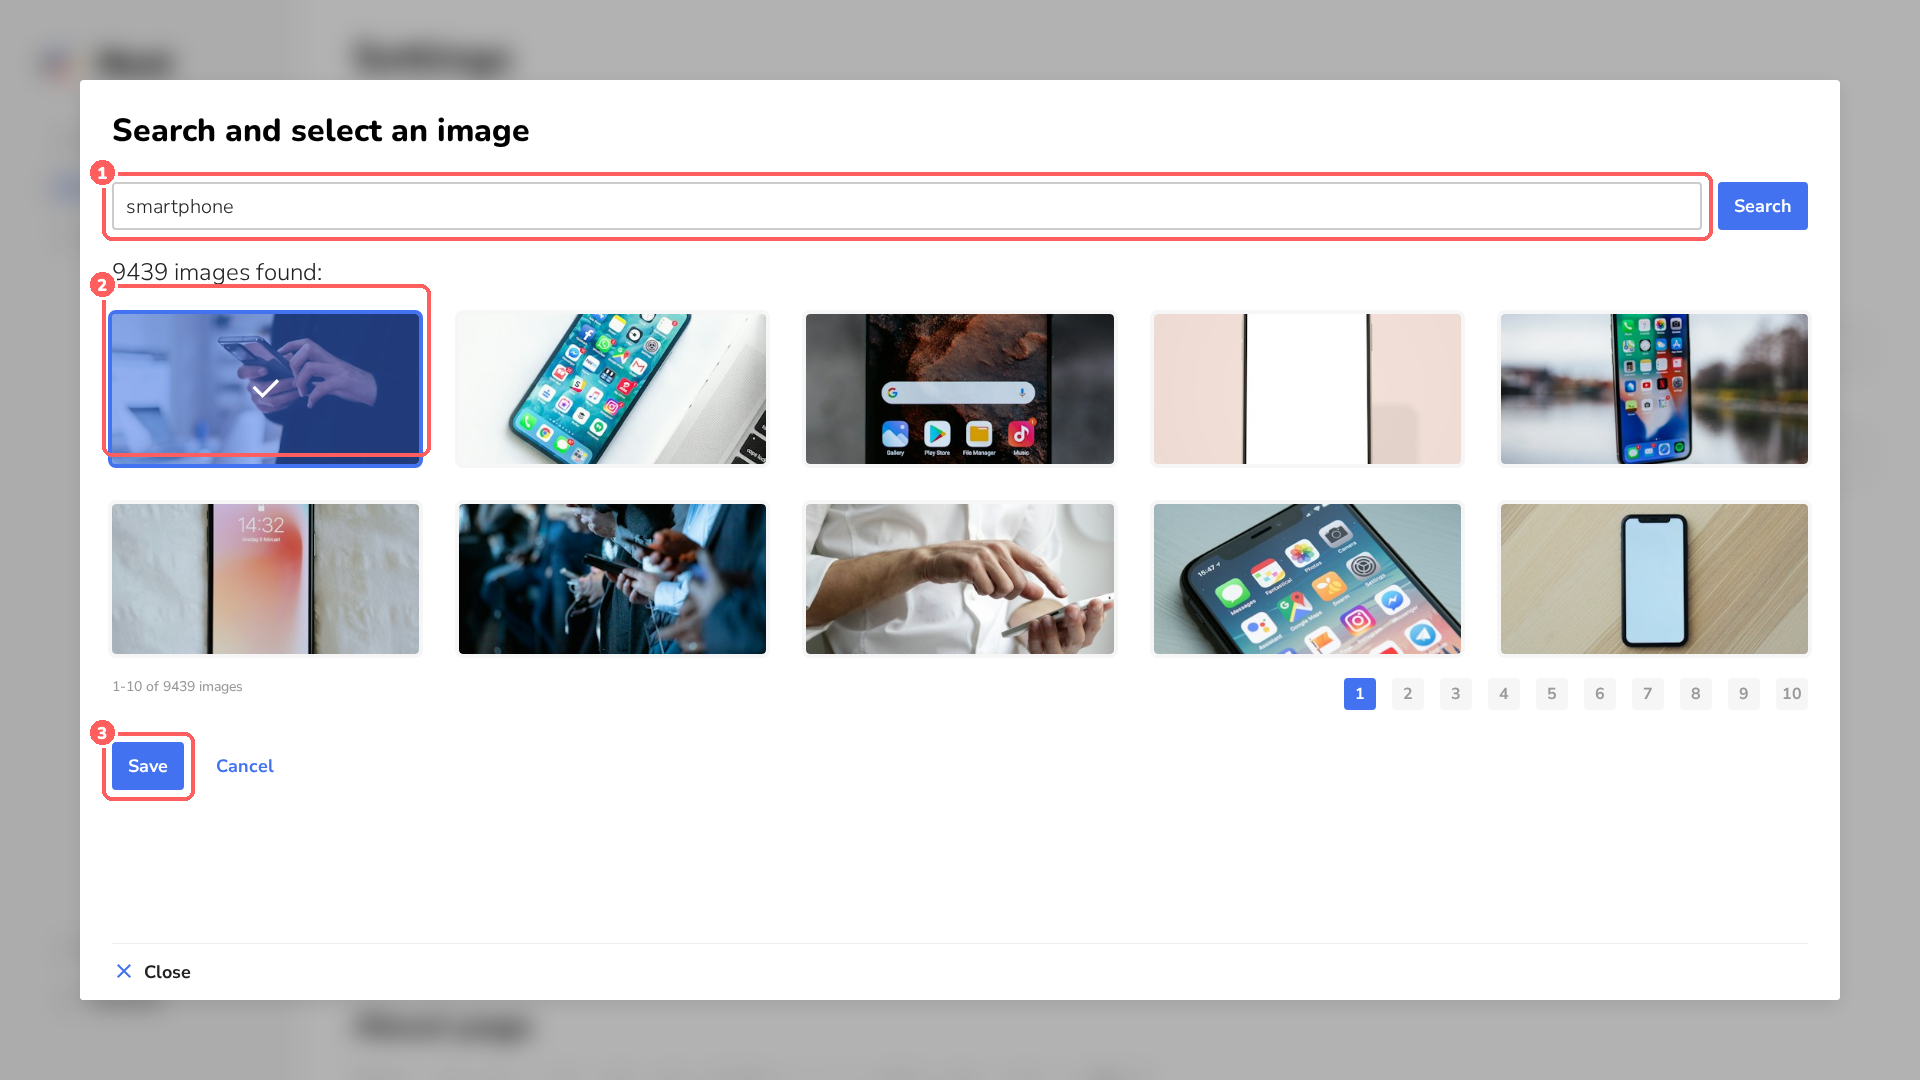
After clicking Change image, type a search term 1 and click Search. Click an image 2 and then Save 3.
About page
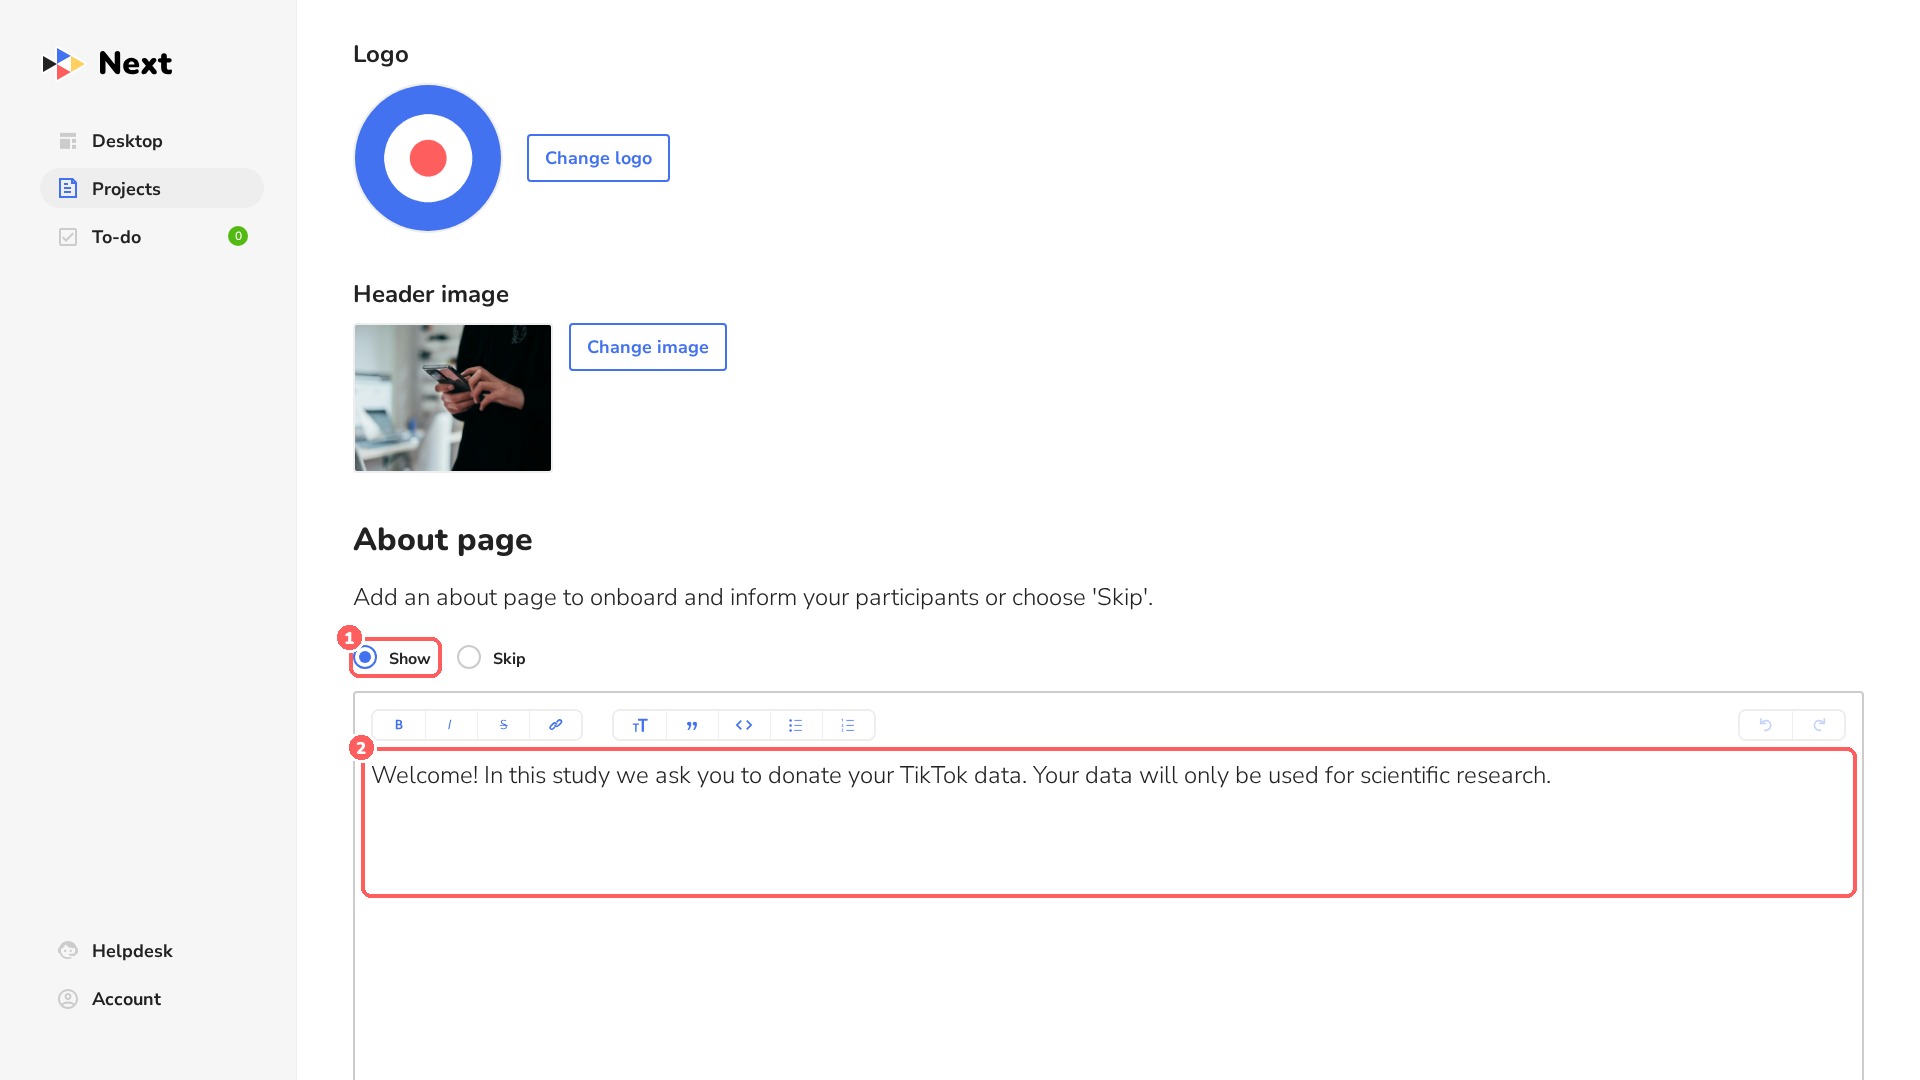
Participants see the about page first. Use it to explain what the study is about. Choose Show 1 and write the text in the editor 2, or choose Skip if you don't need it.
Privacy page
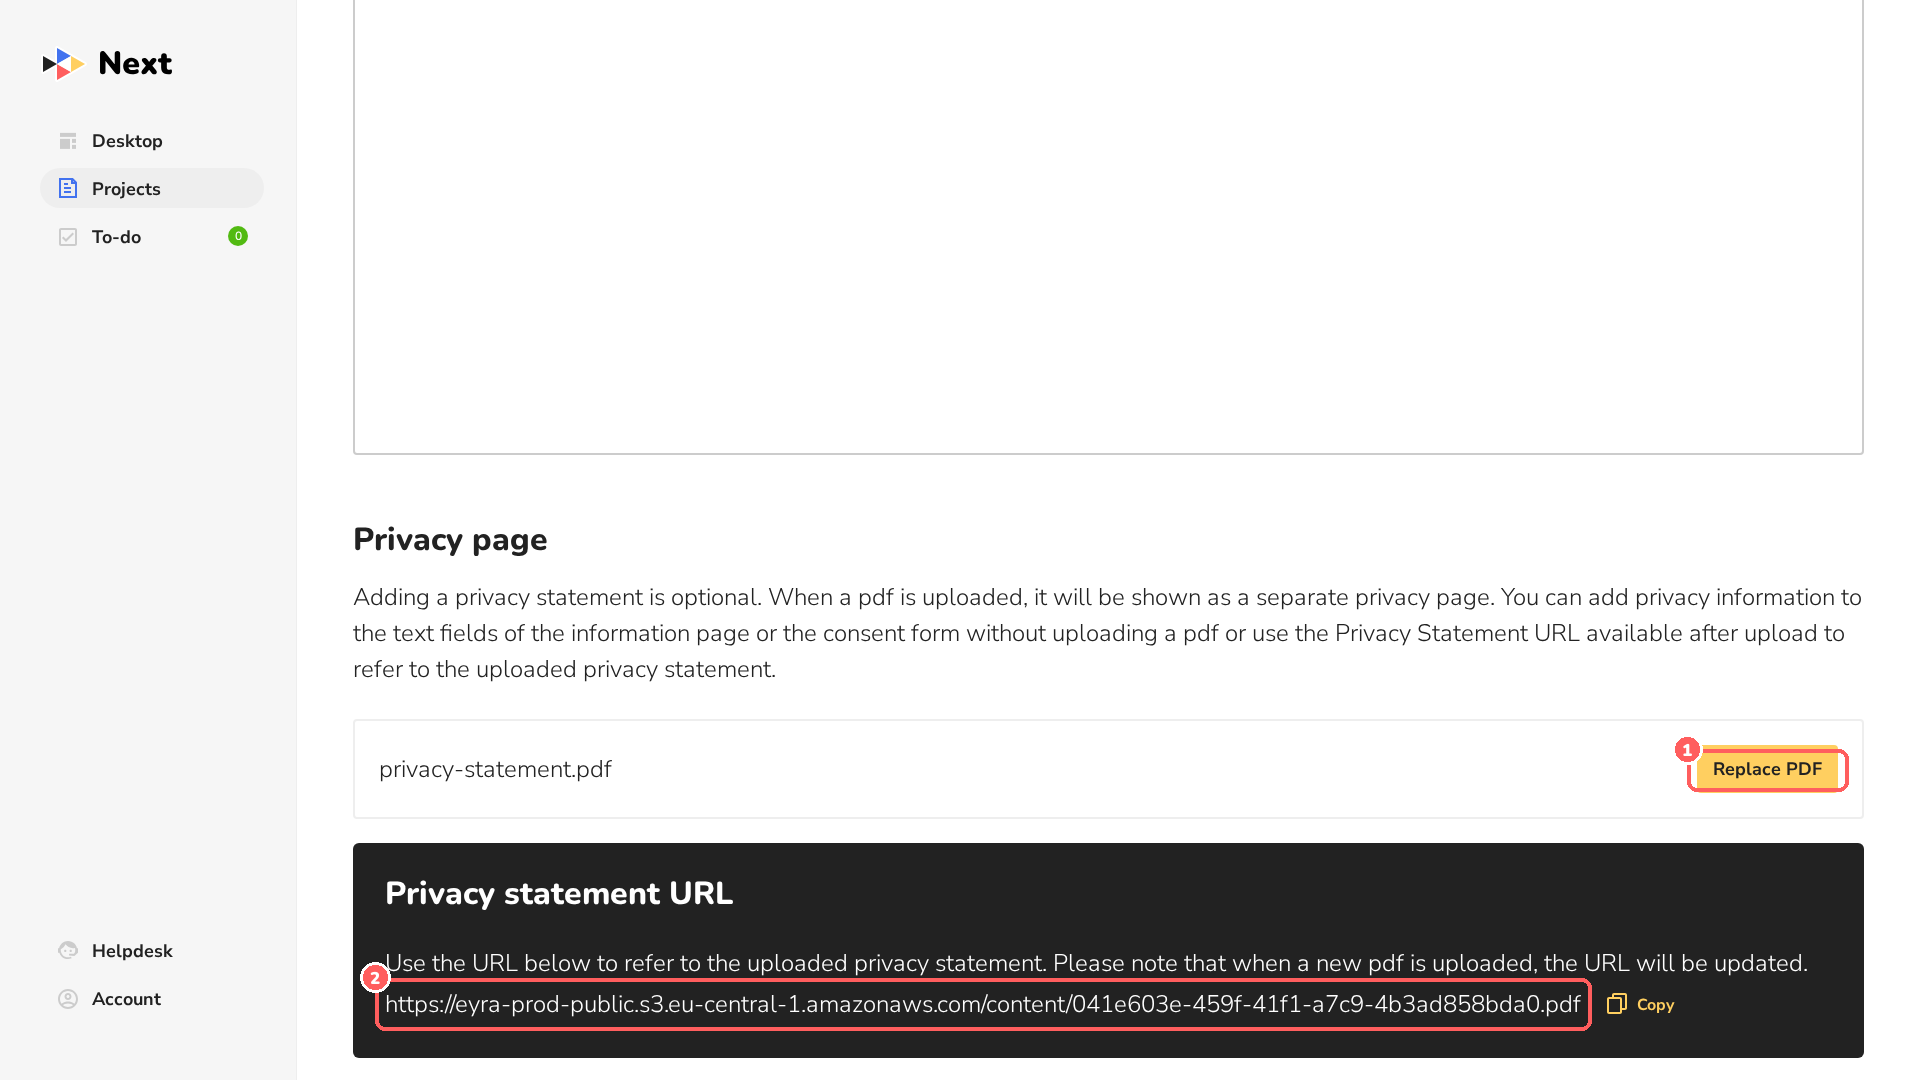
Optionally, upload your privacy statement as a PDF with Select PDF. Participants then see it as a separate page. After the upload you can replace the file 1, and you get a Privacy statement URL 2 that you can use as a link in your about page or consent form.
Consent form
Choose Show 1 and write the consent text 2. Participants must click Yes, I agree before they can start. If participants already gave consent elsewhere, choose Skip.
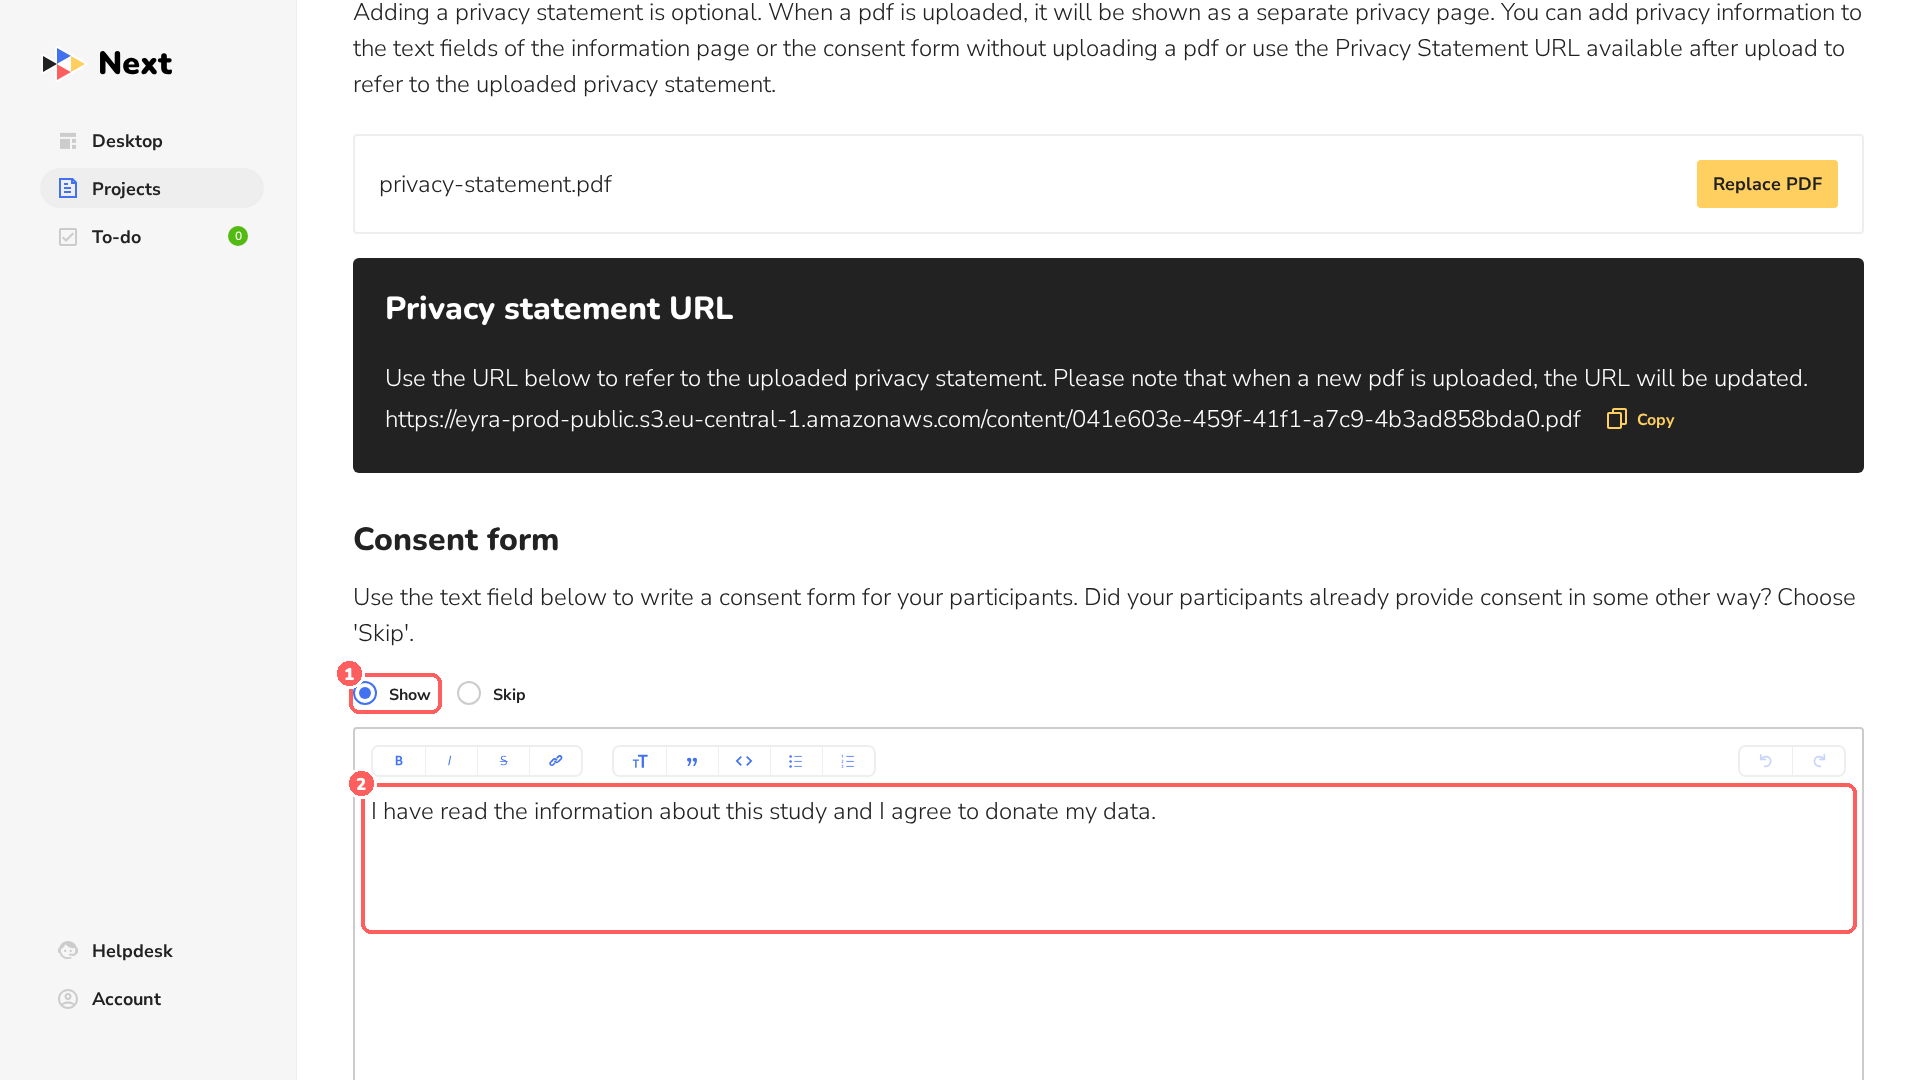
The consent field already contains the example text “Add terms and conditions that participants need to consent to.” This is real text, not a placeholder. Select it and delete it before you type your own text, otherwise participants will see it too.
Helpdesk page
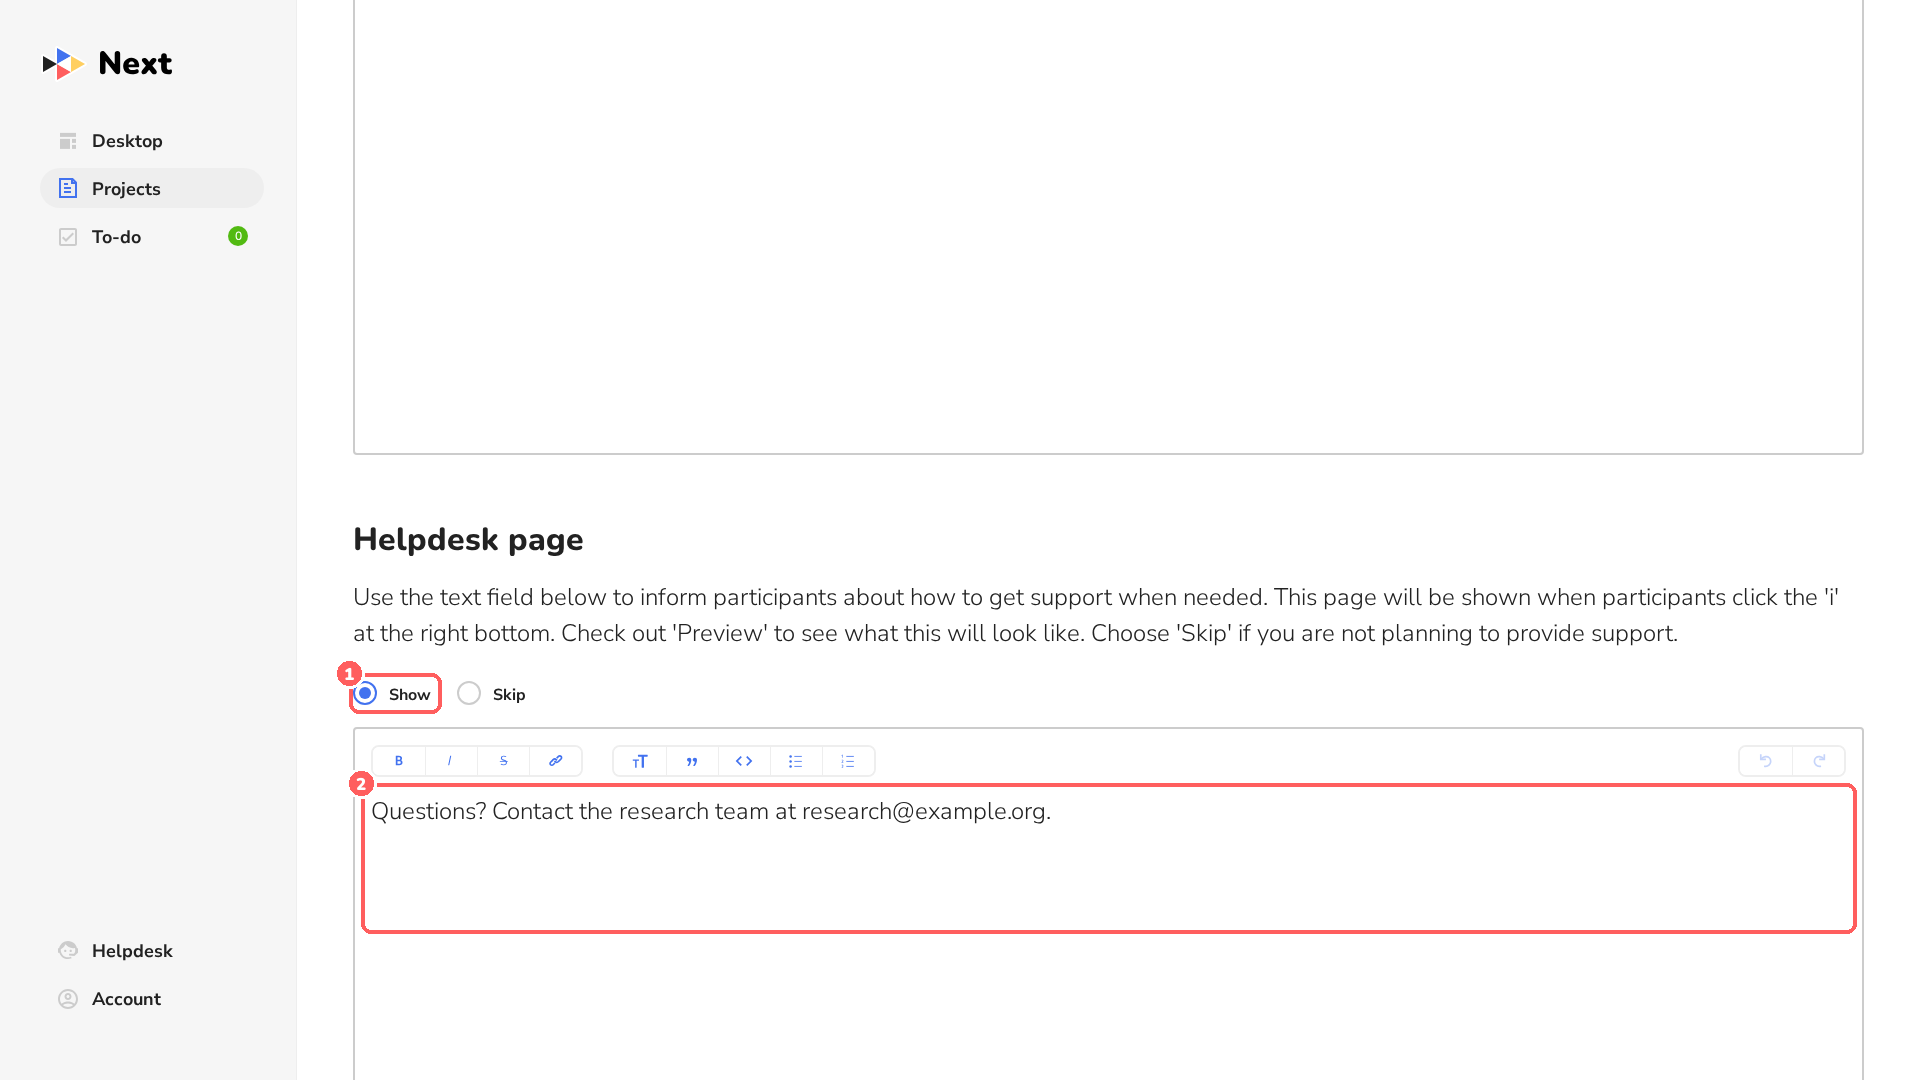
Choose Show 1 to tell participants where they can get help 2, for example an email address. Participants open this page with the i button at the bottom right (see Preview).
5Workflow
The workflow is the list of tasks participants complete. You build it from the Library 2 on the right; your tasks appear on the left 1.
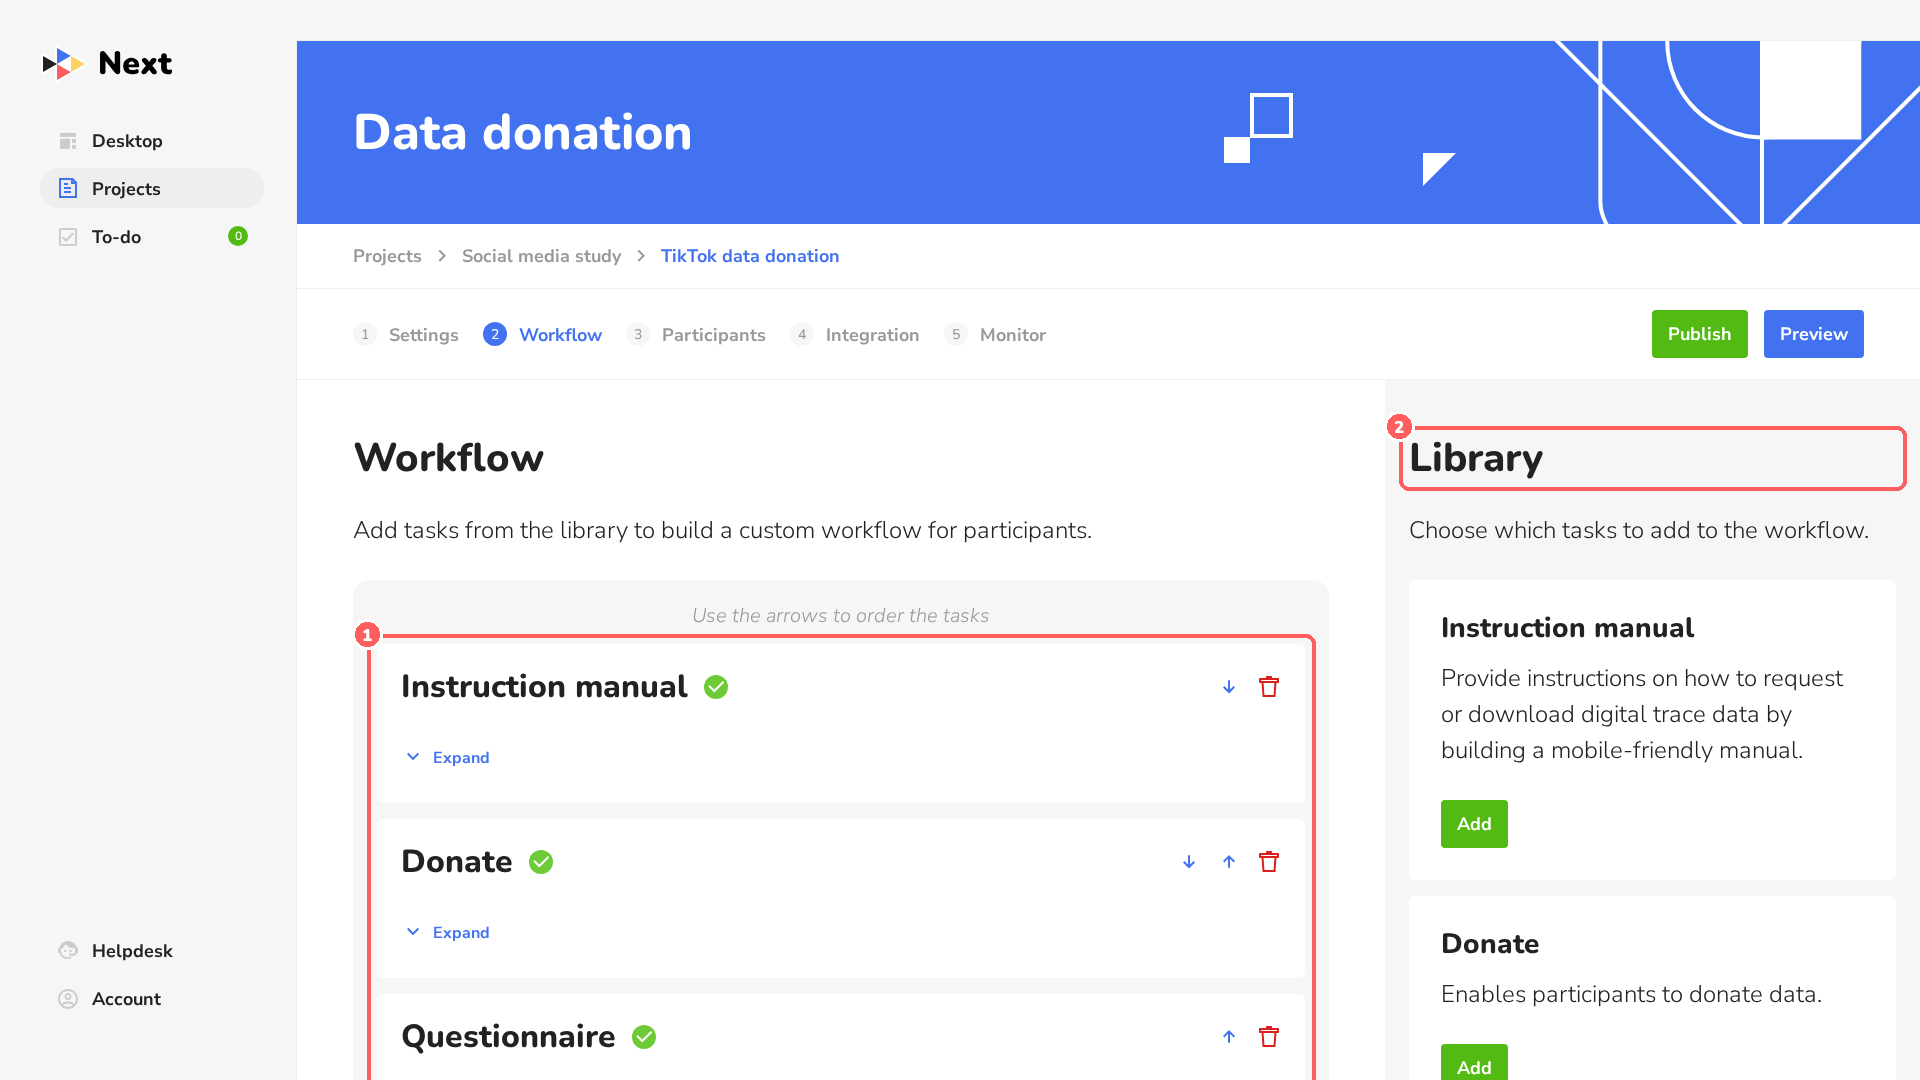
Add tasks from the library
Click Add below a task type to add it to the workflow. These task types are available:
| Task | What it does |
|---|---|
| Instruction manual | A mobile-friendly manual that explains how to request or download data from a platform. You build it yourself on Next. |
| Donate | Lets participants select their data file, review the extracted data and donate it. Needs a flow application. |
| Questionnaire | Sends participants to an online questionnaire (e.g. Qualtrics) and back. |
| PDF request manual | A PDF with instructions for requesting data. Not mobile-friendly. |
| PDF download manual | A PDF with instructions for downloading data. Not mobile-friendly. |
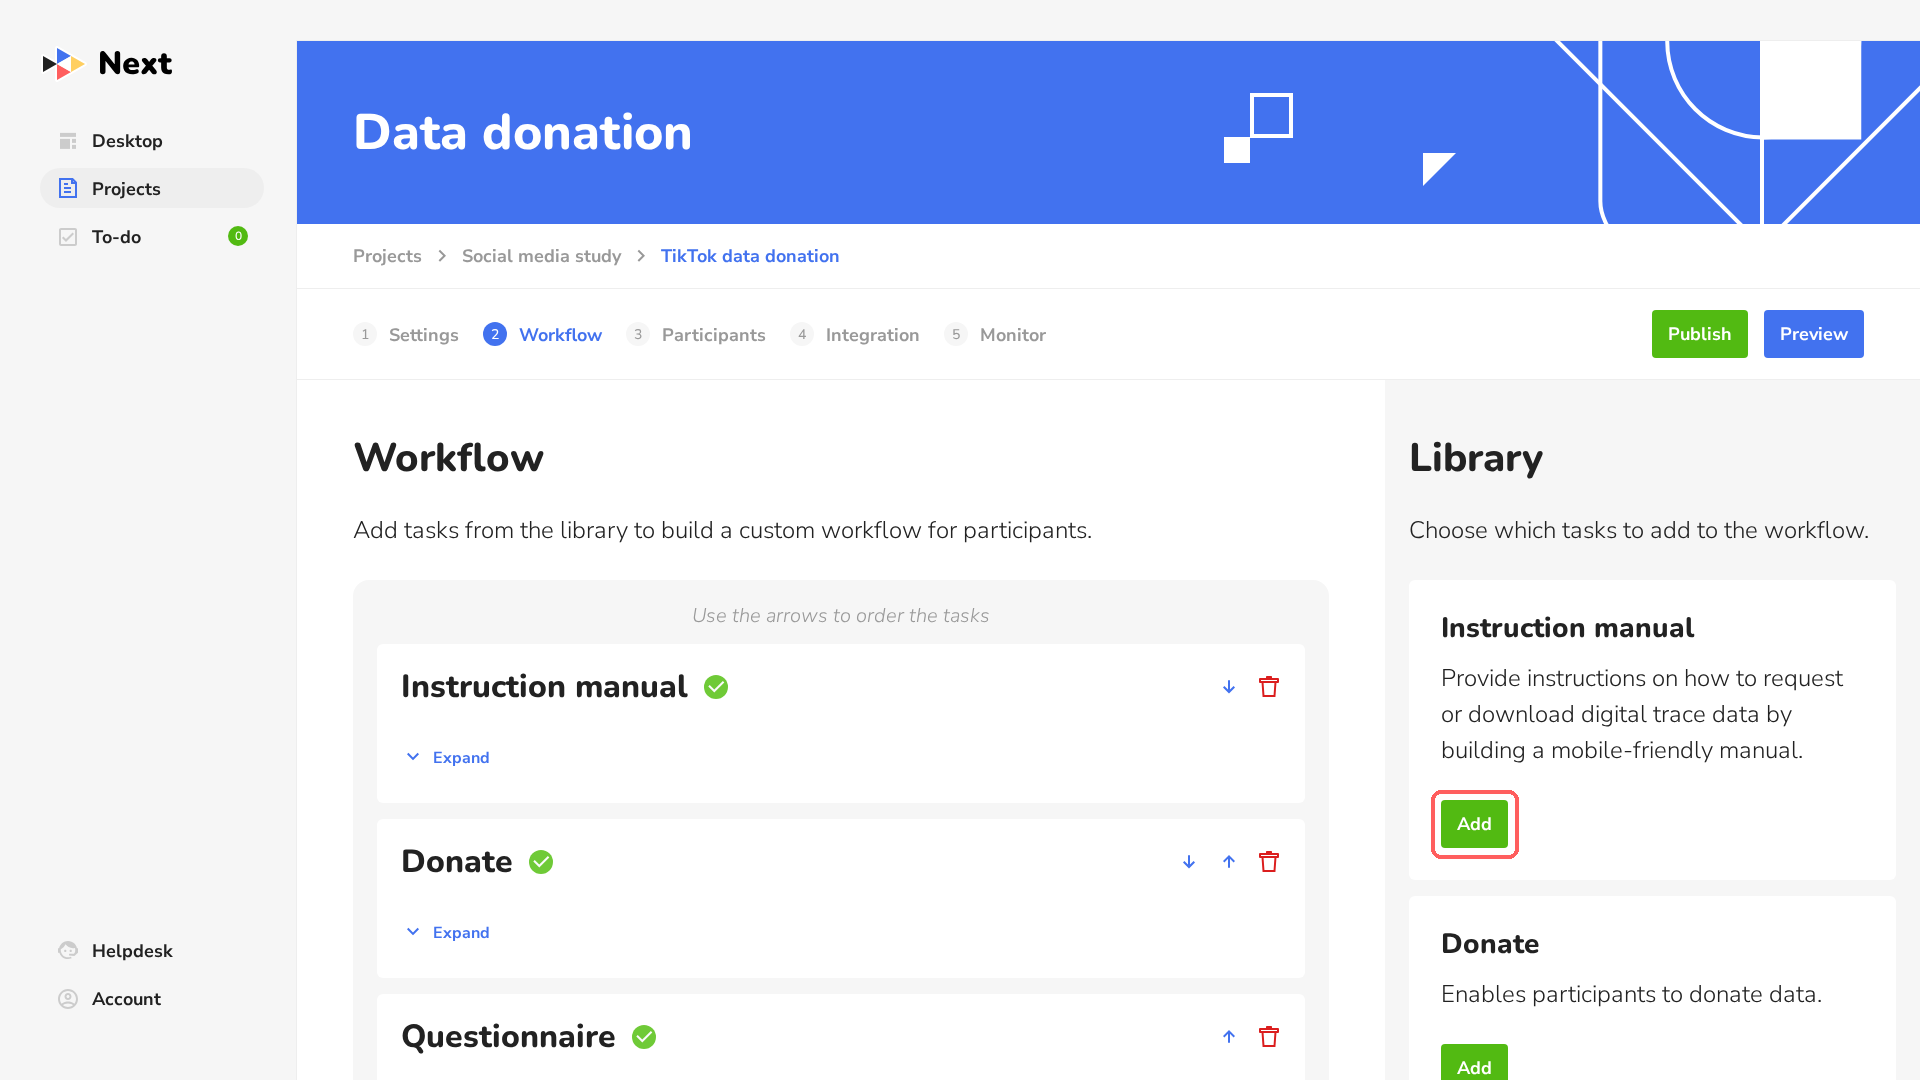
A typical workflow is: Instruction manual → Donate → Questionnaire (optional).
Instruction manual task
-
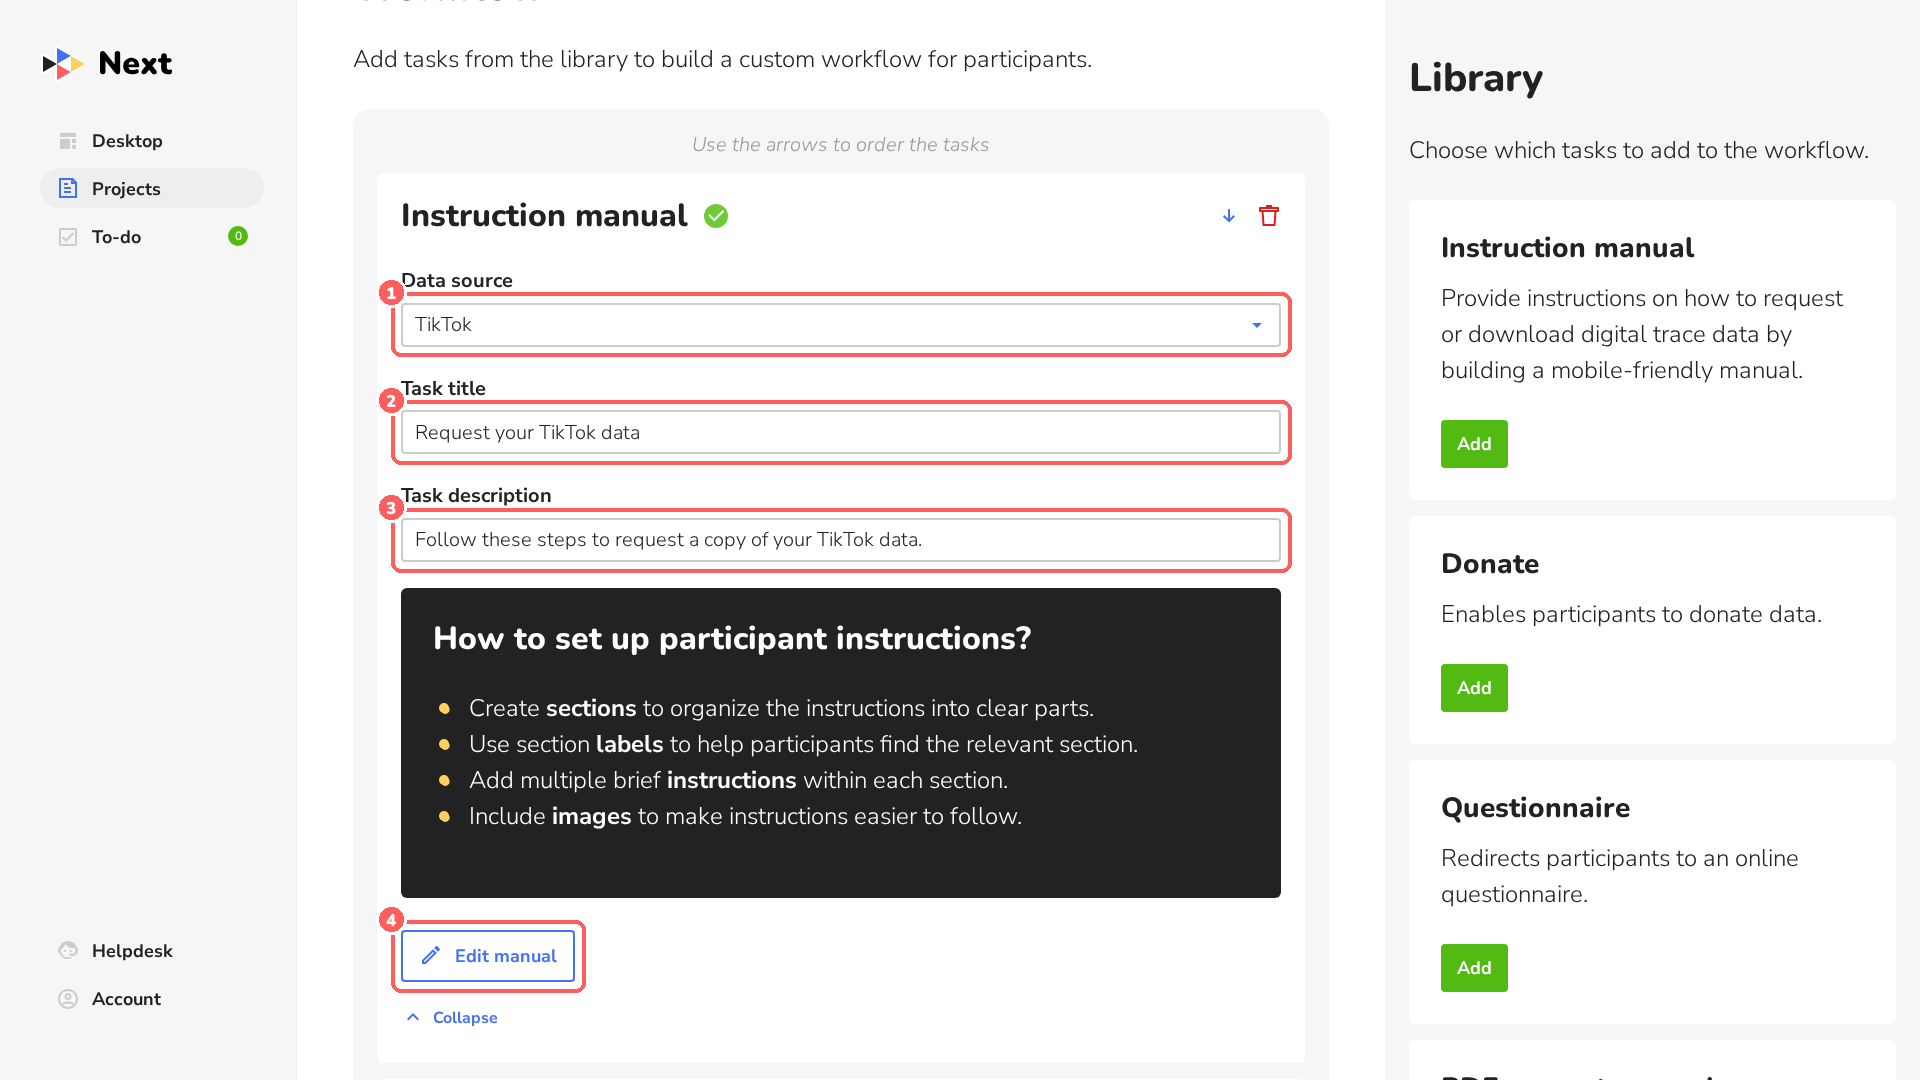
Click Expand on the task and fill in:
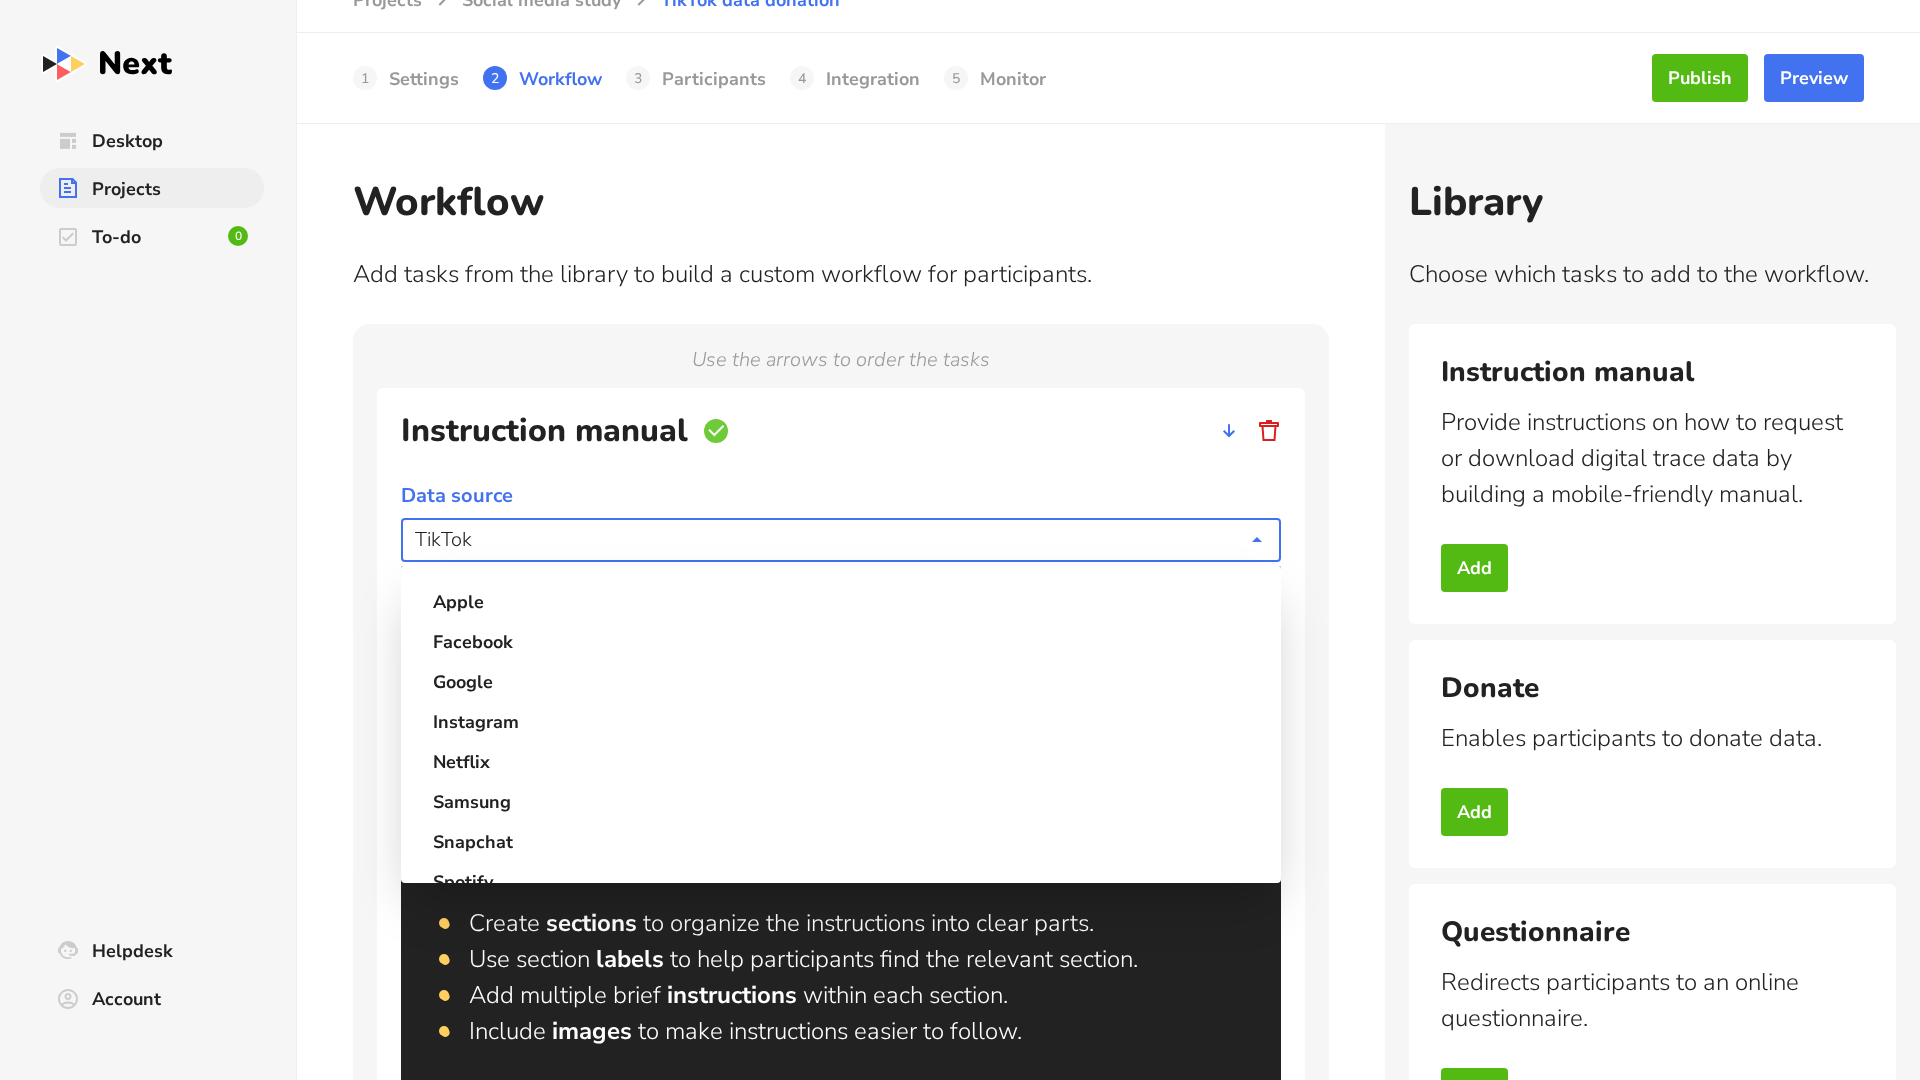
- 1Data source: the platform, e.g. TikTok. Its icon is shown to participants.
- 2Task title and 3 Task description, as participants will see them in the task list.
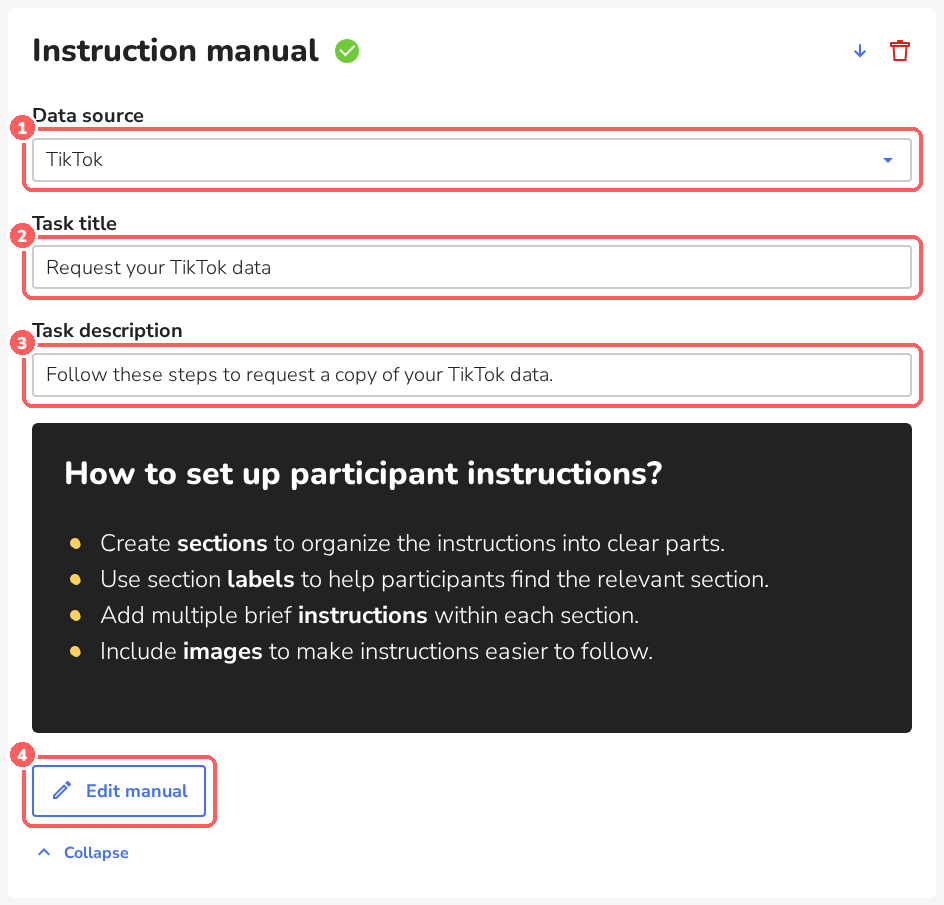
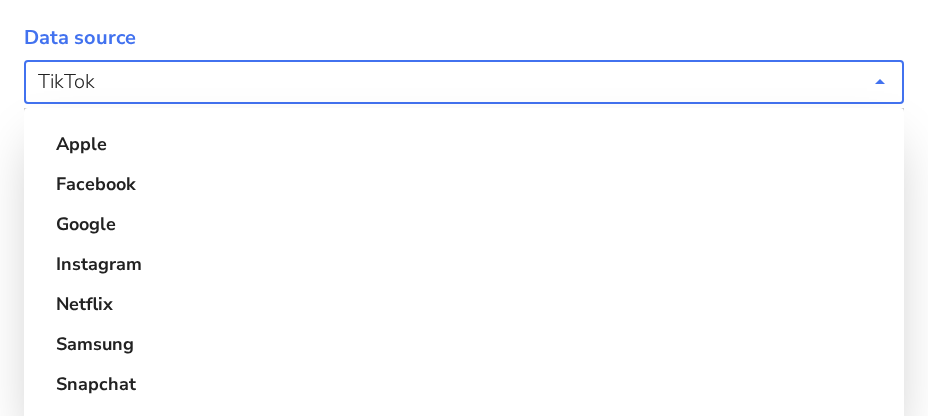
Available data sources include Apple, Facebook, Google, Instagram, Netflix, Samsung, Snapchat, Spotify, TikTok, WhatsApp, X and YouTube. -
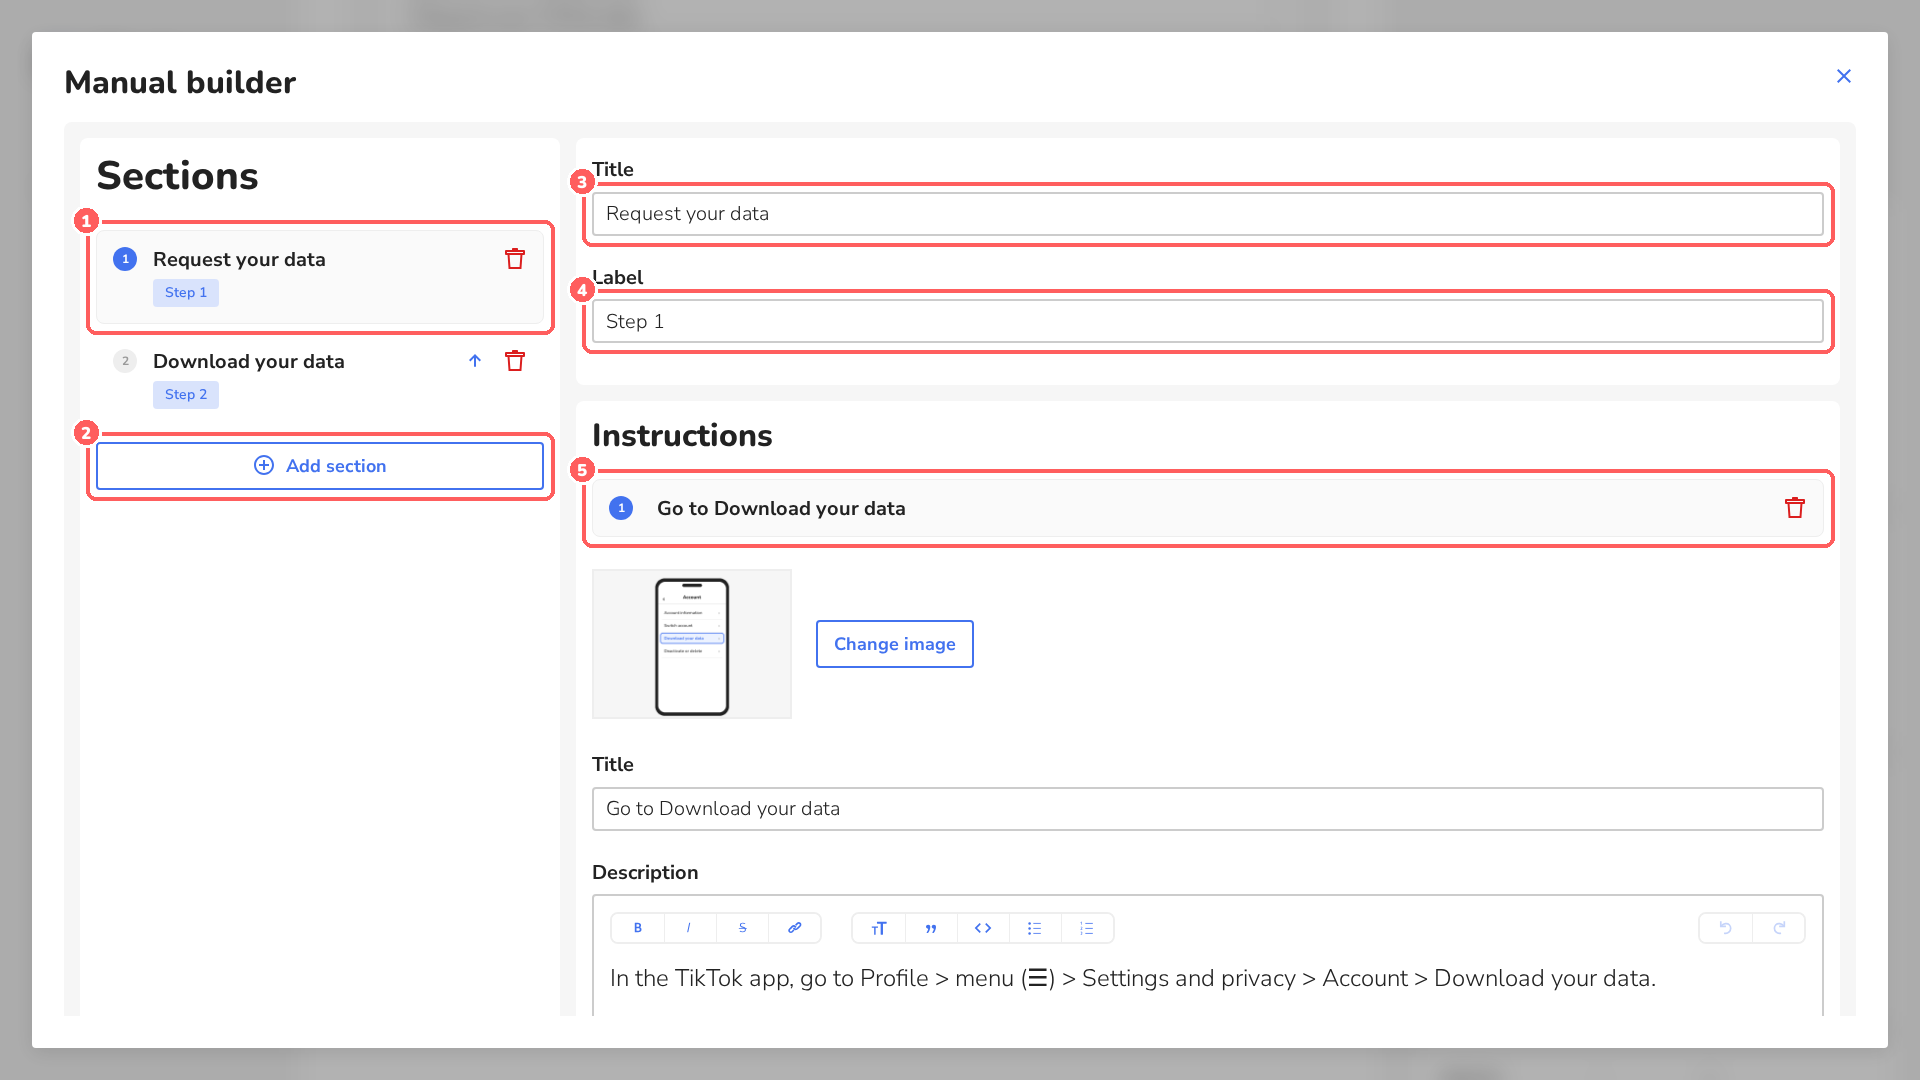
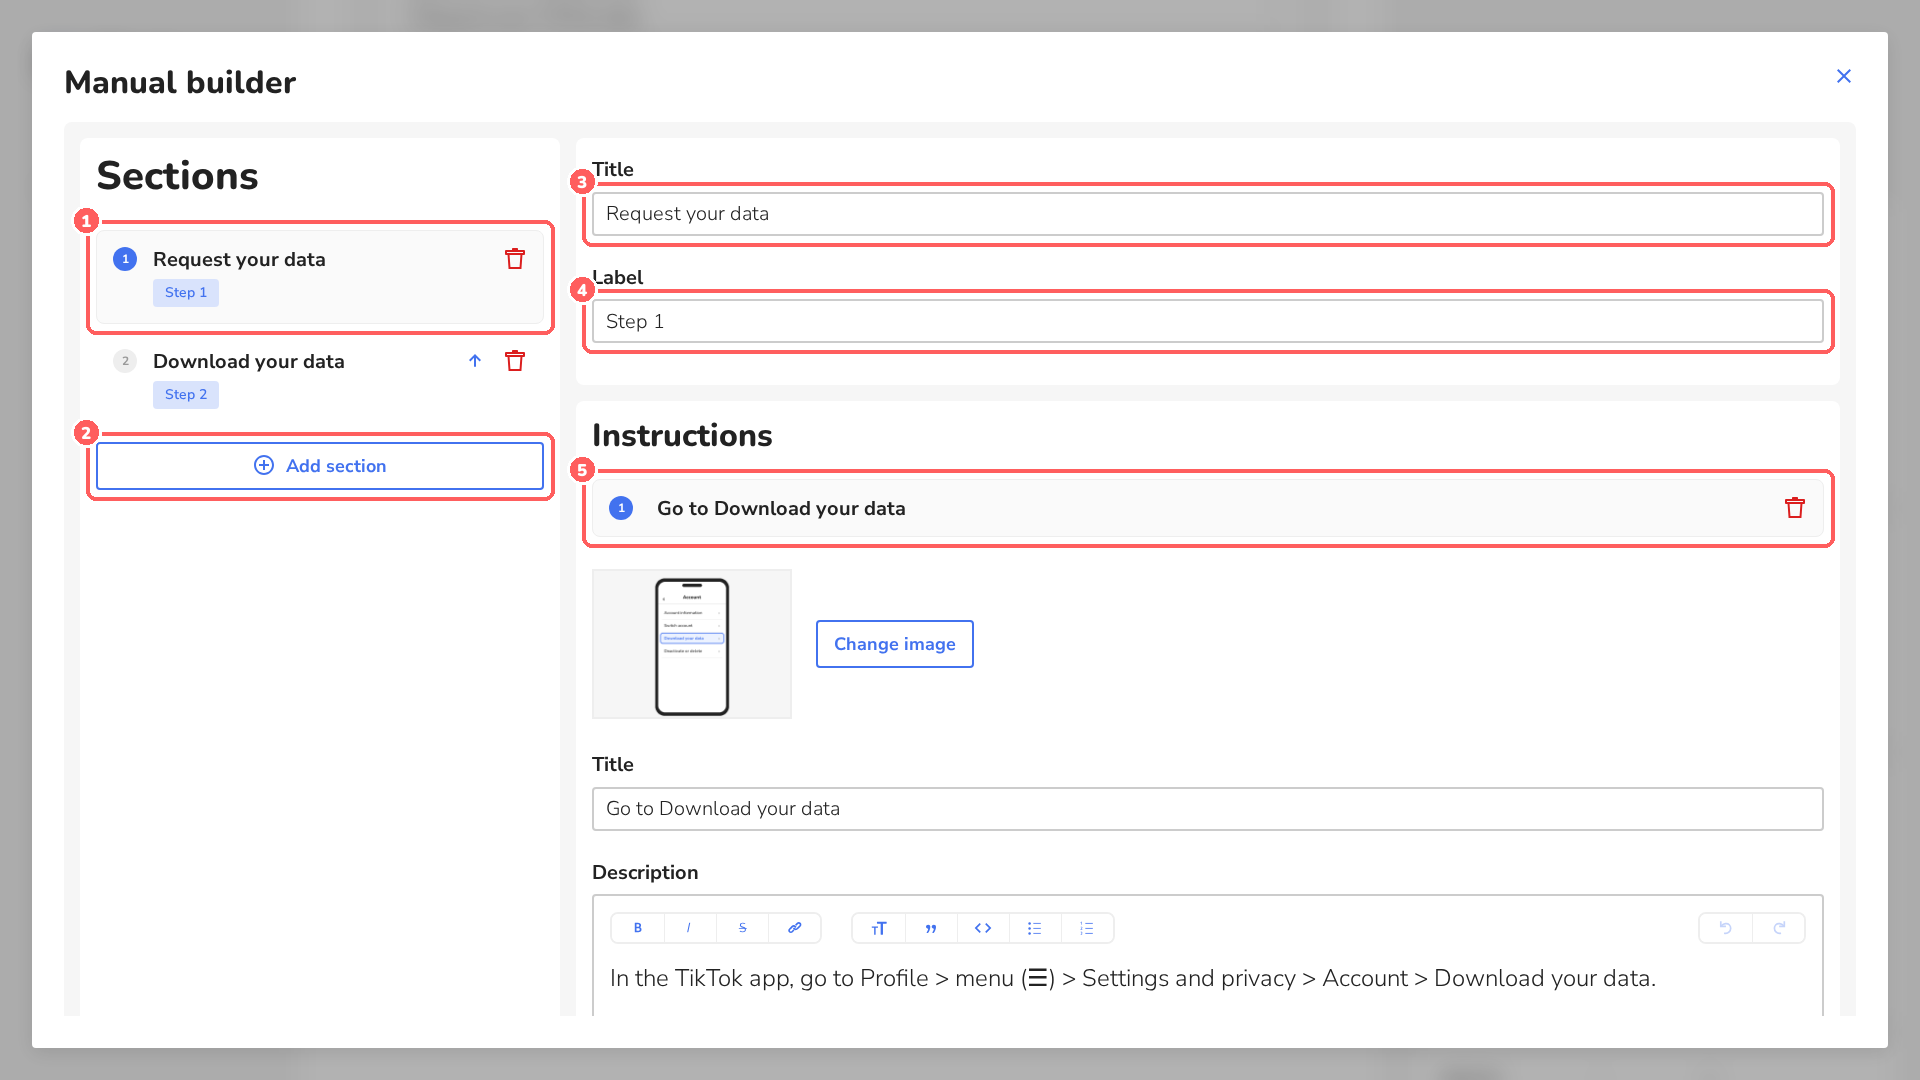
Click Edit manual 4 to open the Manual builder. A manual consists of sections, and each section has one or more instructions.
- 1The sections of your manual. Click a section to edit it.
- 2Add section adds a new section.
- 3Title and 4 Label of the selected section (e.g. “Step 1”).
- 5The instructions in this section. Click one to open or close it.
-
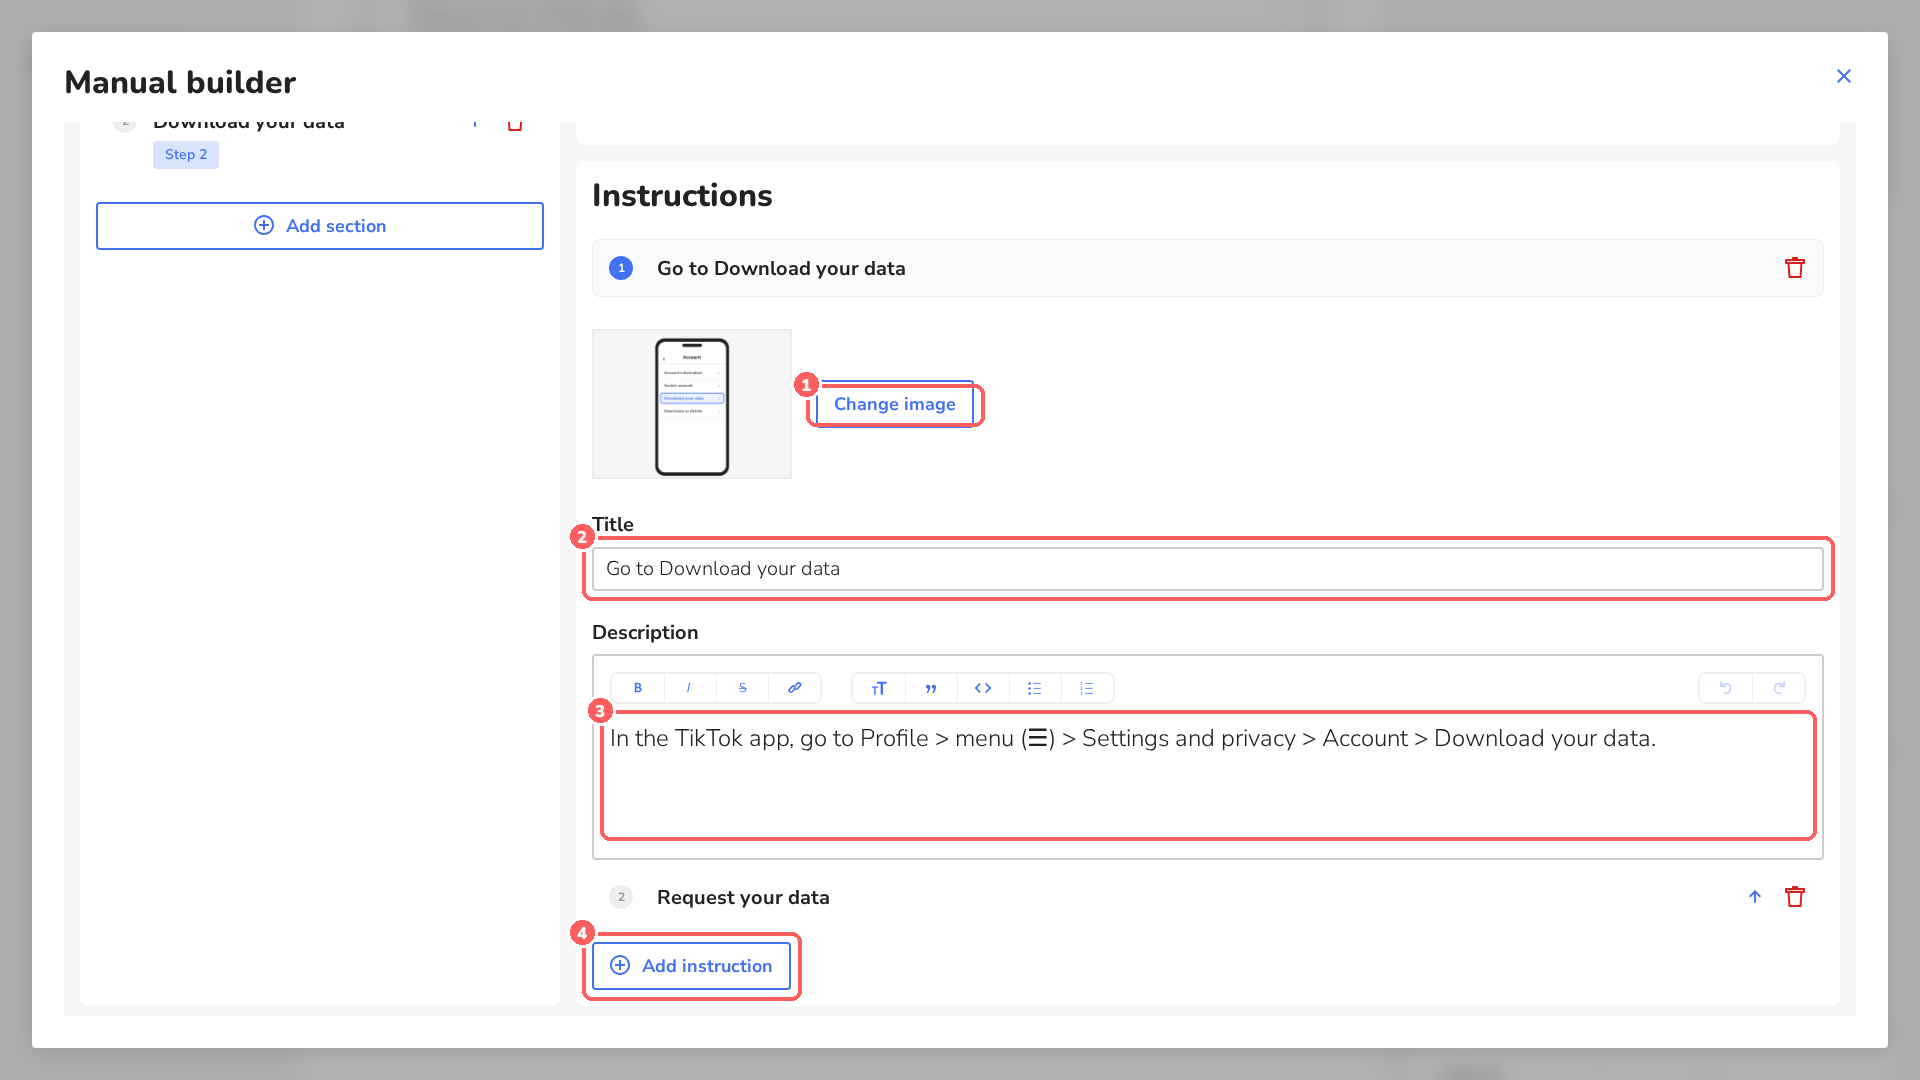
For each instruction, add an image 1 (e.g. a screenshot of the app), a title 2 and a short description 3. Use Add instruction 4 for the next one. Close the builder with the × at the top right when you are done.
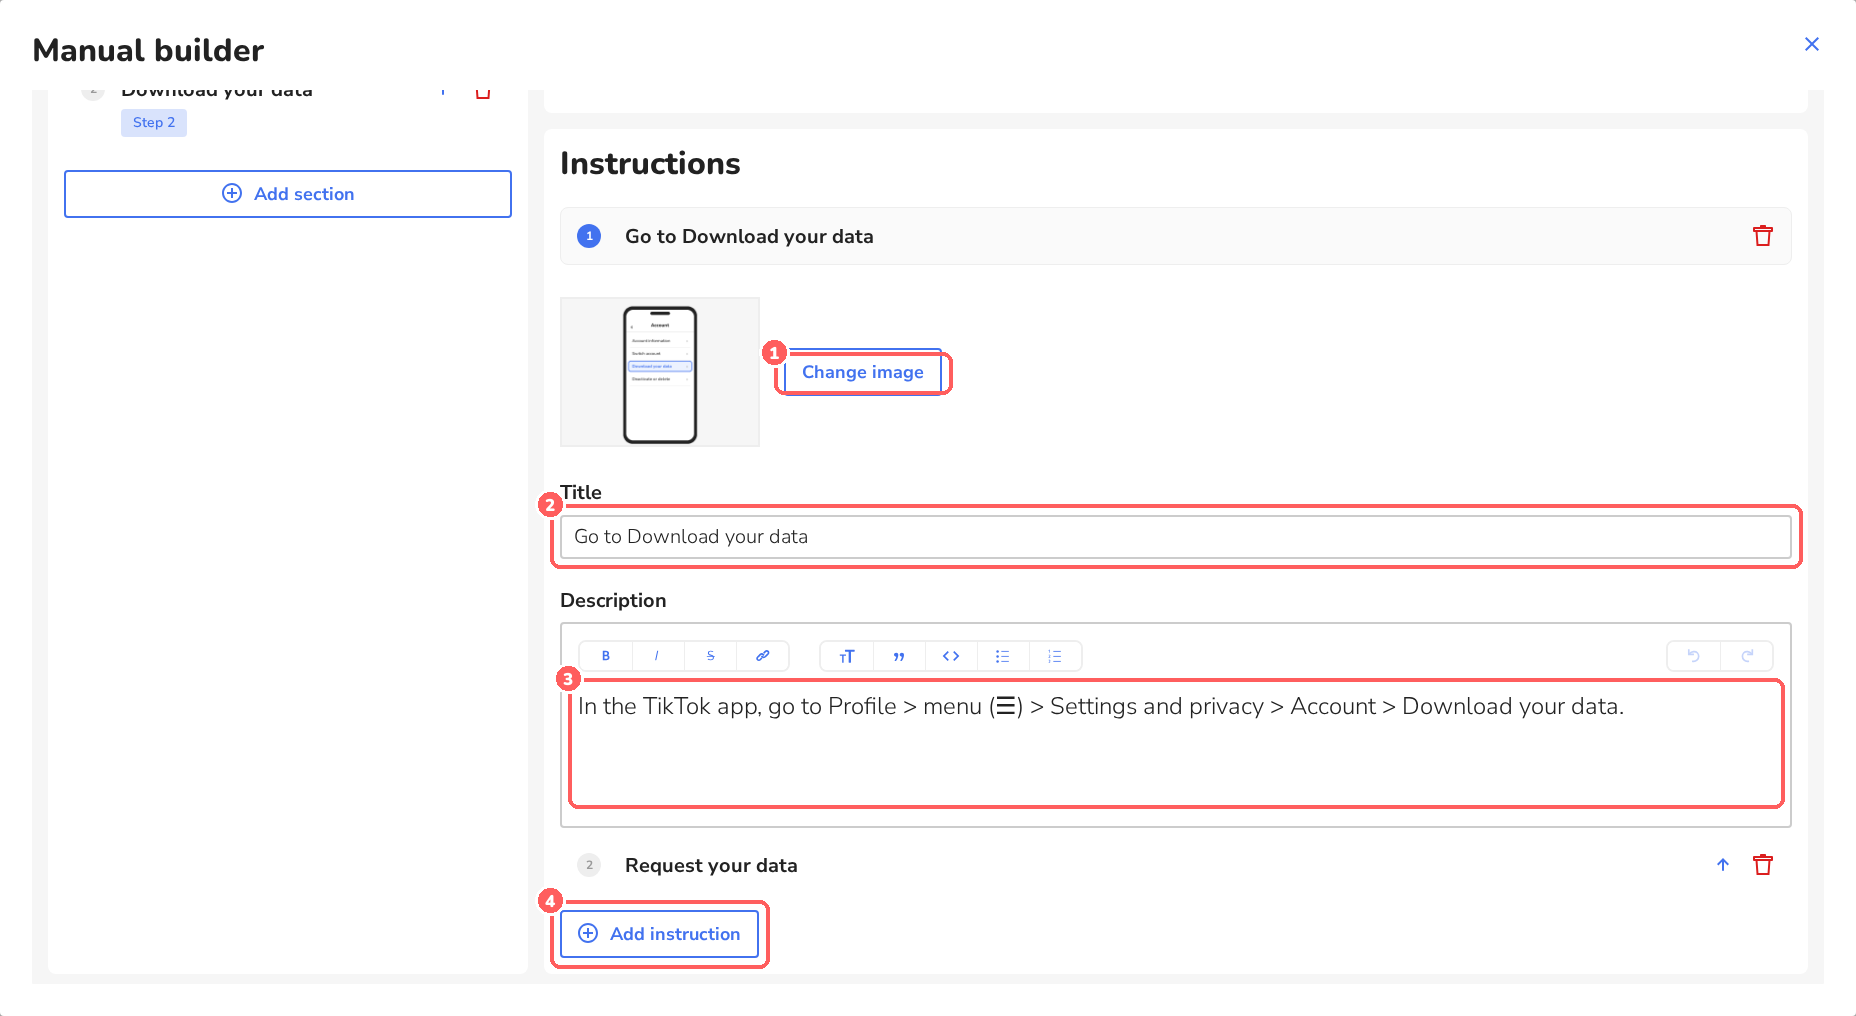
Keep the manual short and simple. Participants usually read it on their phone. In the example there are just two sections: Request your data (2 instructions) and Download your data (1 instruction).
Donate task
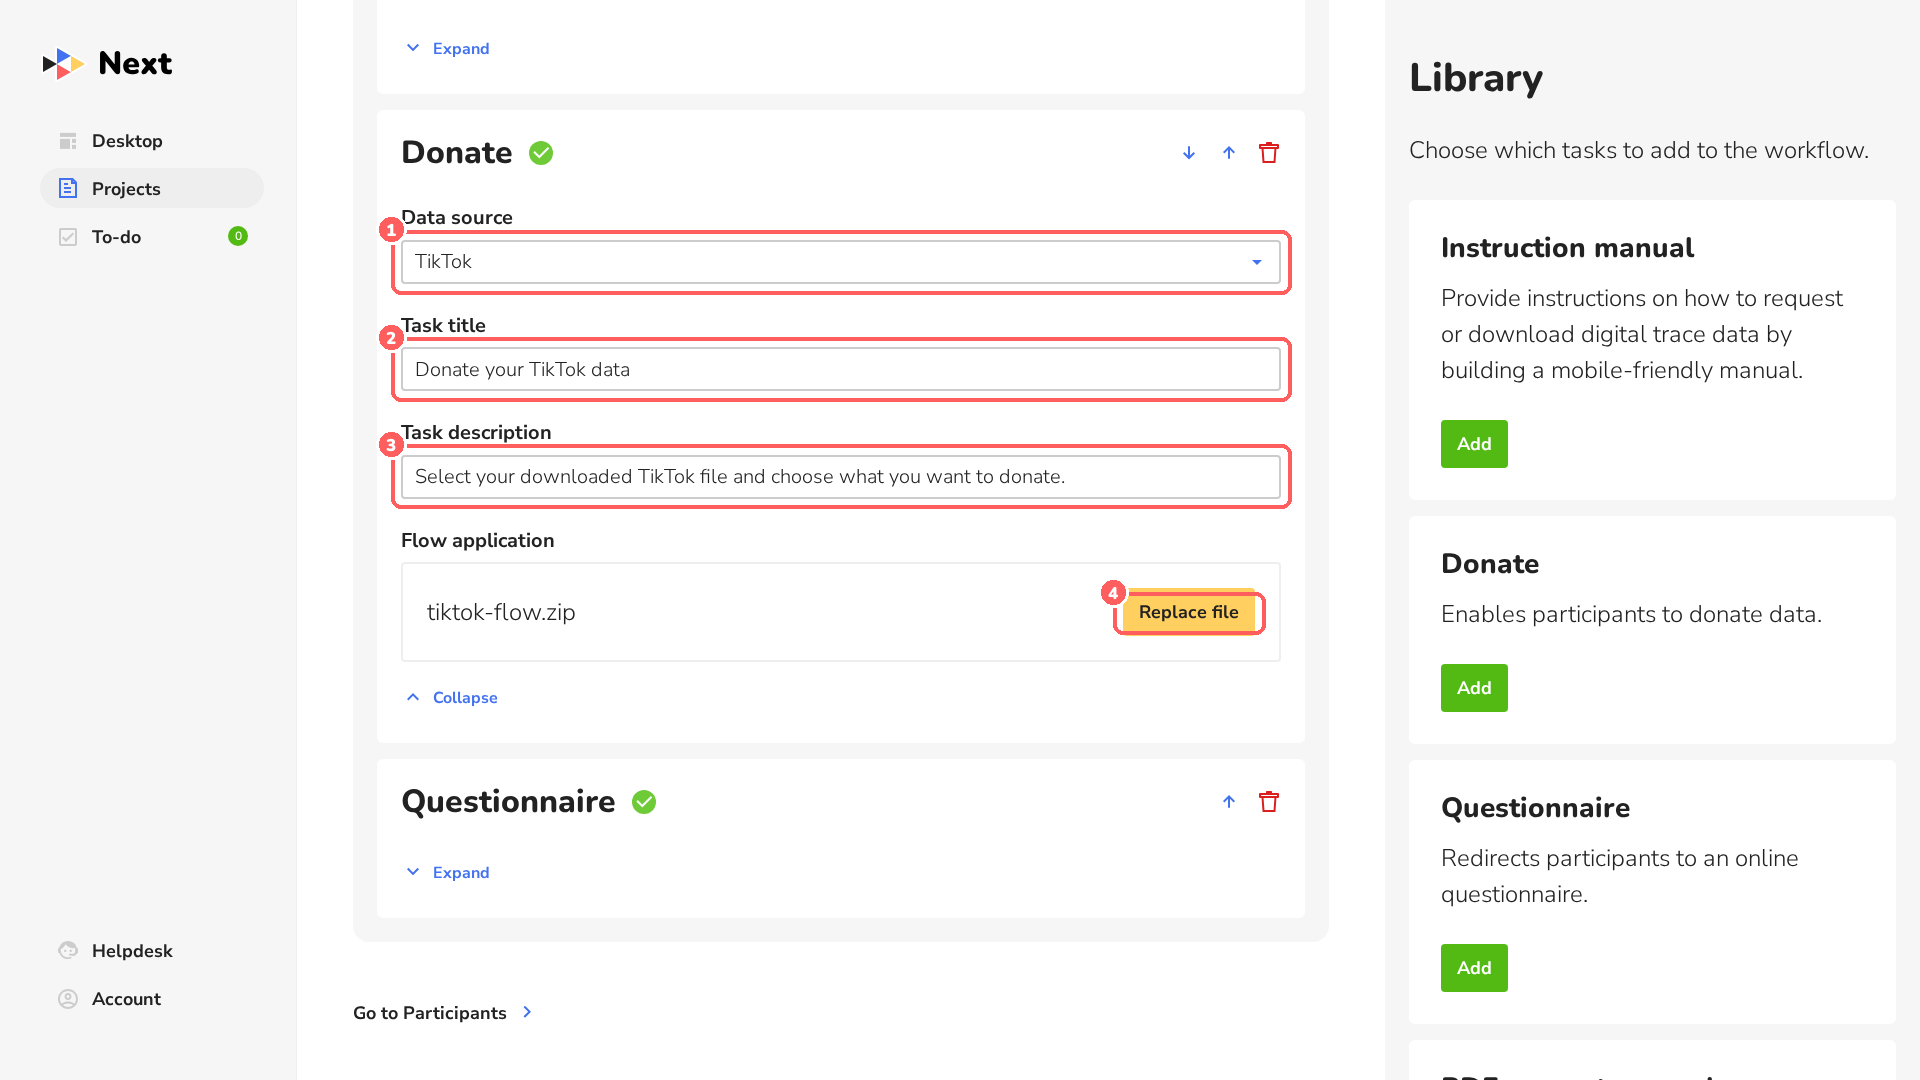
Expand the Donate task and fill in the Data source 1, Task title 2 and Task description 3. Then upload your flow application: click Select file and choose the .zip file. After uploading, the button changes to Replace file 4.
Don't have a flow application yet? Go to eyra.co/projects/data-donation and look for the Getting started section.
Questionnaire task (optional)
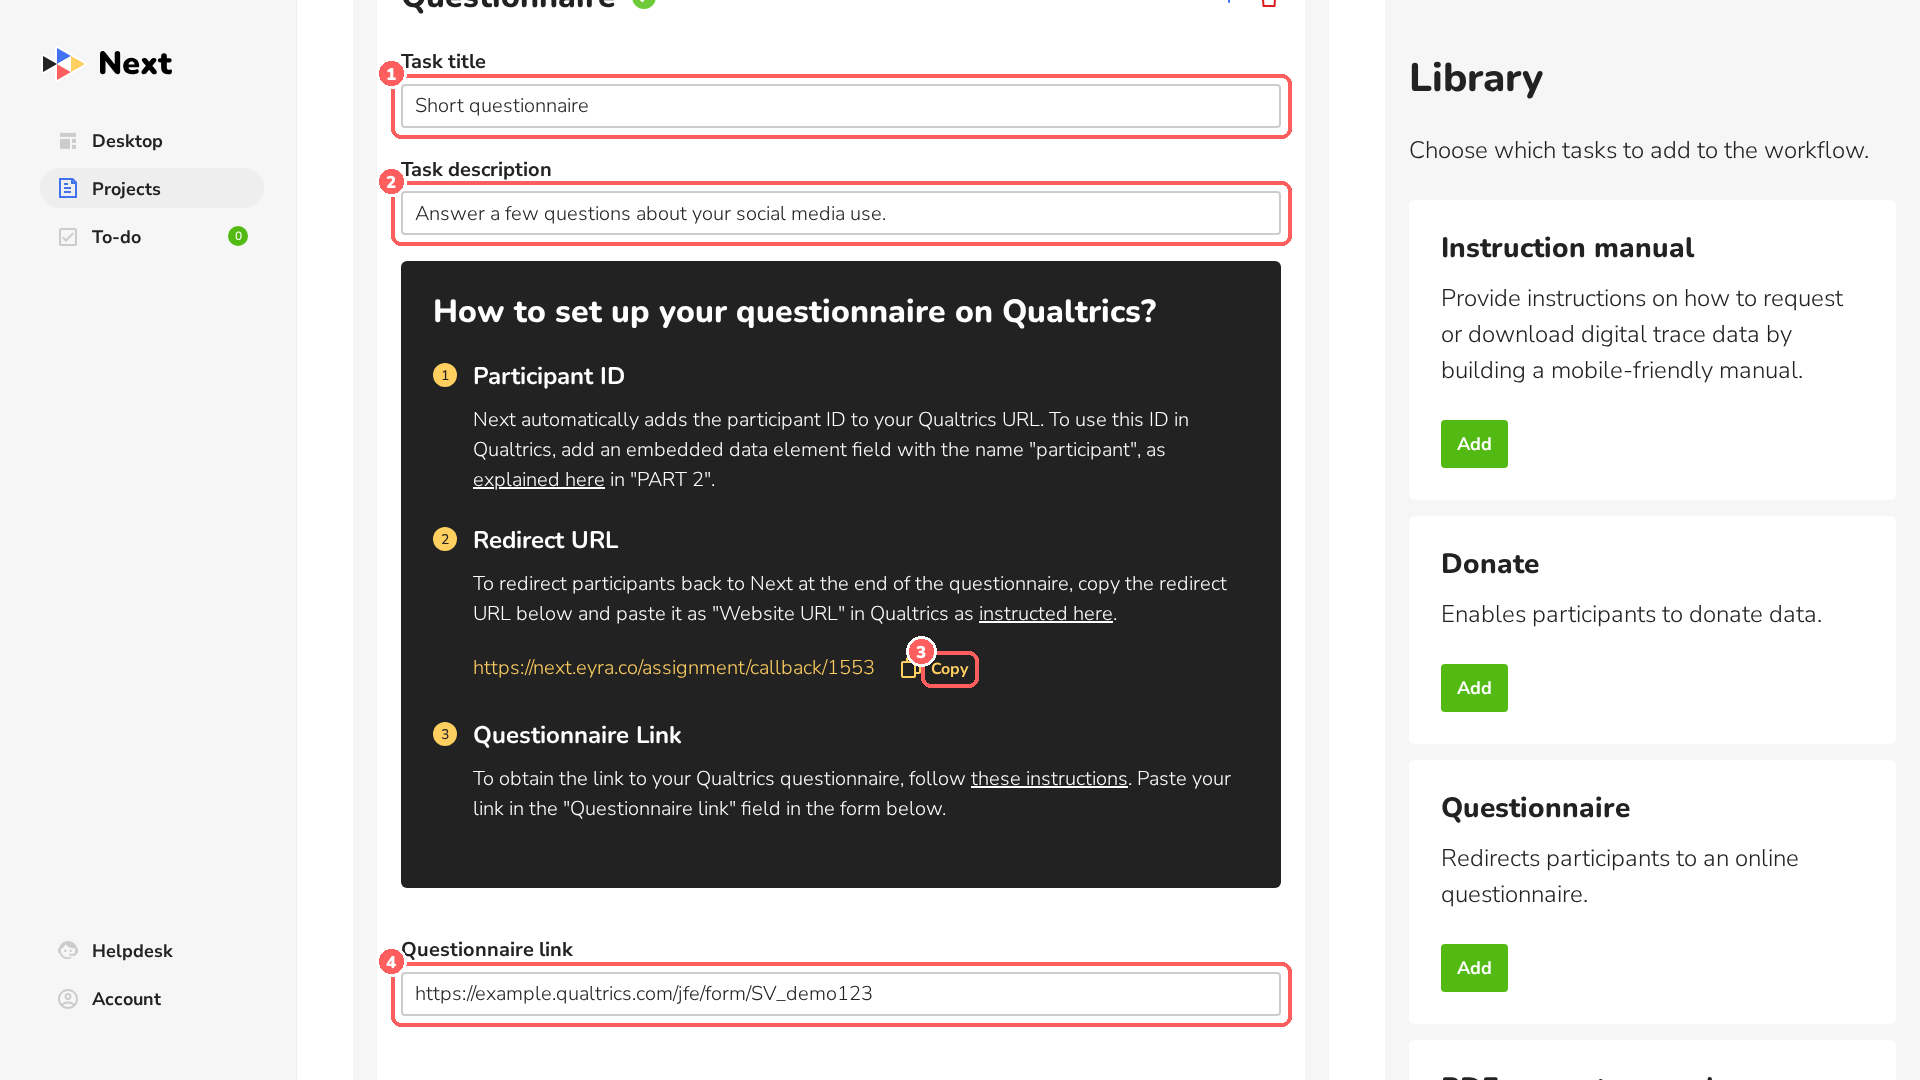
Fill in the Task title 1 and Task description 2. The dark box explains how to connect a Qualtrics questionnaire:
- Next adds the participant ID to your questionnaire link. In Qualtrics, add an embedded data field called
participantto store it. - Copy the redirect URL 3 and paste it as the end-of-survey “Website URL” in Qualtrics. Participants then return to Next when they finish.
- Paste the link to your questionnaire in Questionnaire link 4.
Order, check and delete tasks
Use the arrows 1 2 to move a task down or up. A green check mark 4 means that all required fields of a task are filled in. The bin 3 removes a task.
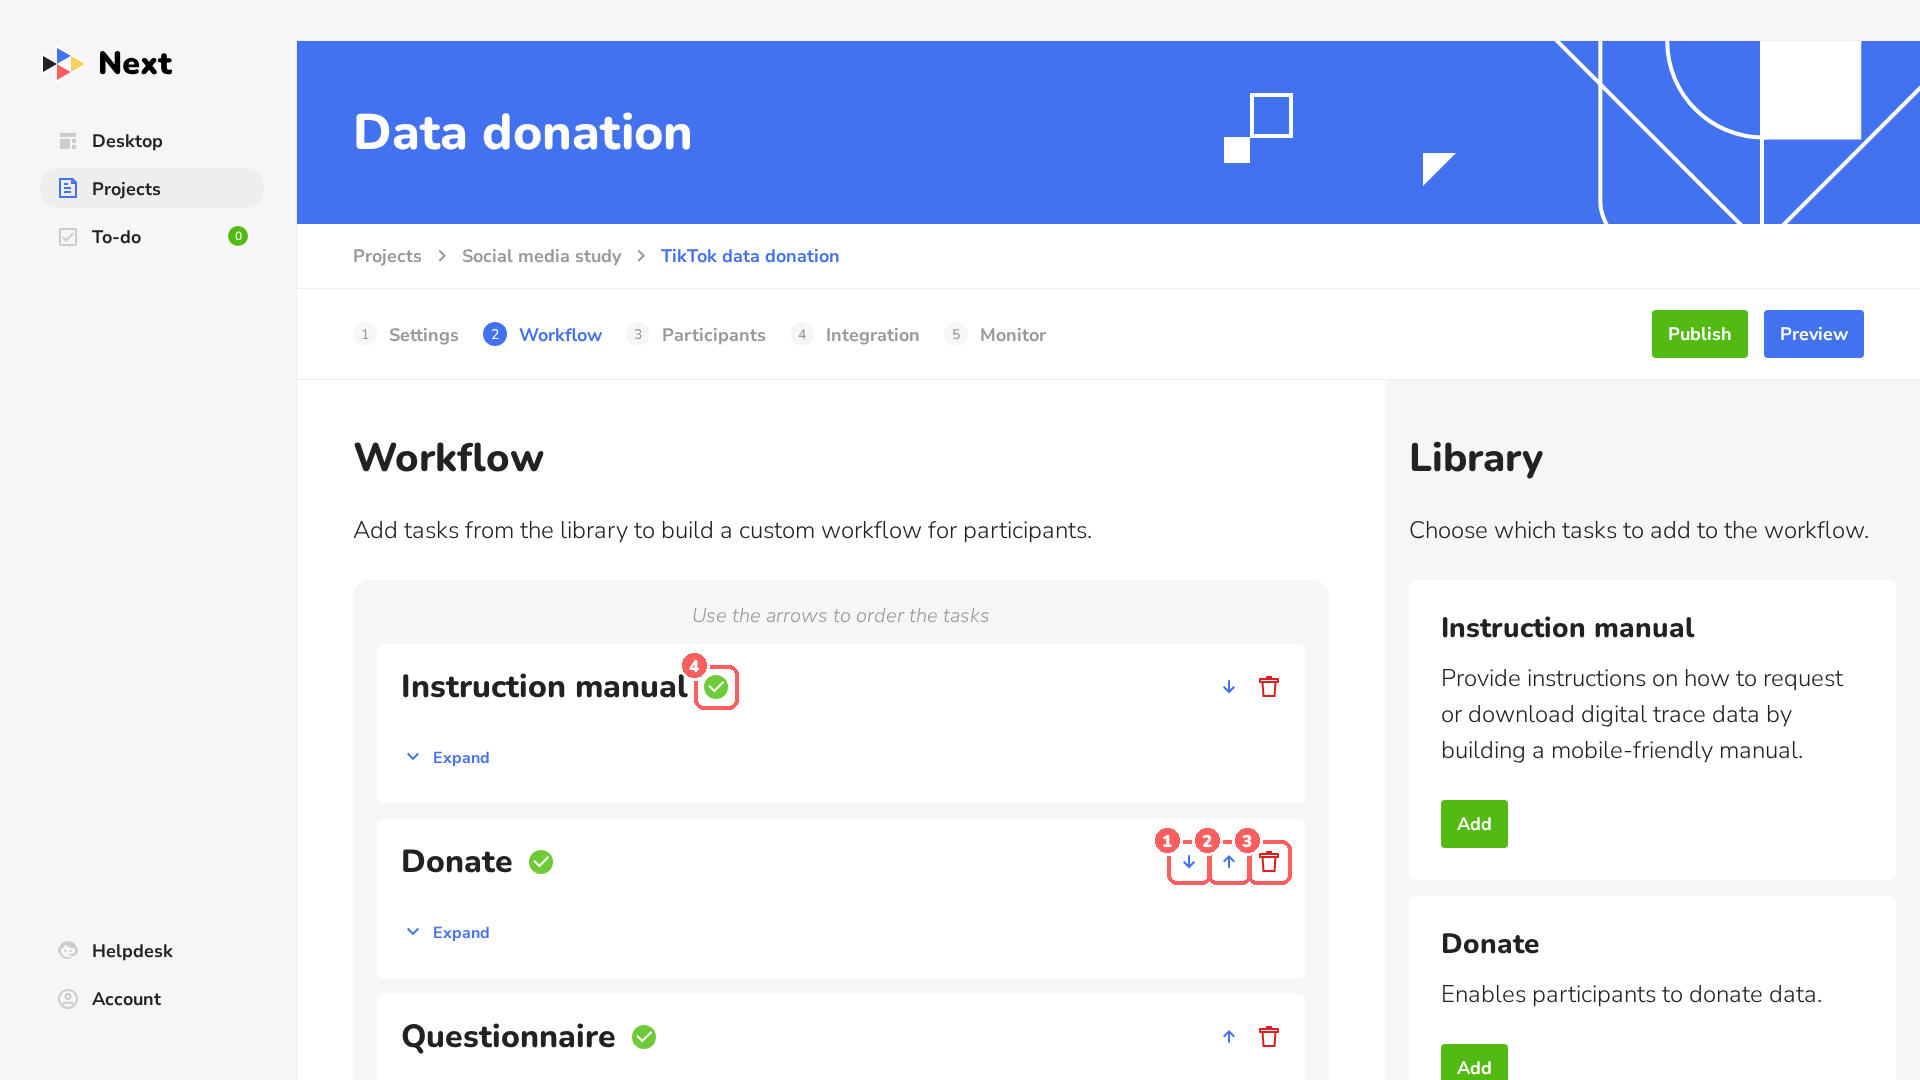
Deleting a task happens immediately, without asking for confirmation. Everything you entered in the task is lost.
6Participants
- 1Number of participants: how many participants you expect. The Monitor tab uses this number to show progress.
- 2Language setting for participants: the language of the buttons and standard texts participants see (English, Spanish, German, Italian, Dutch, Romanian or Lithuanian). Your own texts are shown as you wrote them.
- 3Invite link: the link you send to participants. Click Copy 4 to copy it.
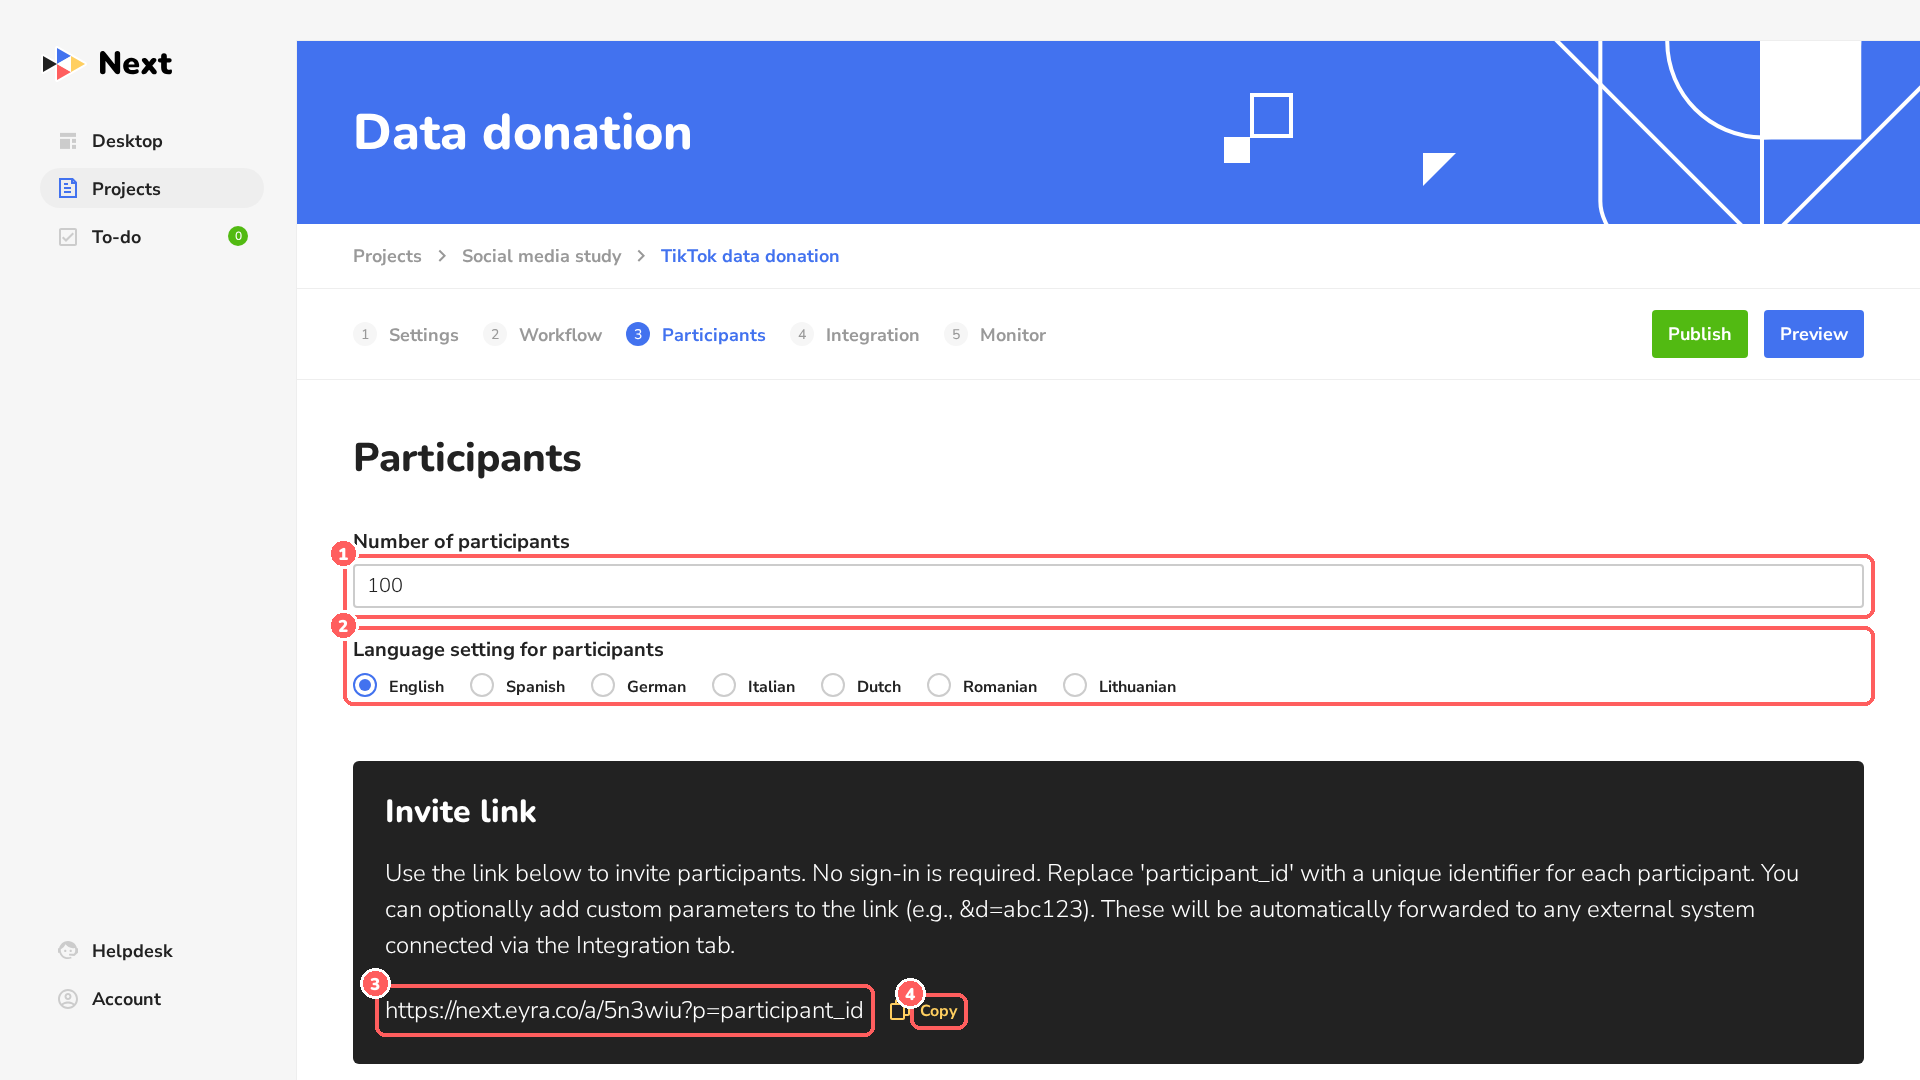
In the invite link, replace participant_id with a unique code for each participant, for example https://next.eyra.co/a/5n3wiu?p=P0001. Participants don't need to sign in. You can add extra parameters (e.g. &d=abc123); these are passed on to the systems you connect in the Integration tab.
7Integration
This tab is optional. Use it when participants come from another system, such as a panel company.
- 1End of workflow: a URL that participants are sent to after they finish, e.g. to confirm completion to your panel.
- 2Destination: the name of that organisation or platform. Participants see it just before they are redirected.
- 3Progress: a webhook URL that receives real-time progress updates for each participant.
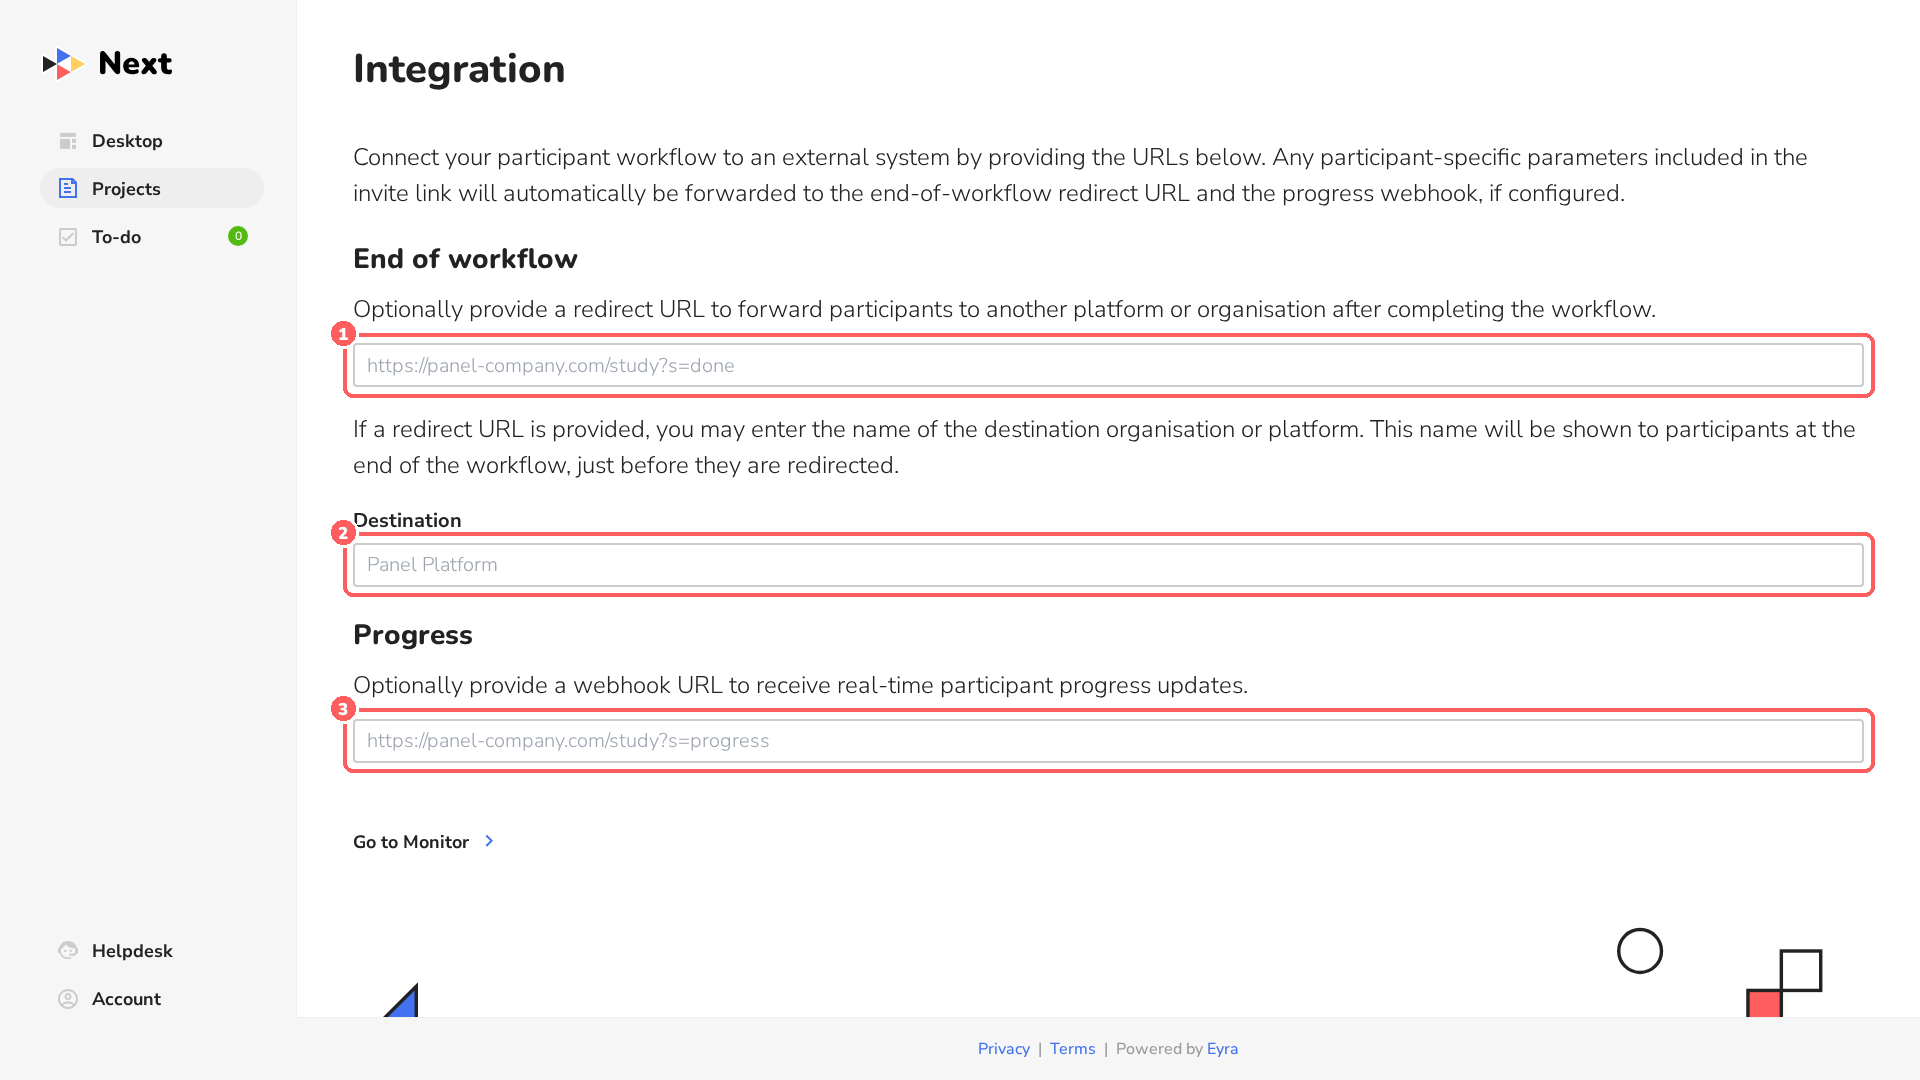
Parameters from the invite link (such as the participant ID) are automatically added to these URLs.
8Preview: test your study
Click Preview at the top right of the item page to go through the study as a participant. Do this before you publish, and check every step.
-
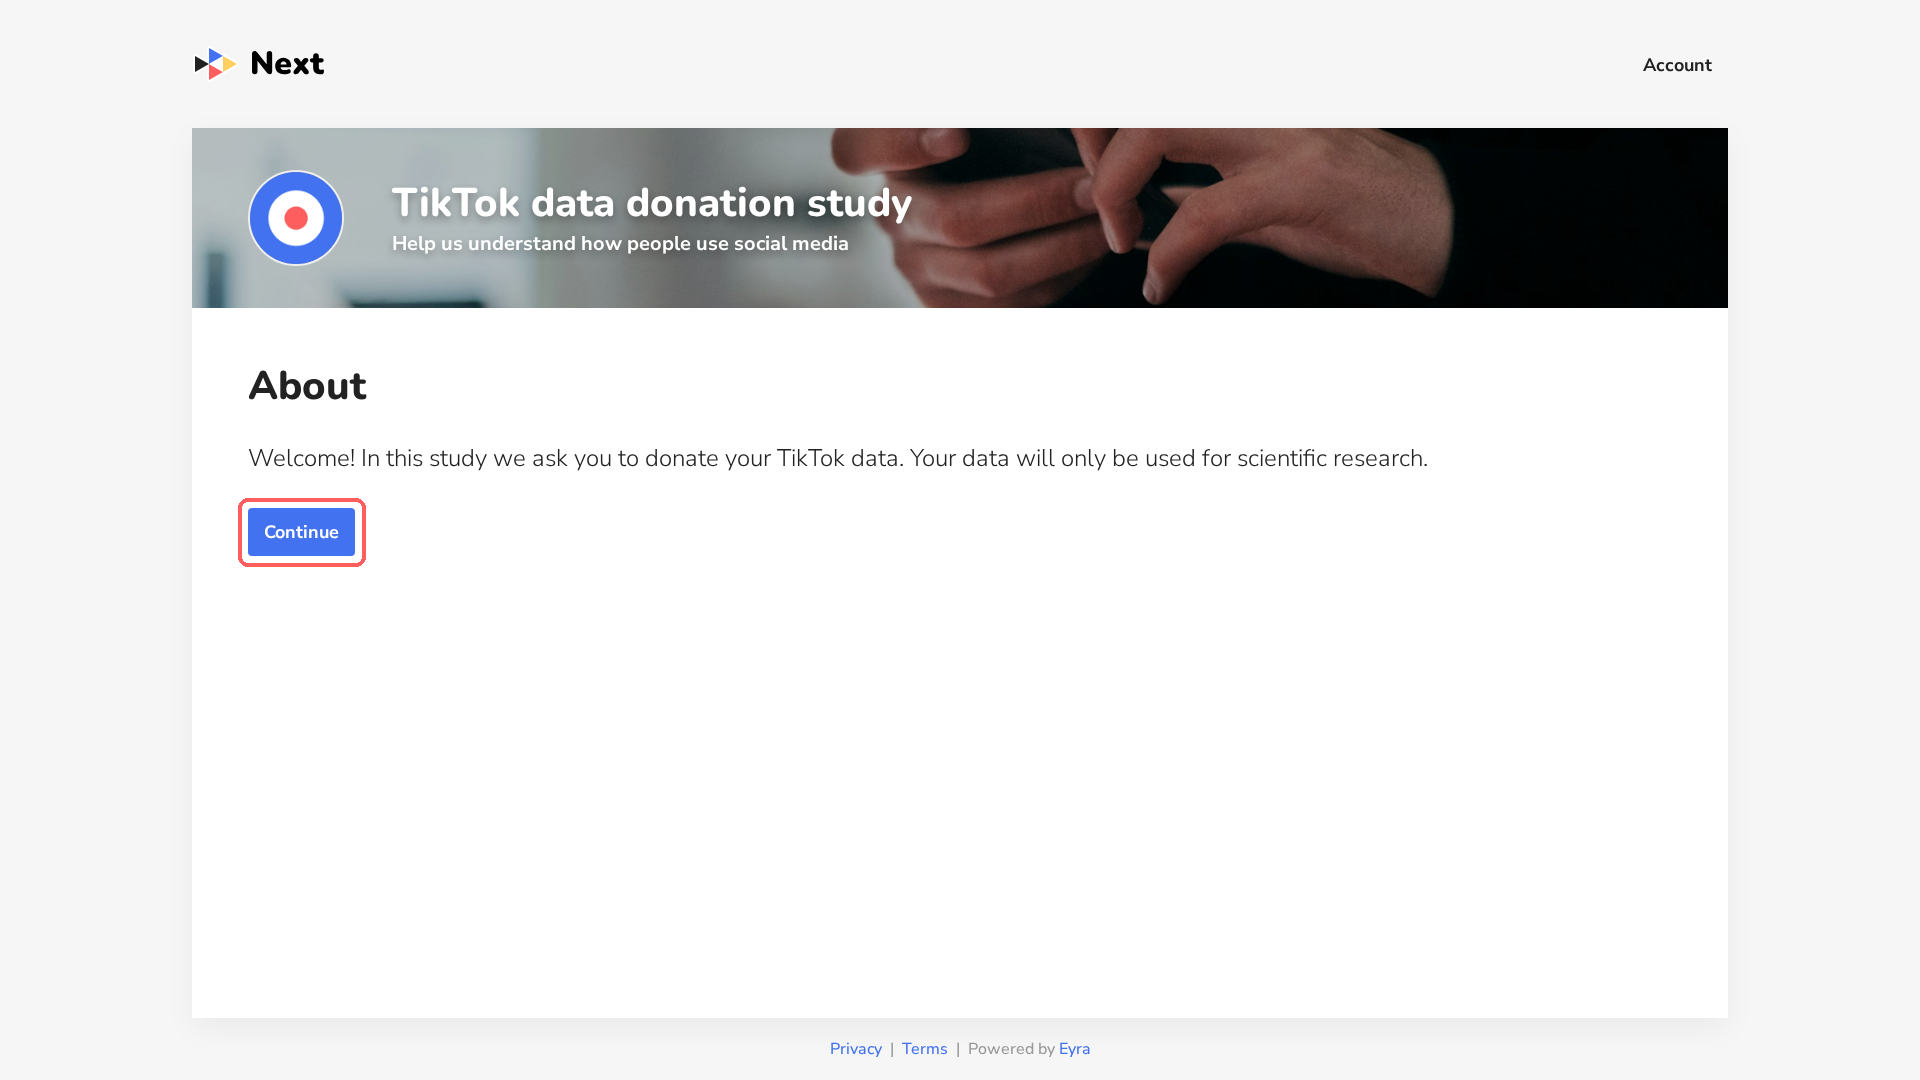
Participants first see the header with your branding and the About page. They click Continue.
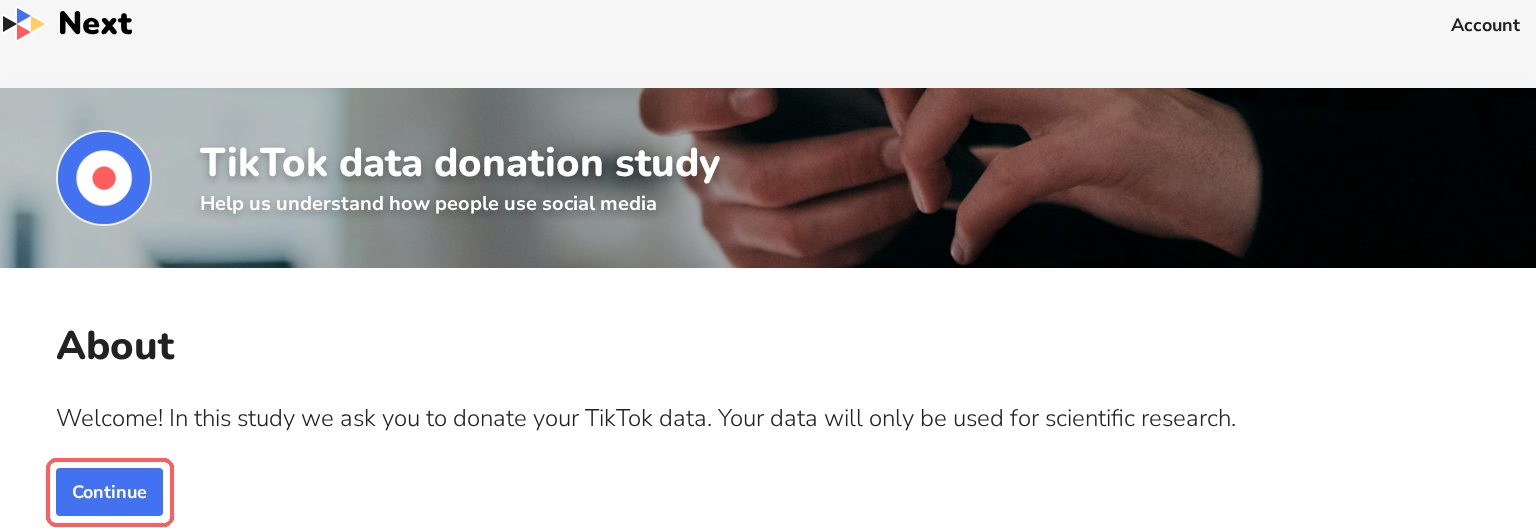
-
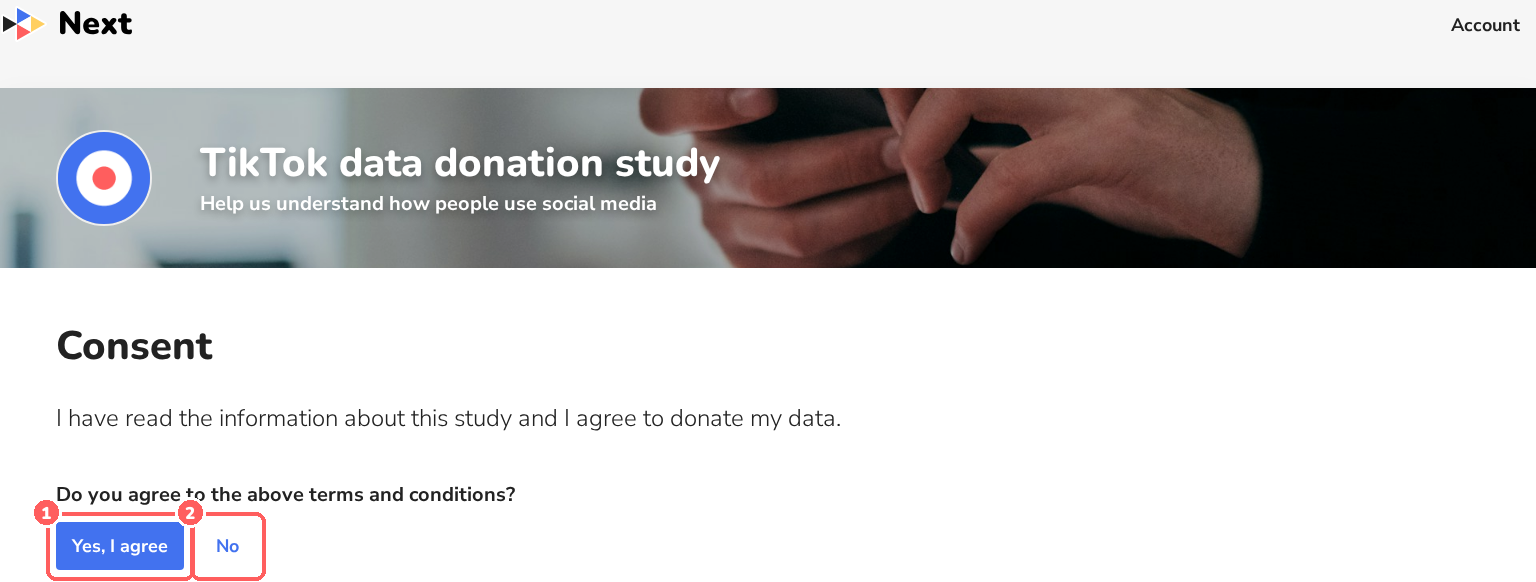
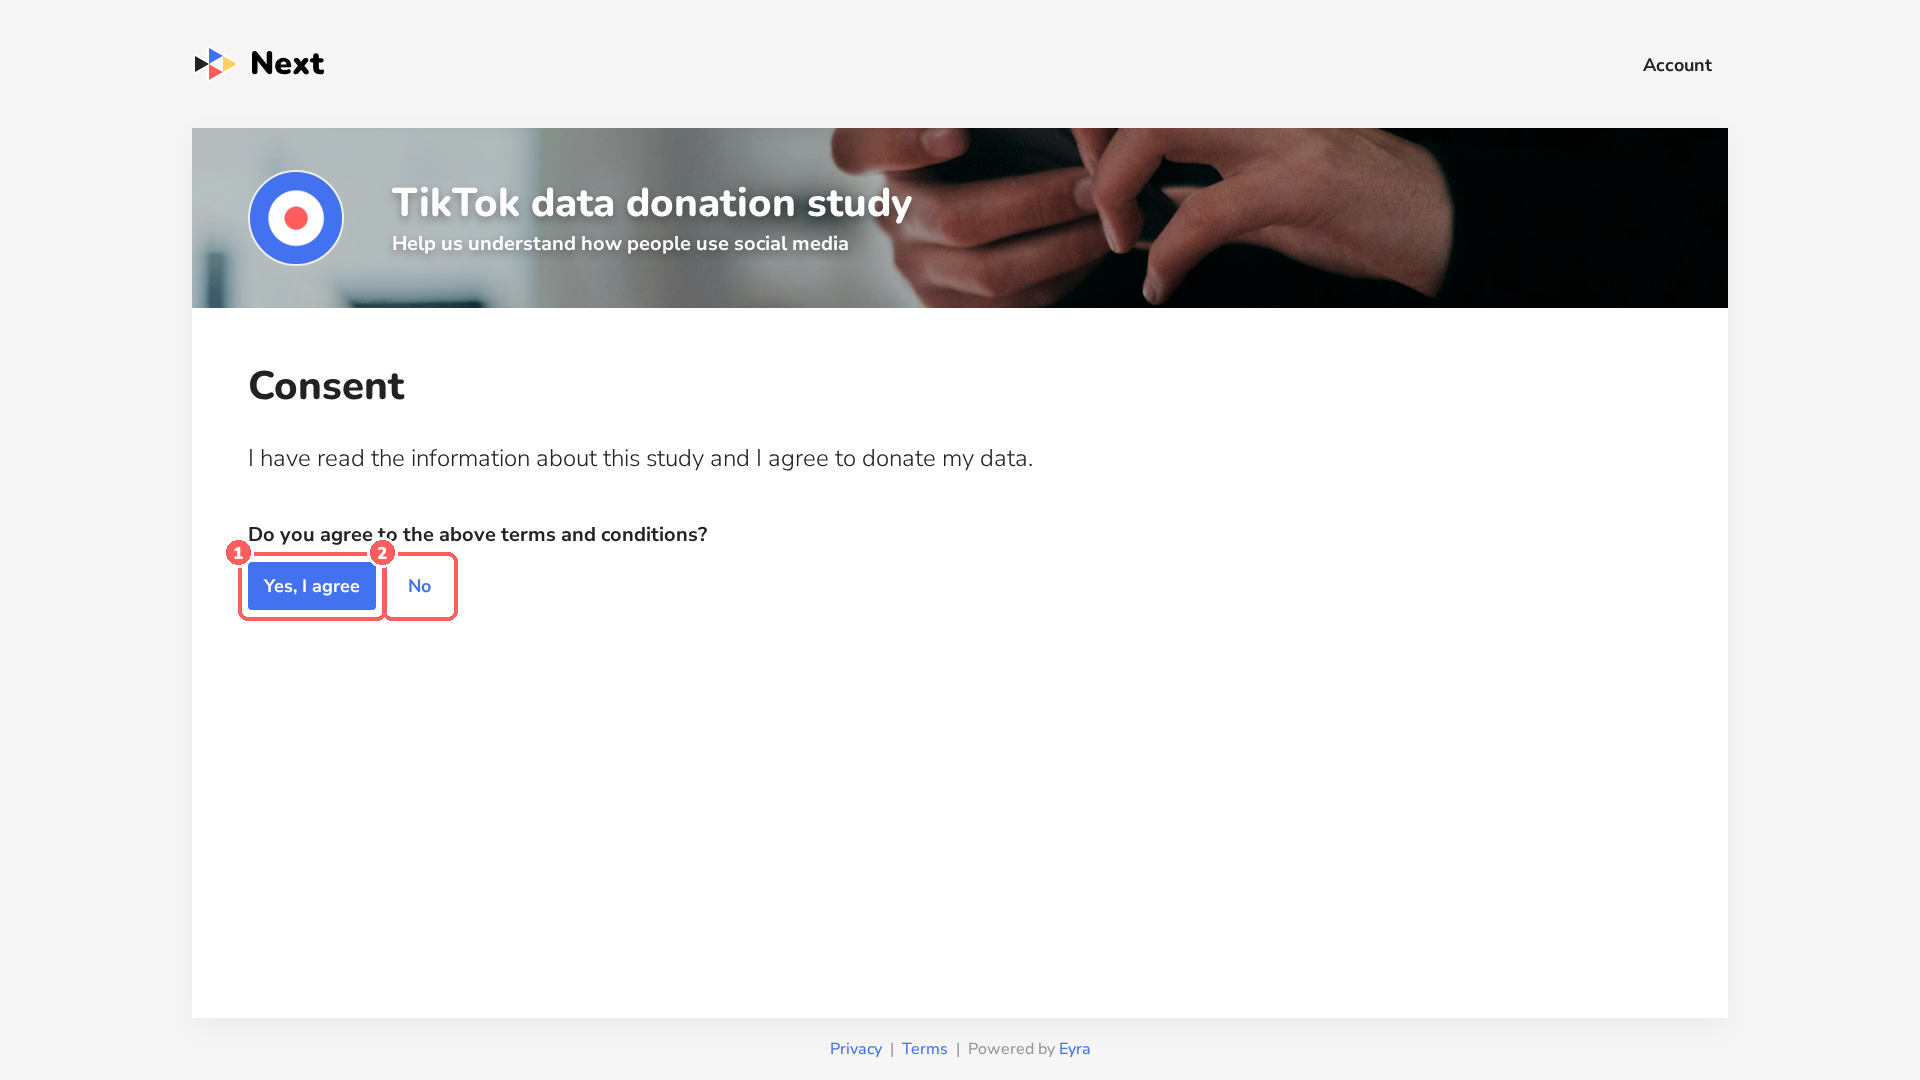
Next is the Consent page. Participants click Yes, I agree 1 to continue, or No 2 to stop.
-
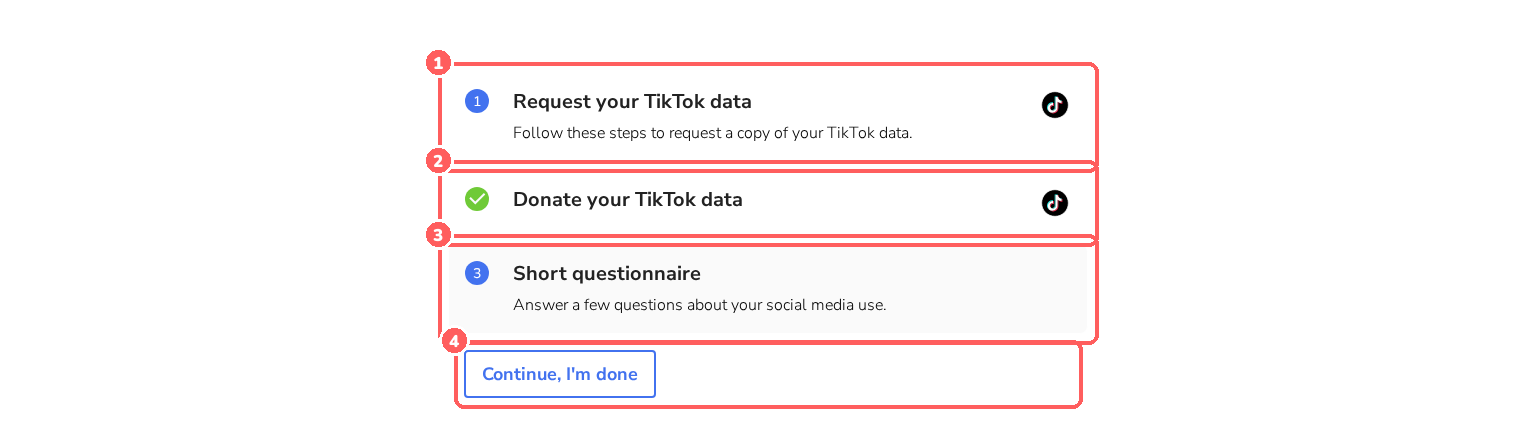
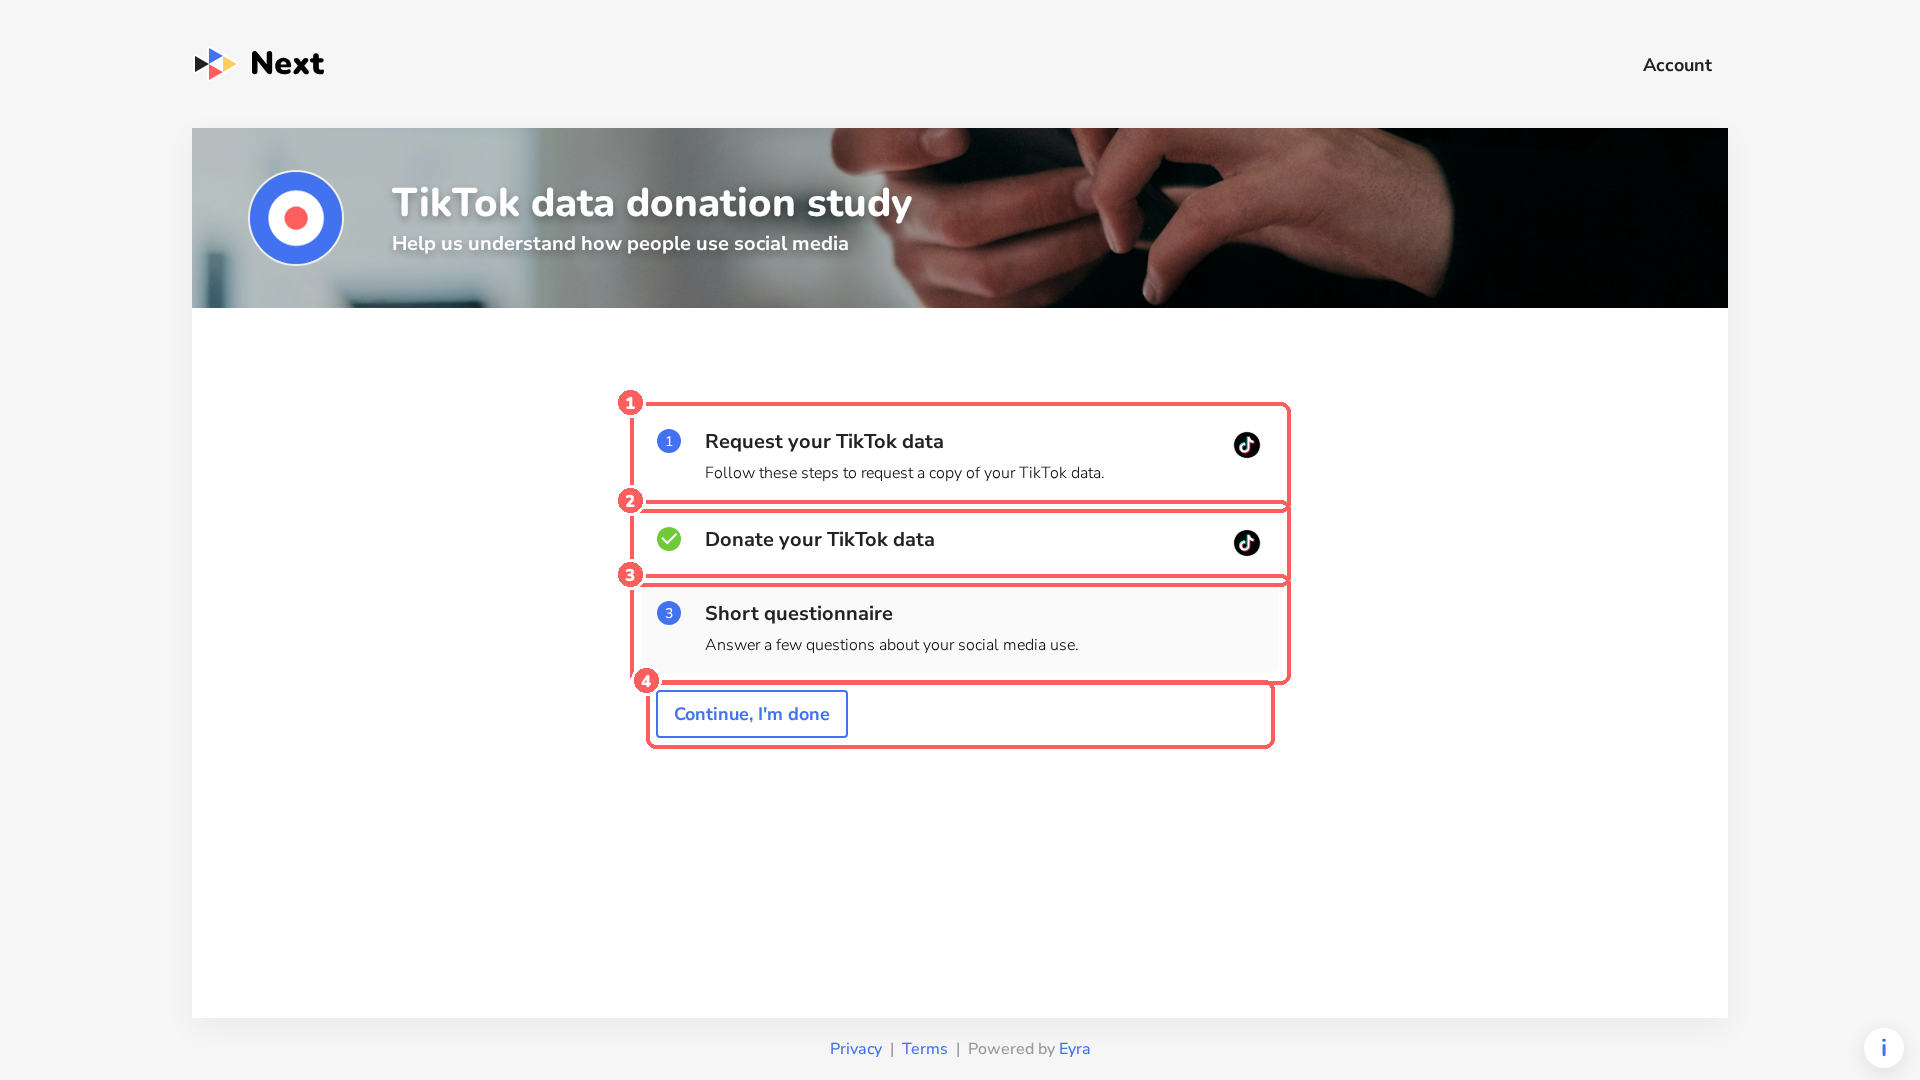
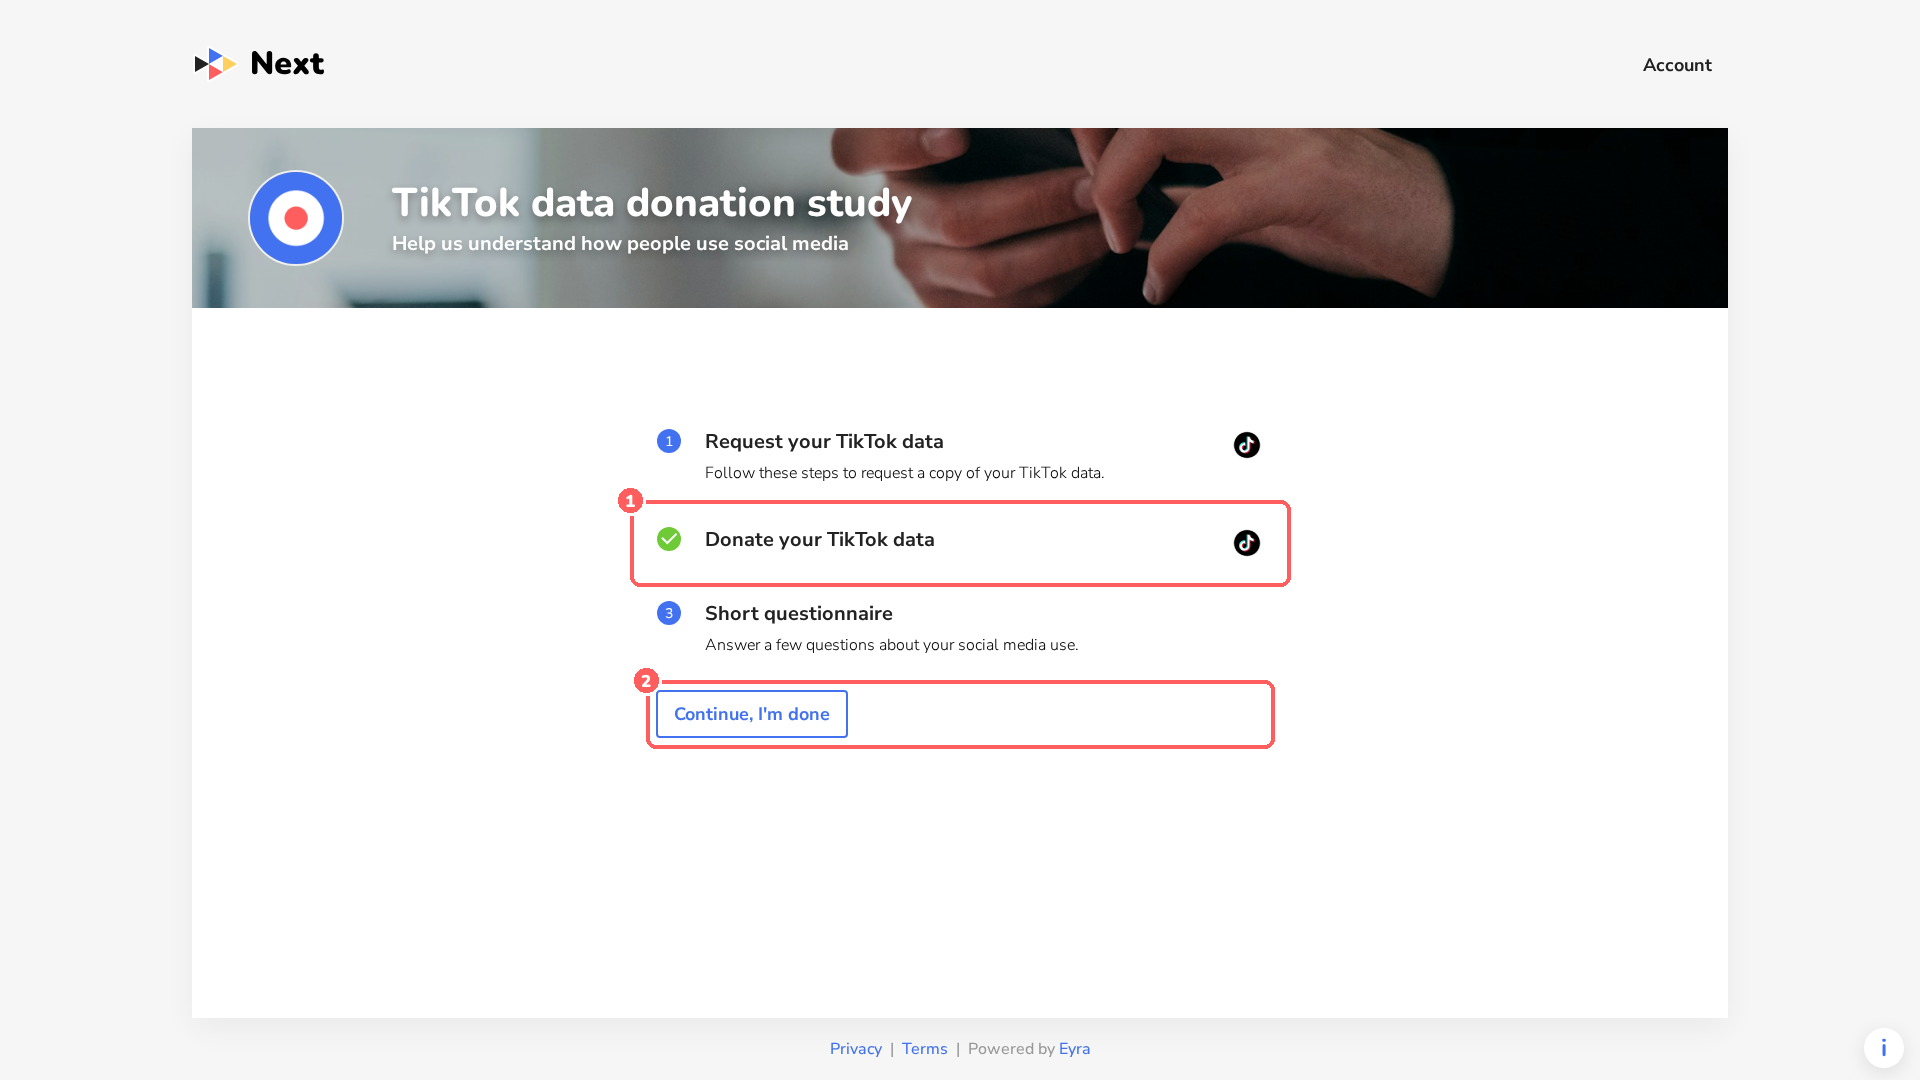
Participants then see the task list 1–3. They click a task to start it. When they are finished, they click Continue, I'm done 4.
-
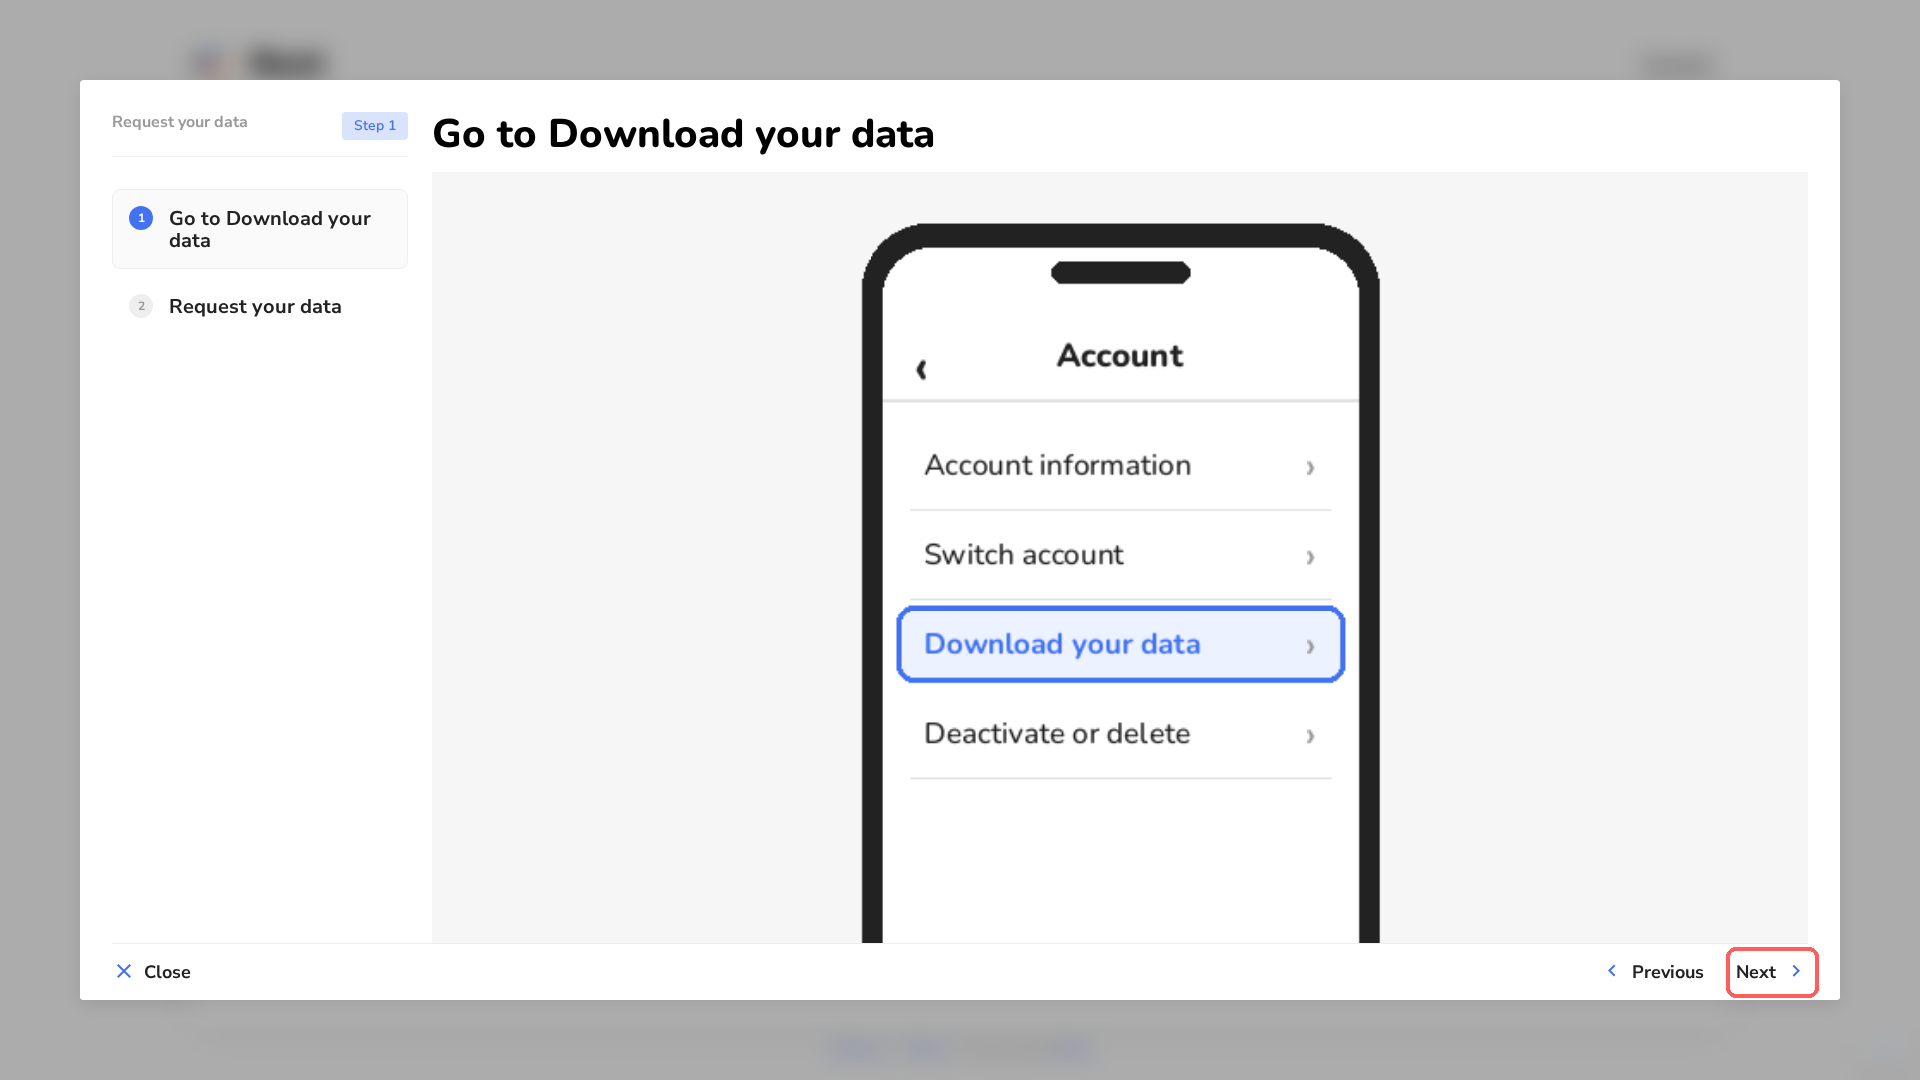
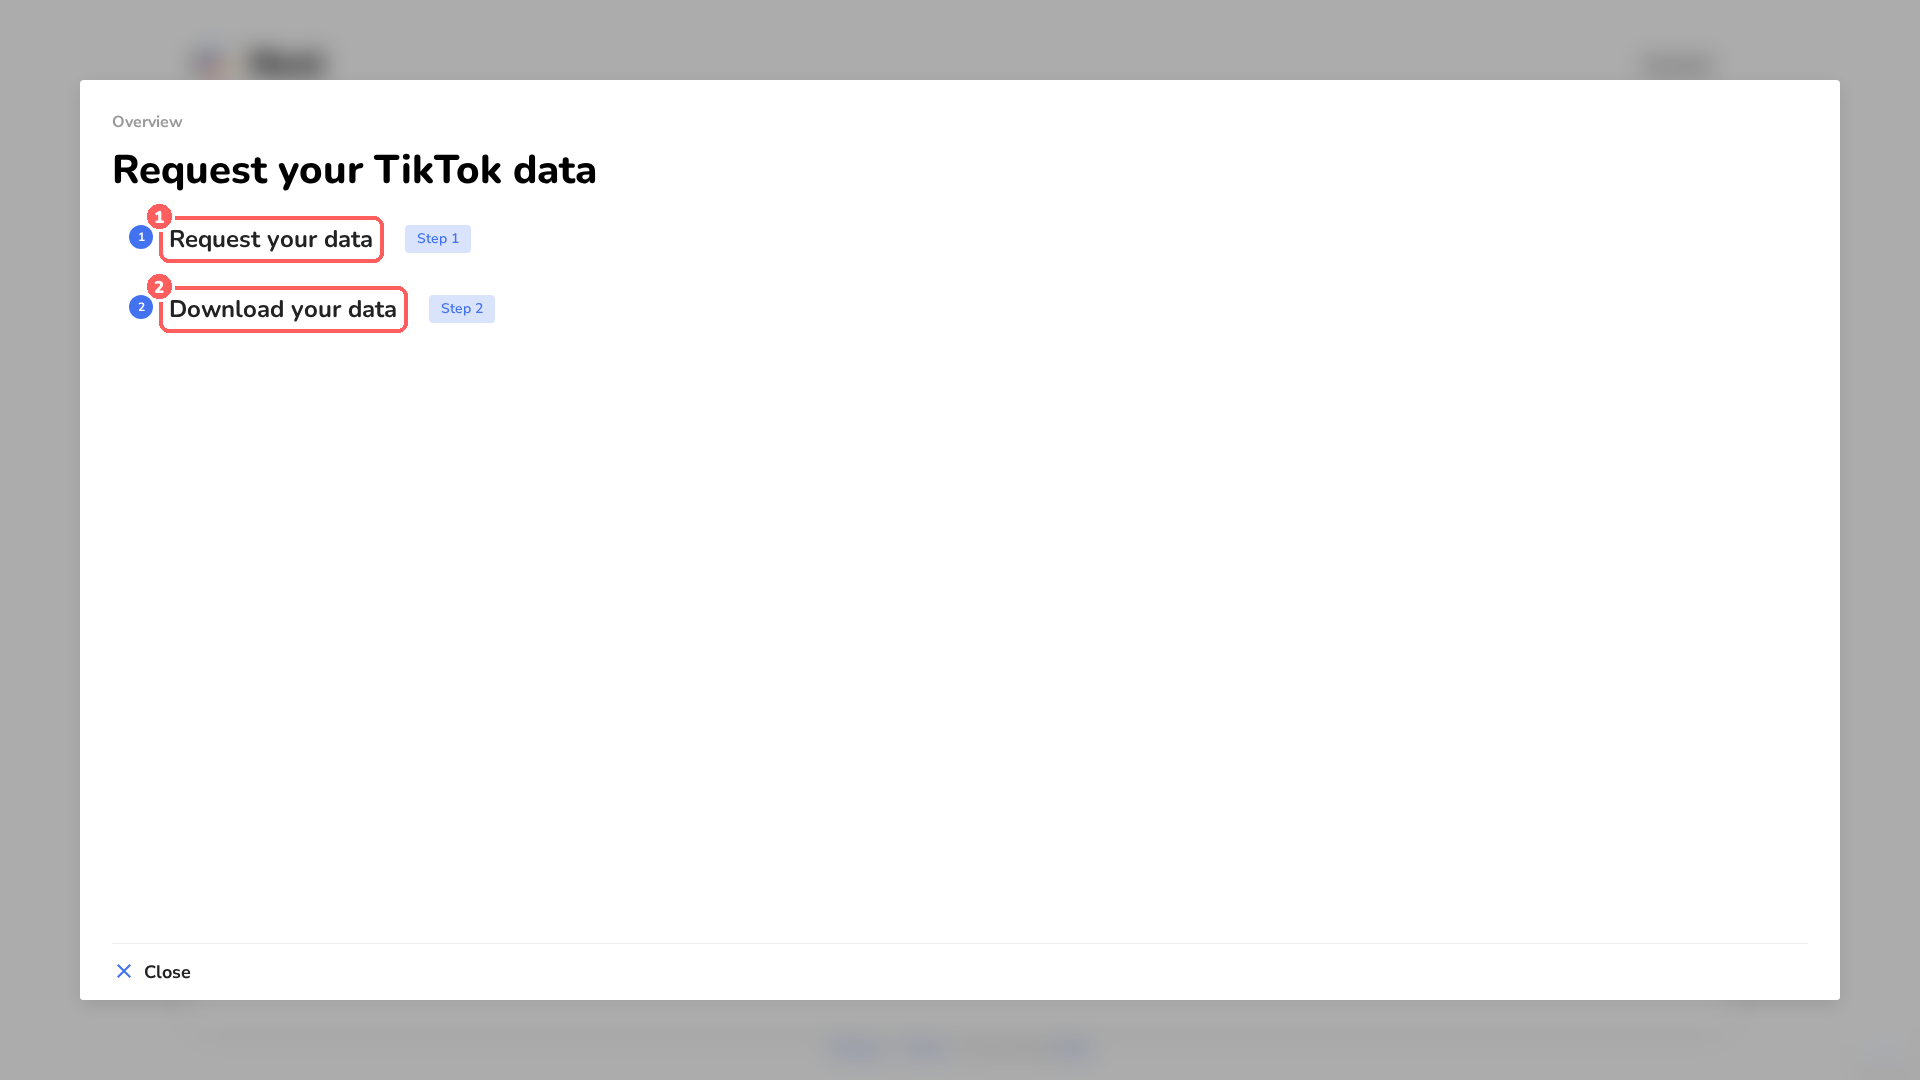
The instruction manual opens with an overview of its sections. Participants click a section and use Next to go through the instructions.

-
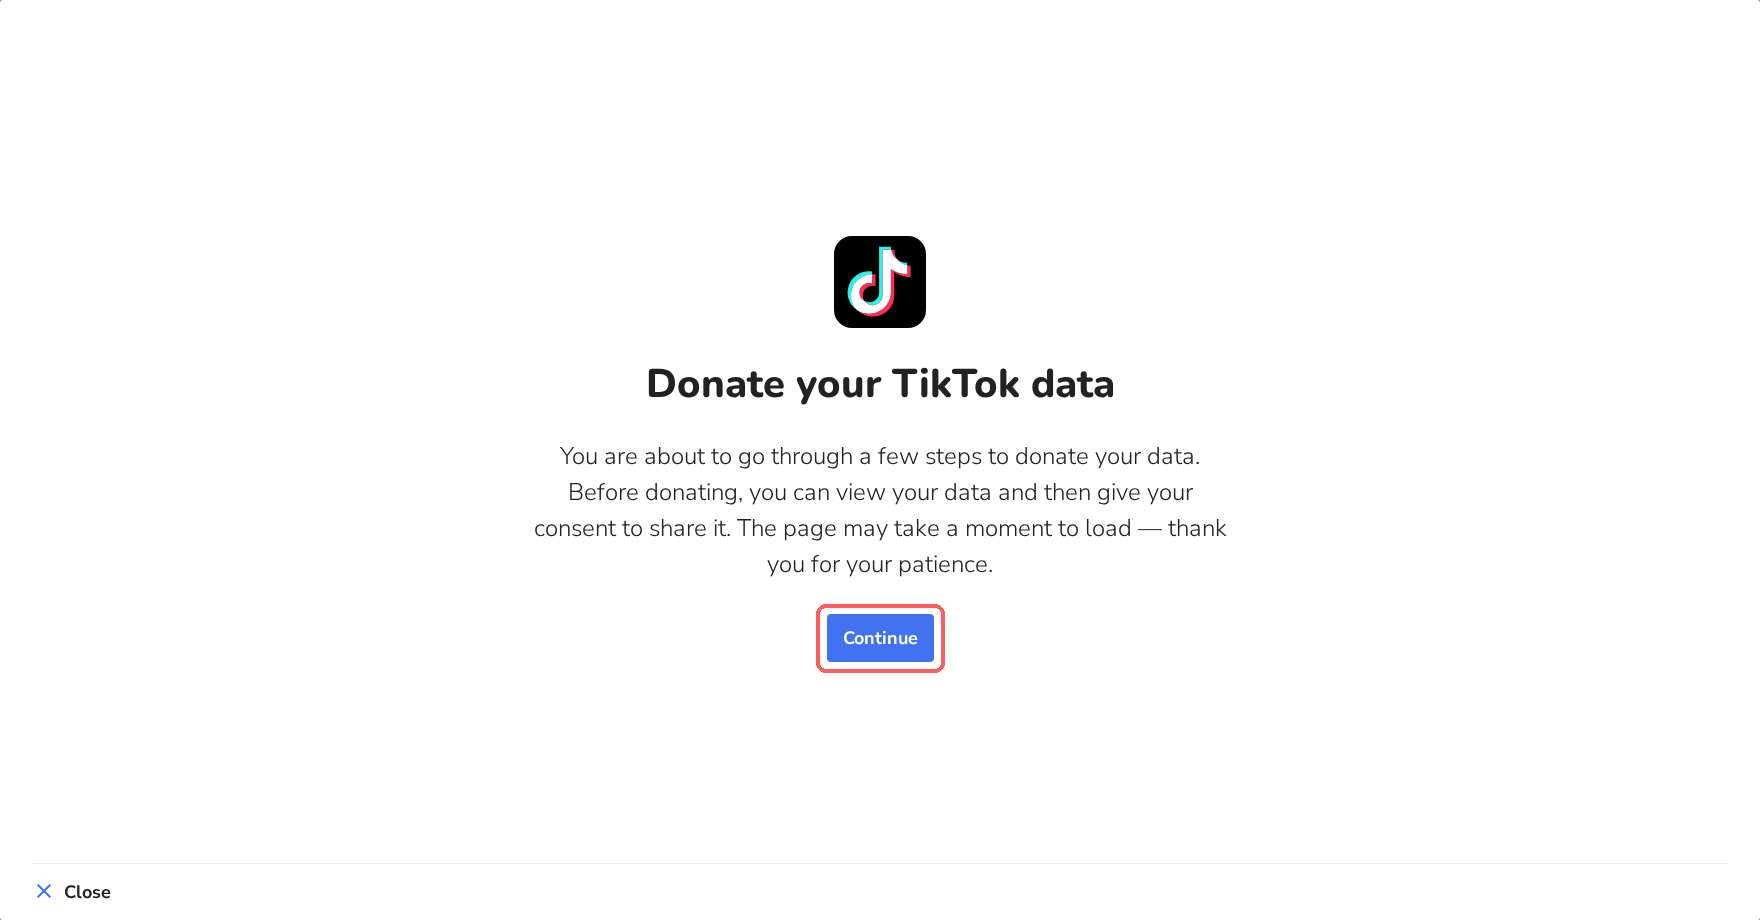
In the Donate task, participants first see an introduction and click Continue. The flow application then loads, which can take a moment.
-
Participants click Choose file 1, select the file they received from the platform and click Continue 2. The data is extracted on their own device; nothing is sent yet.
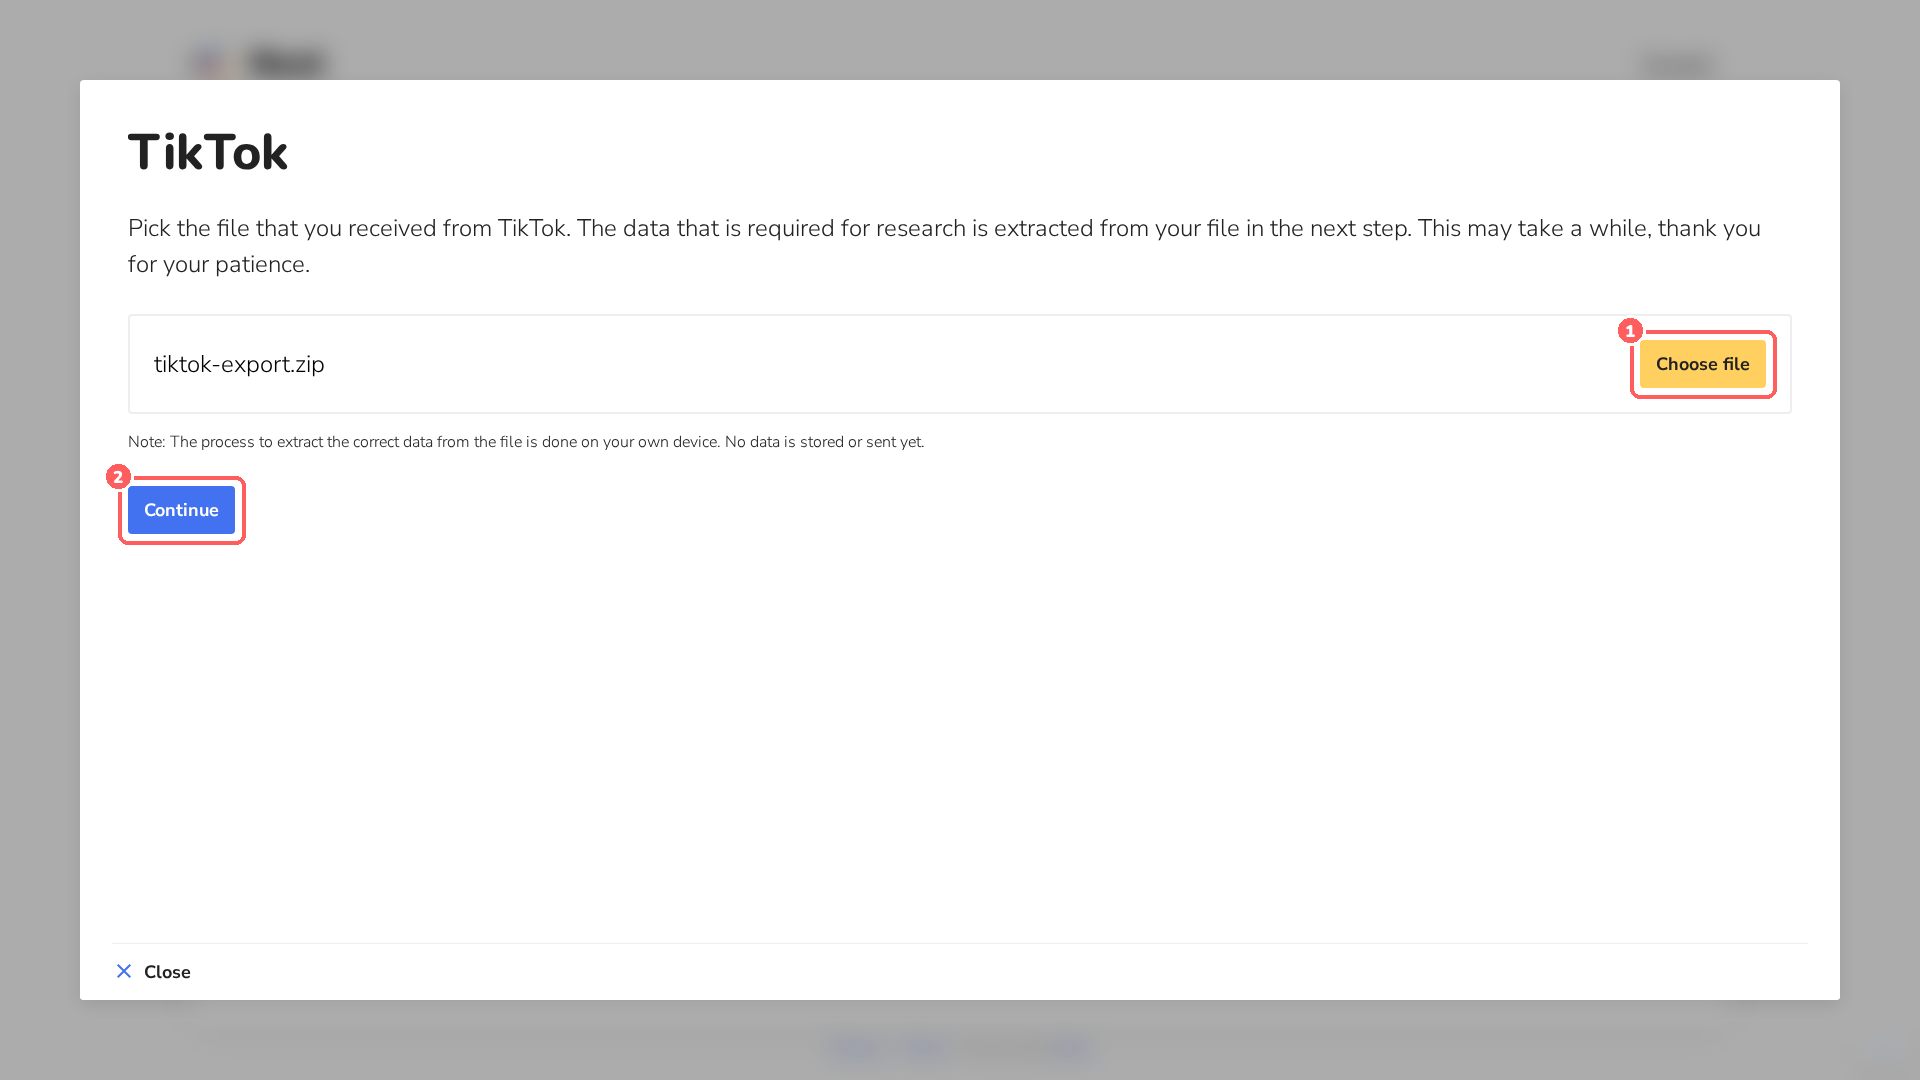
For testing you need a data file from the platform. Your flow application may come with test data; otherwise request your own data from the platform.
-
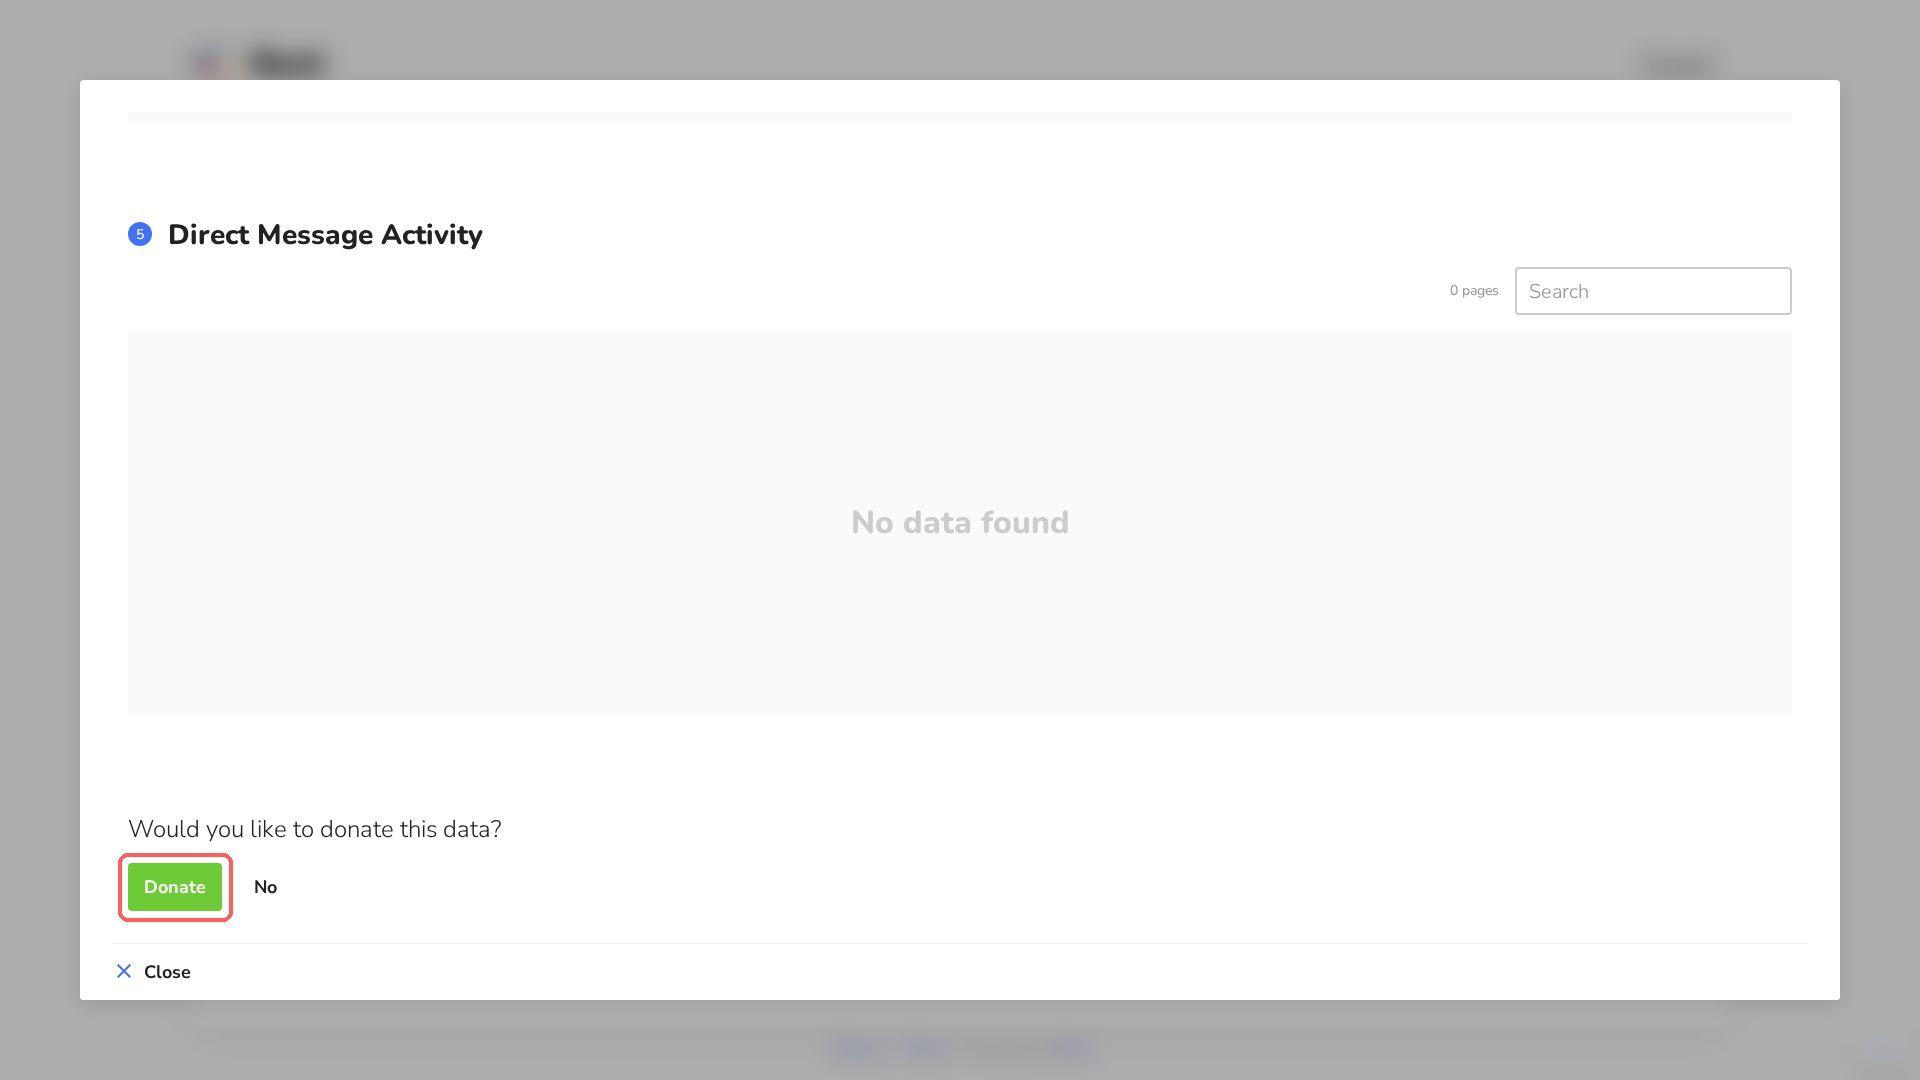
Participants review the extracted data 1. With Adjust 2 they can remove information they don't want to share. What exactly is shown depends on your flow application.
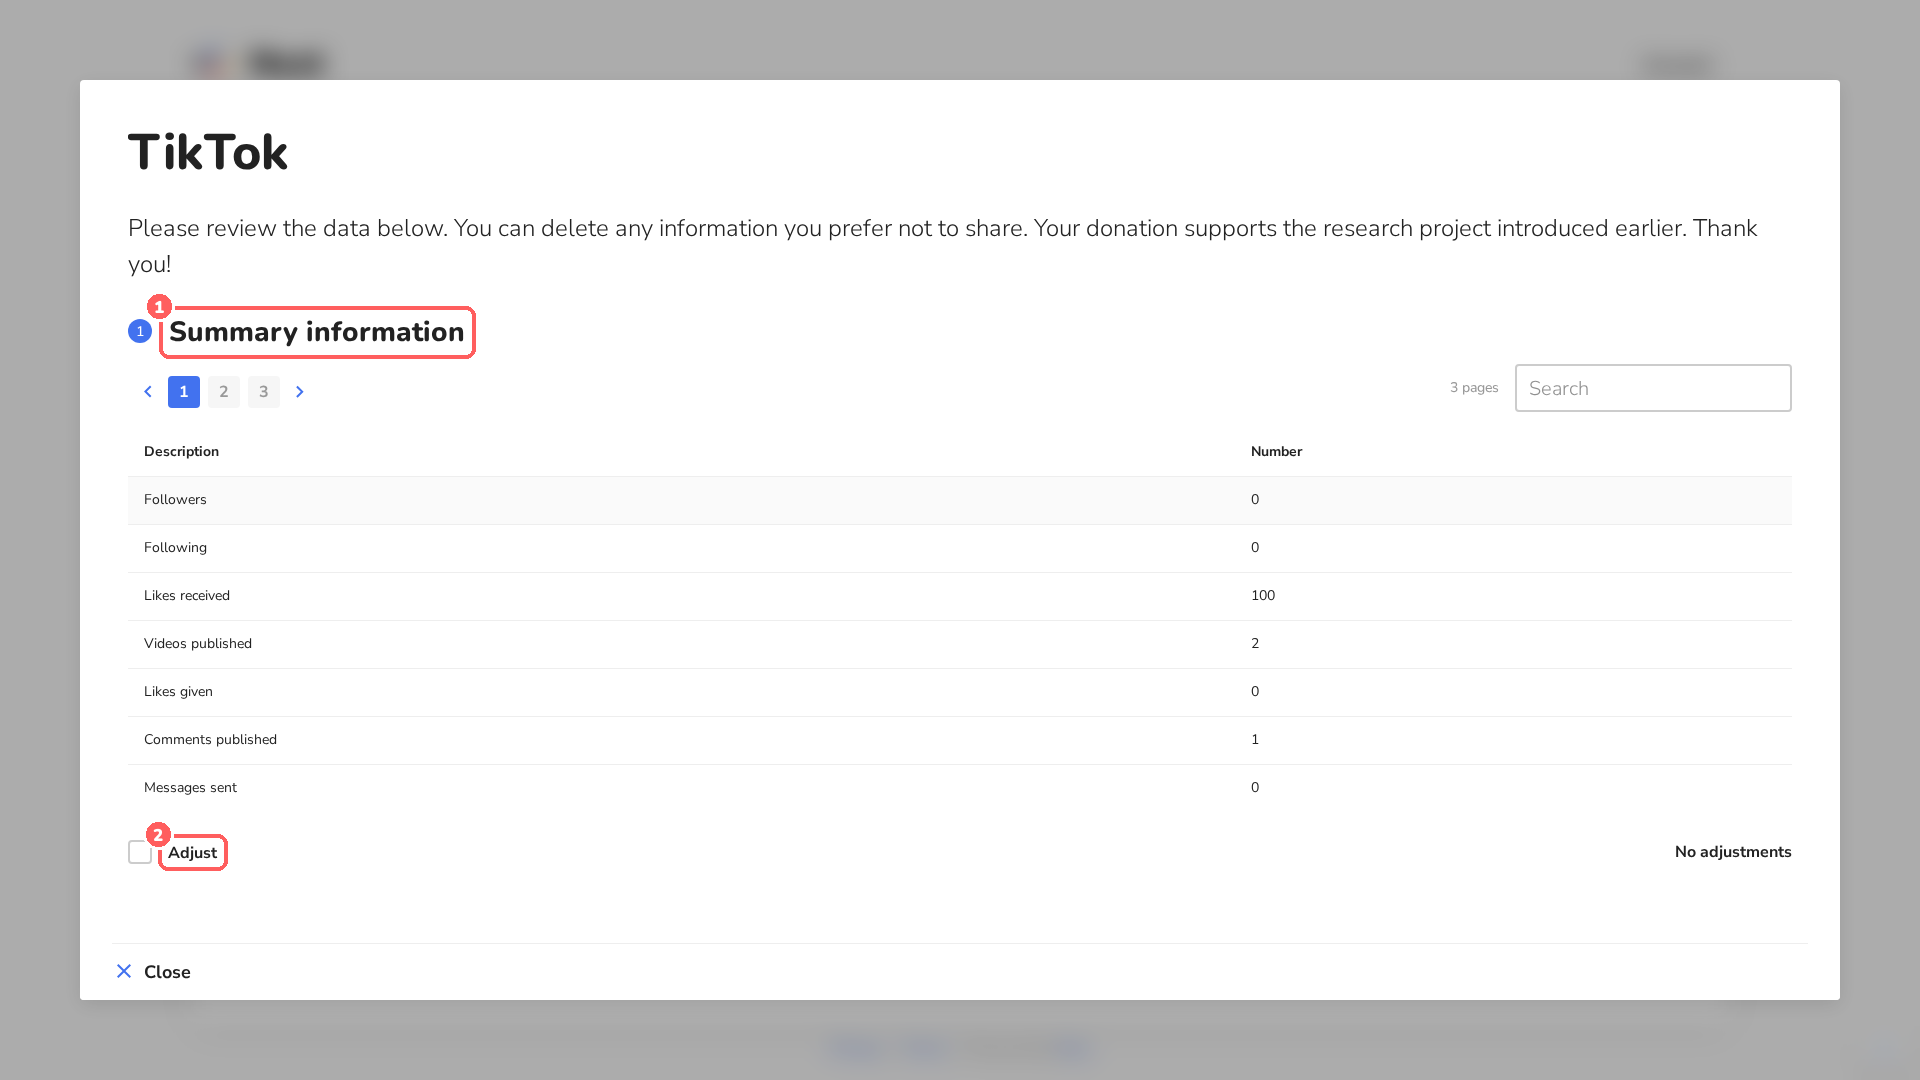
-
At the bottom, participants click Donate to share the data, or No to decline.
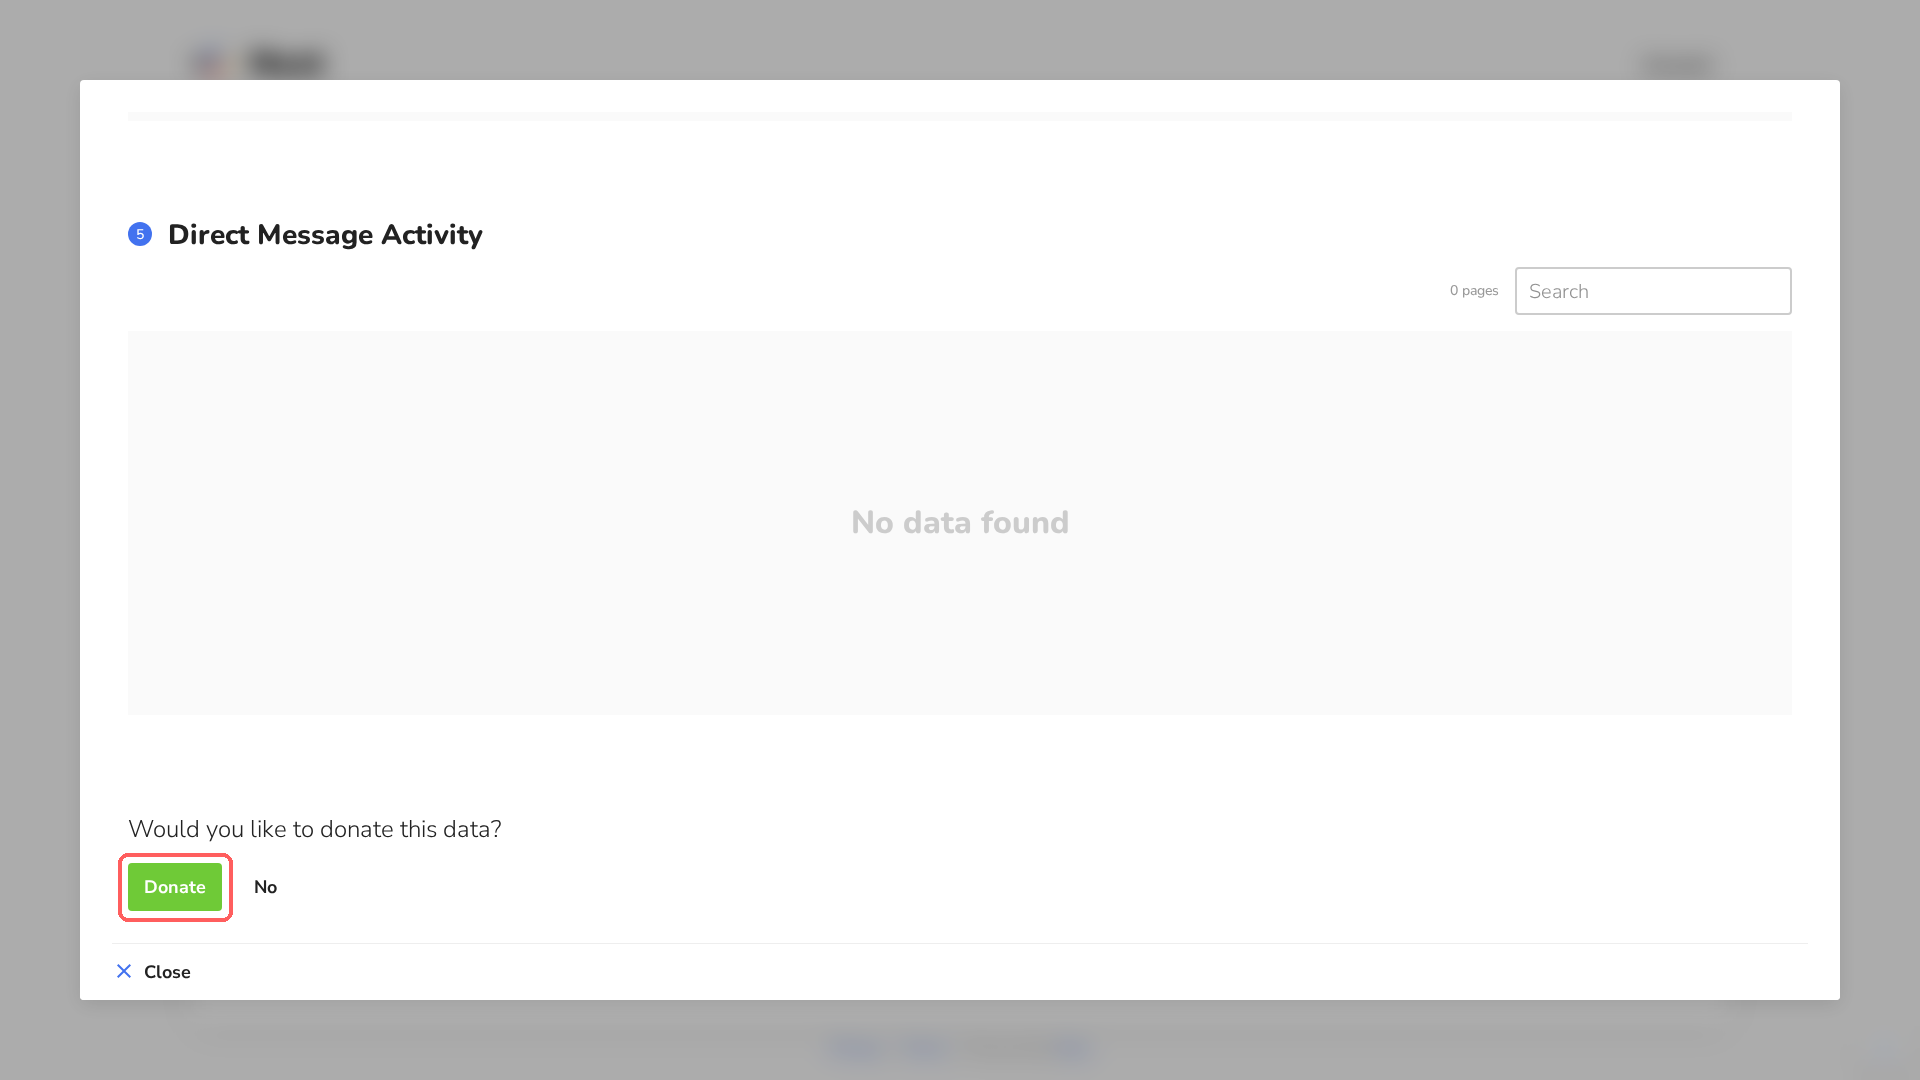
-
A completed task gets a green check mark 1.

-
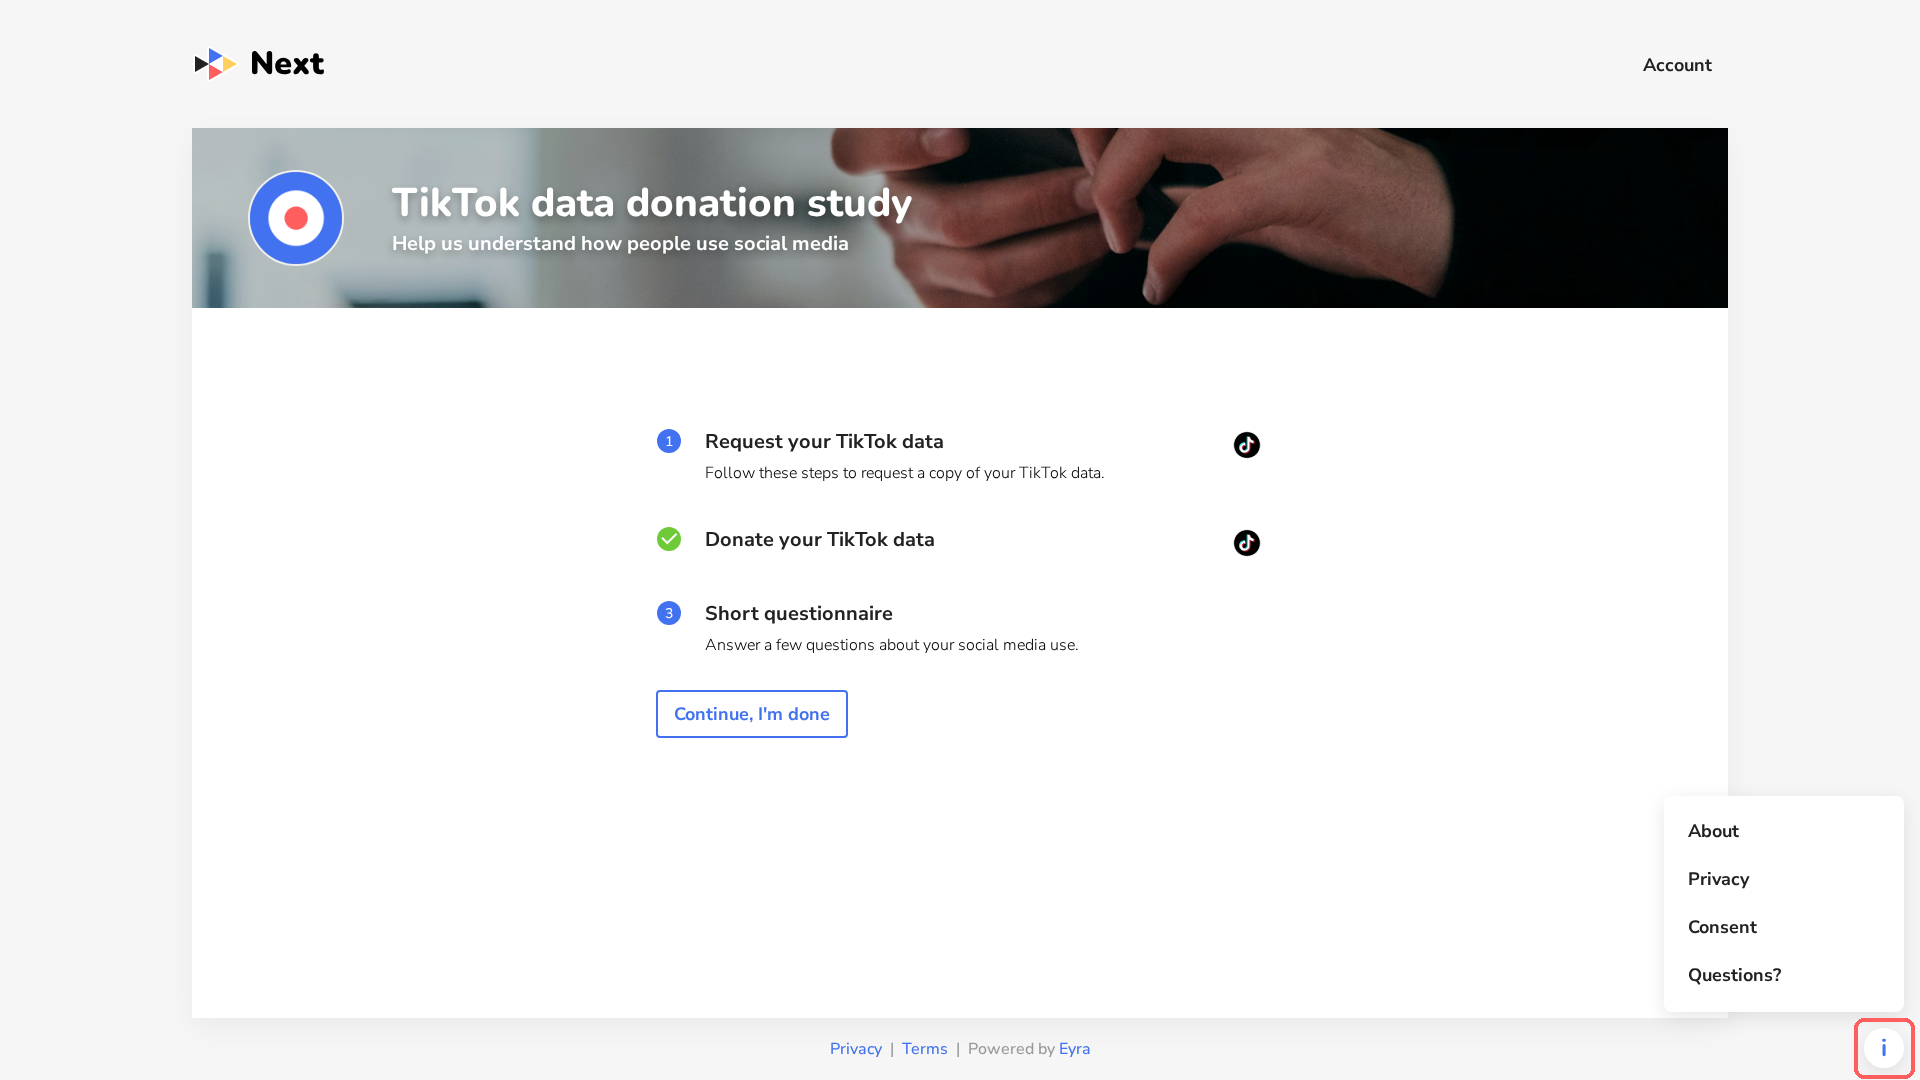
Through the i button at the bottom right, participants can read the About page, privacy statement and consent form again, and open your helpdesk page (Questions?).
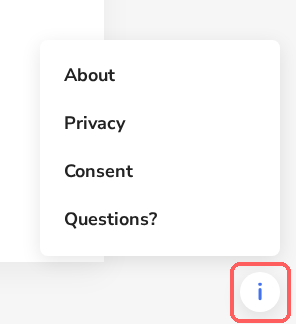
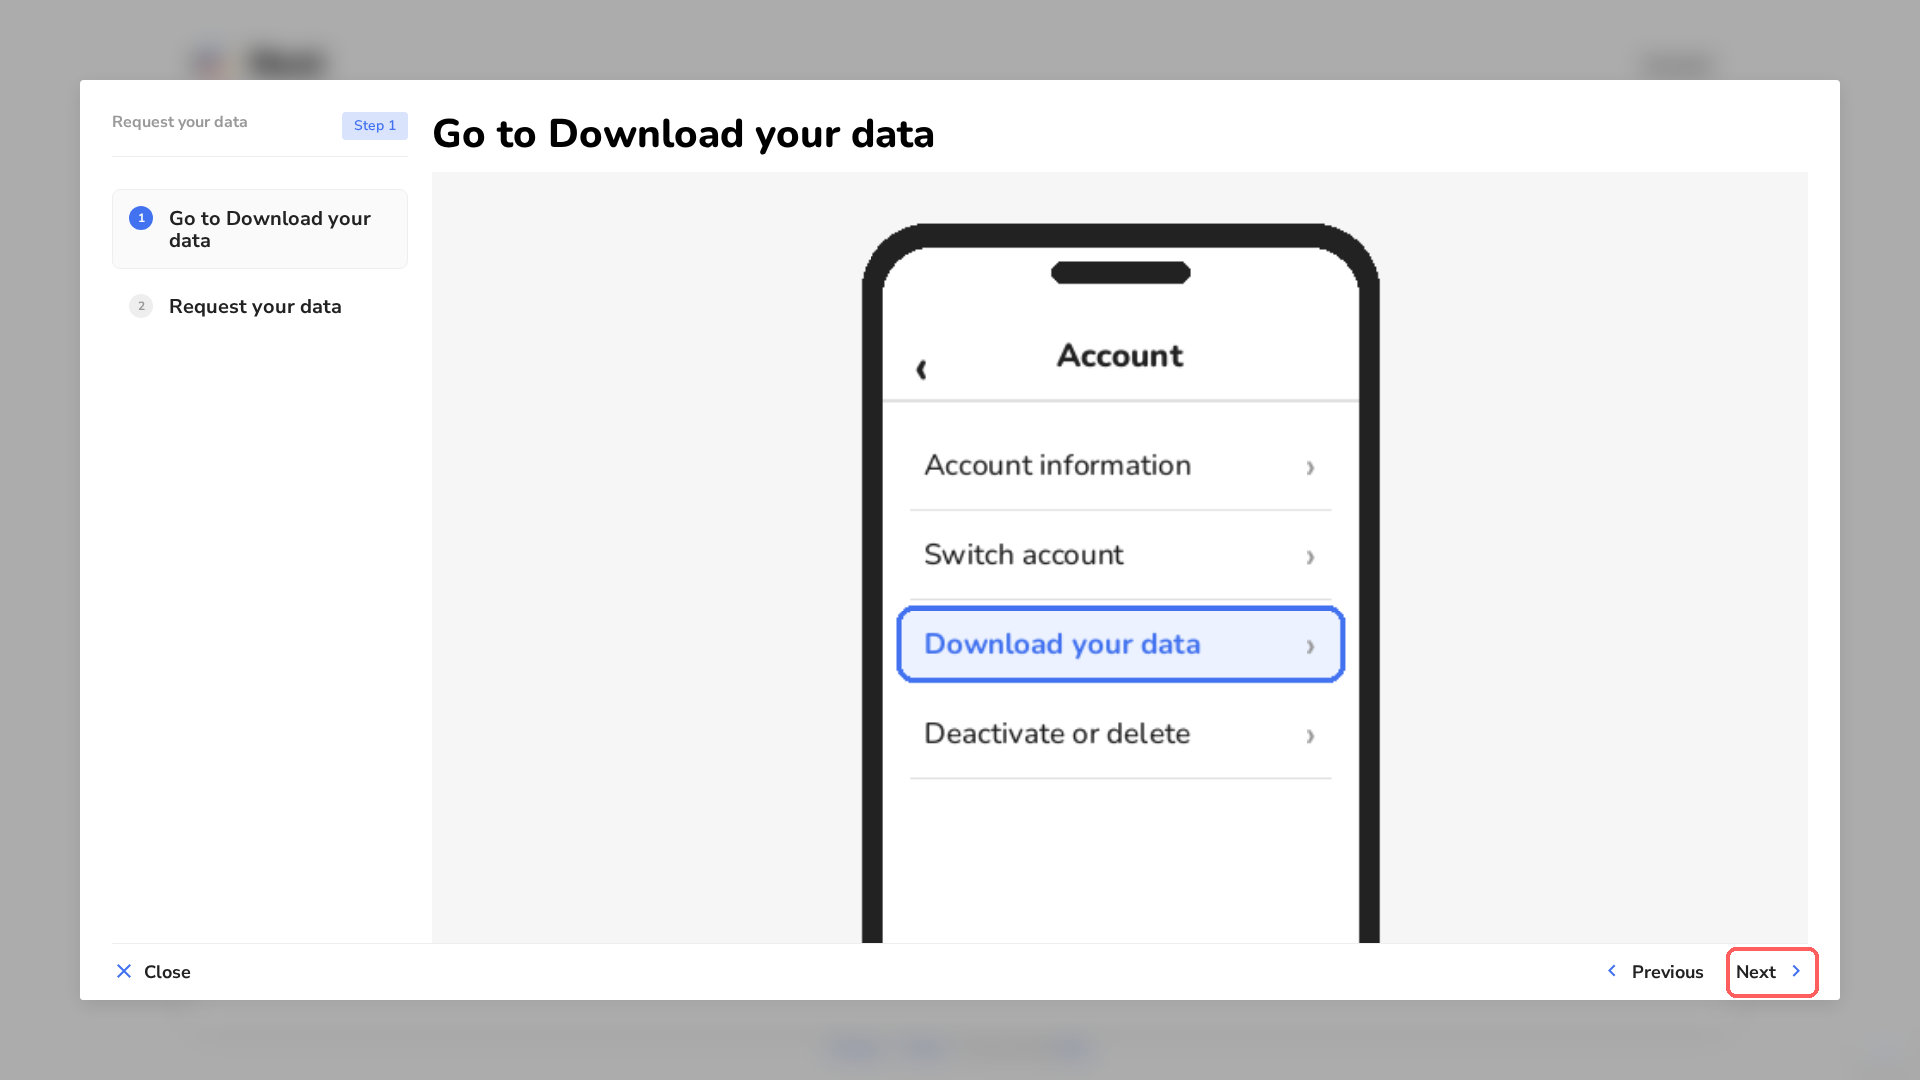
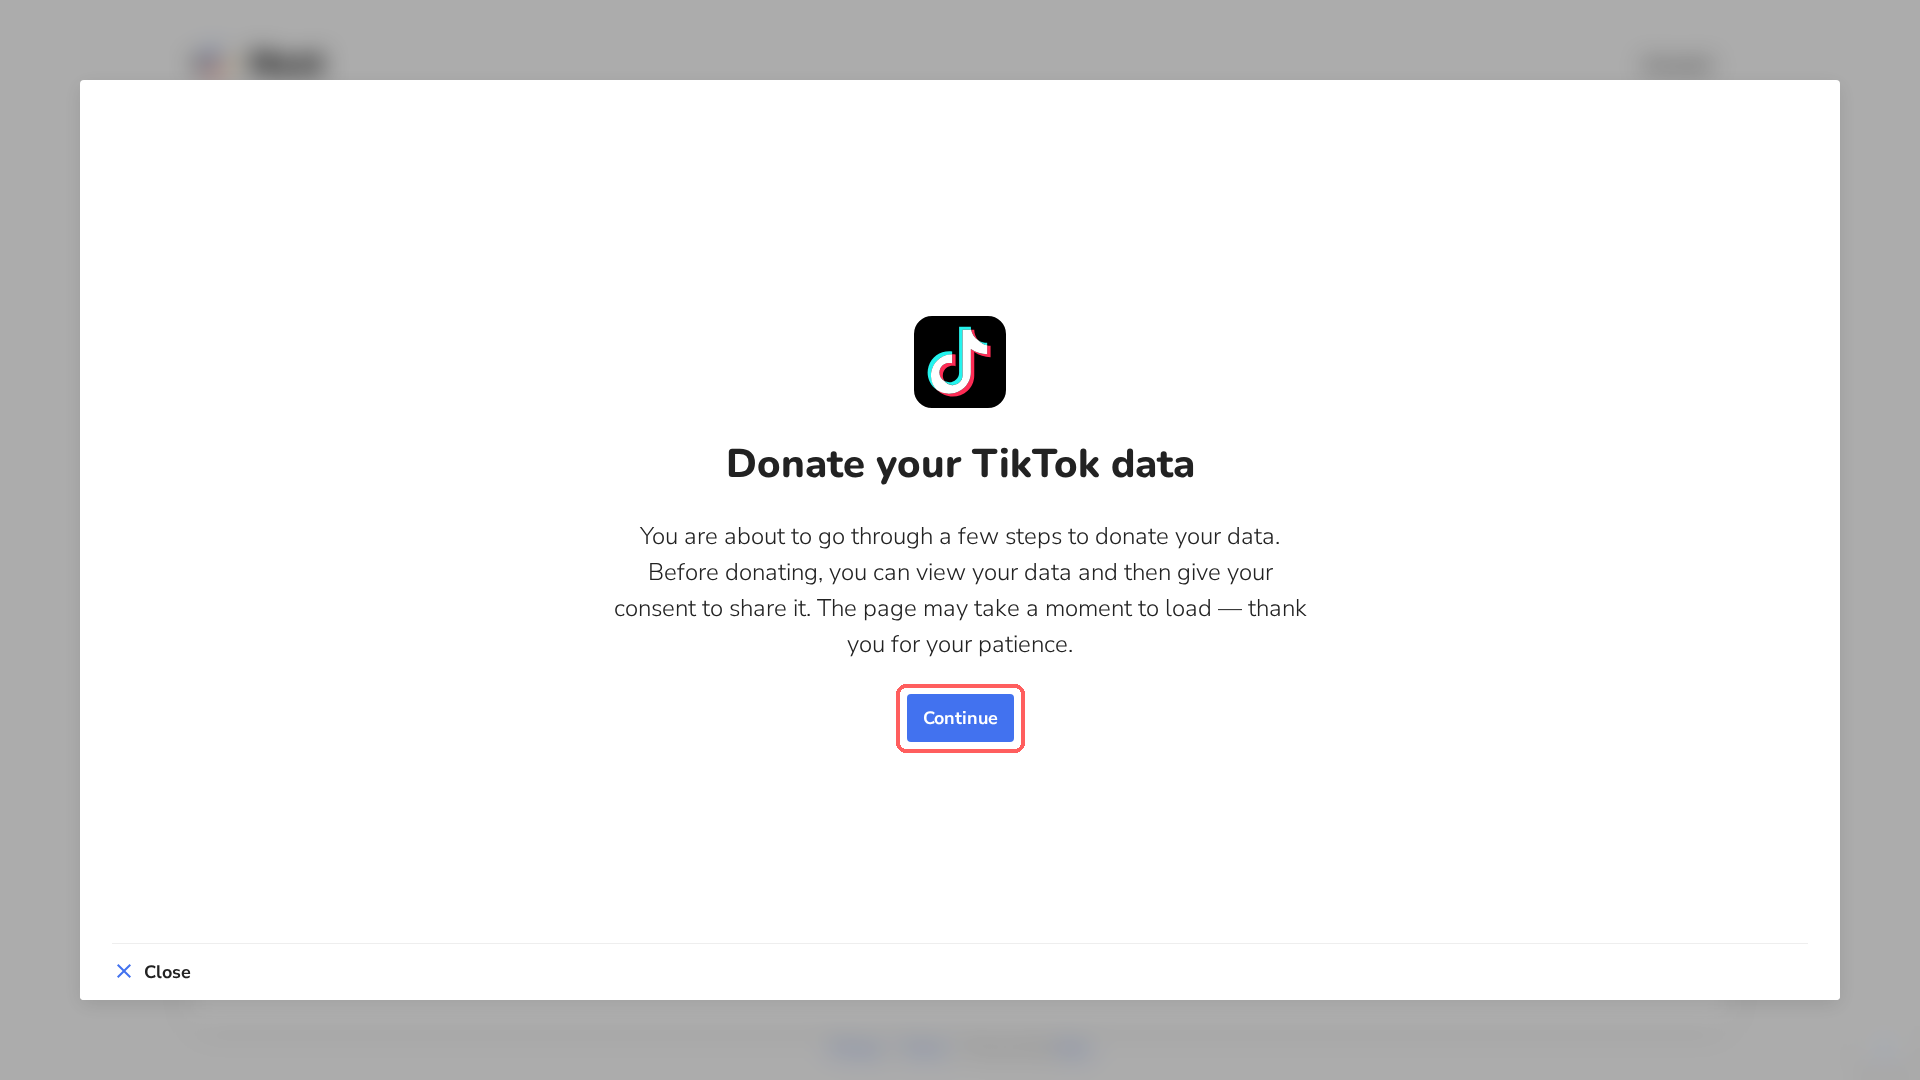
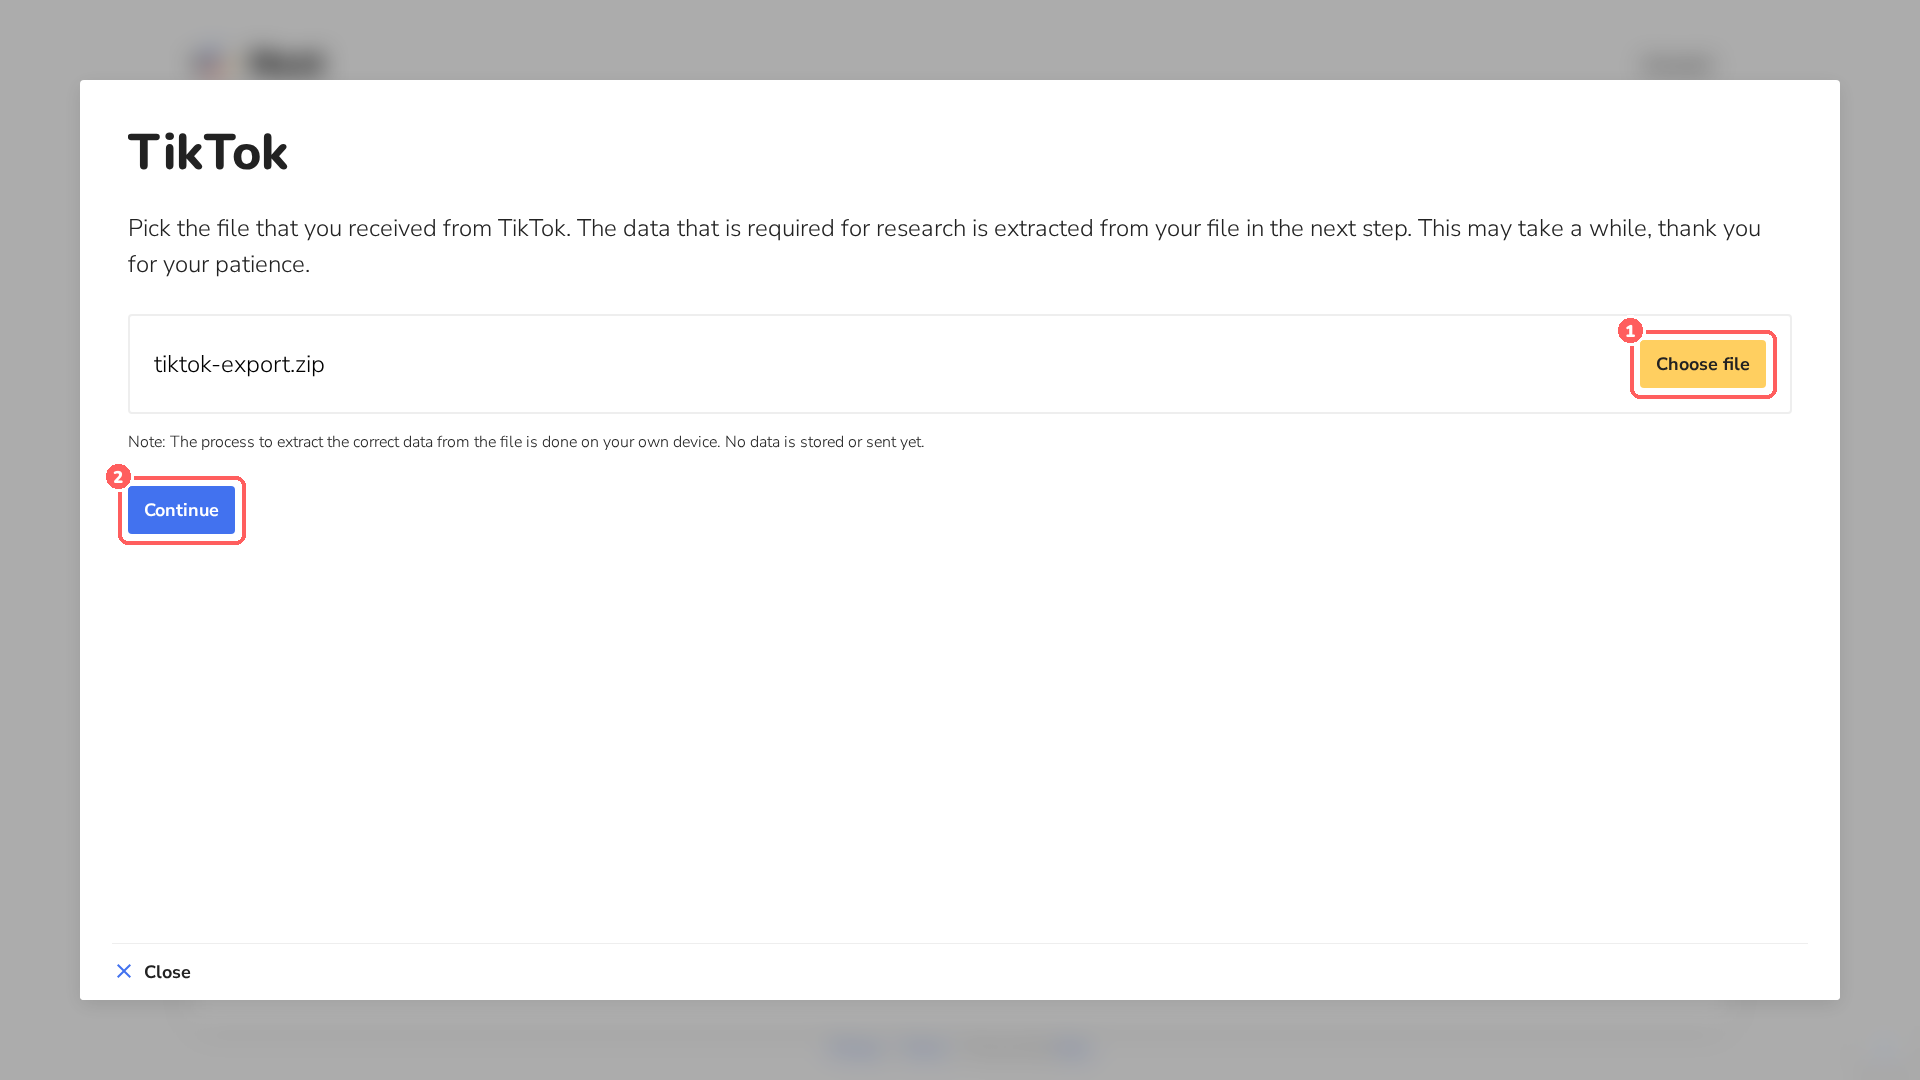
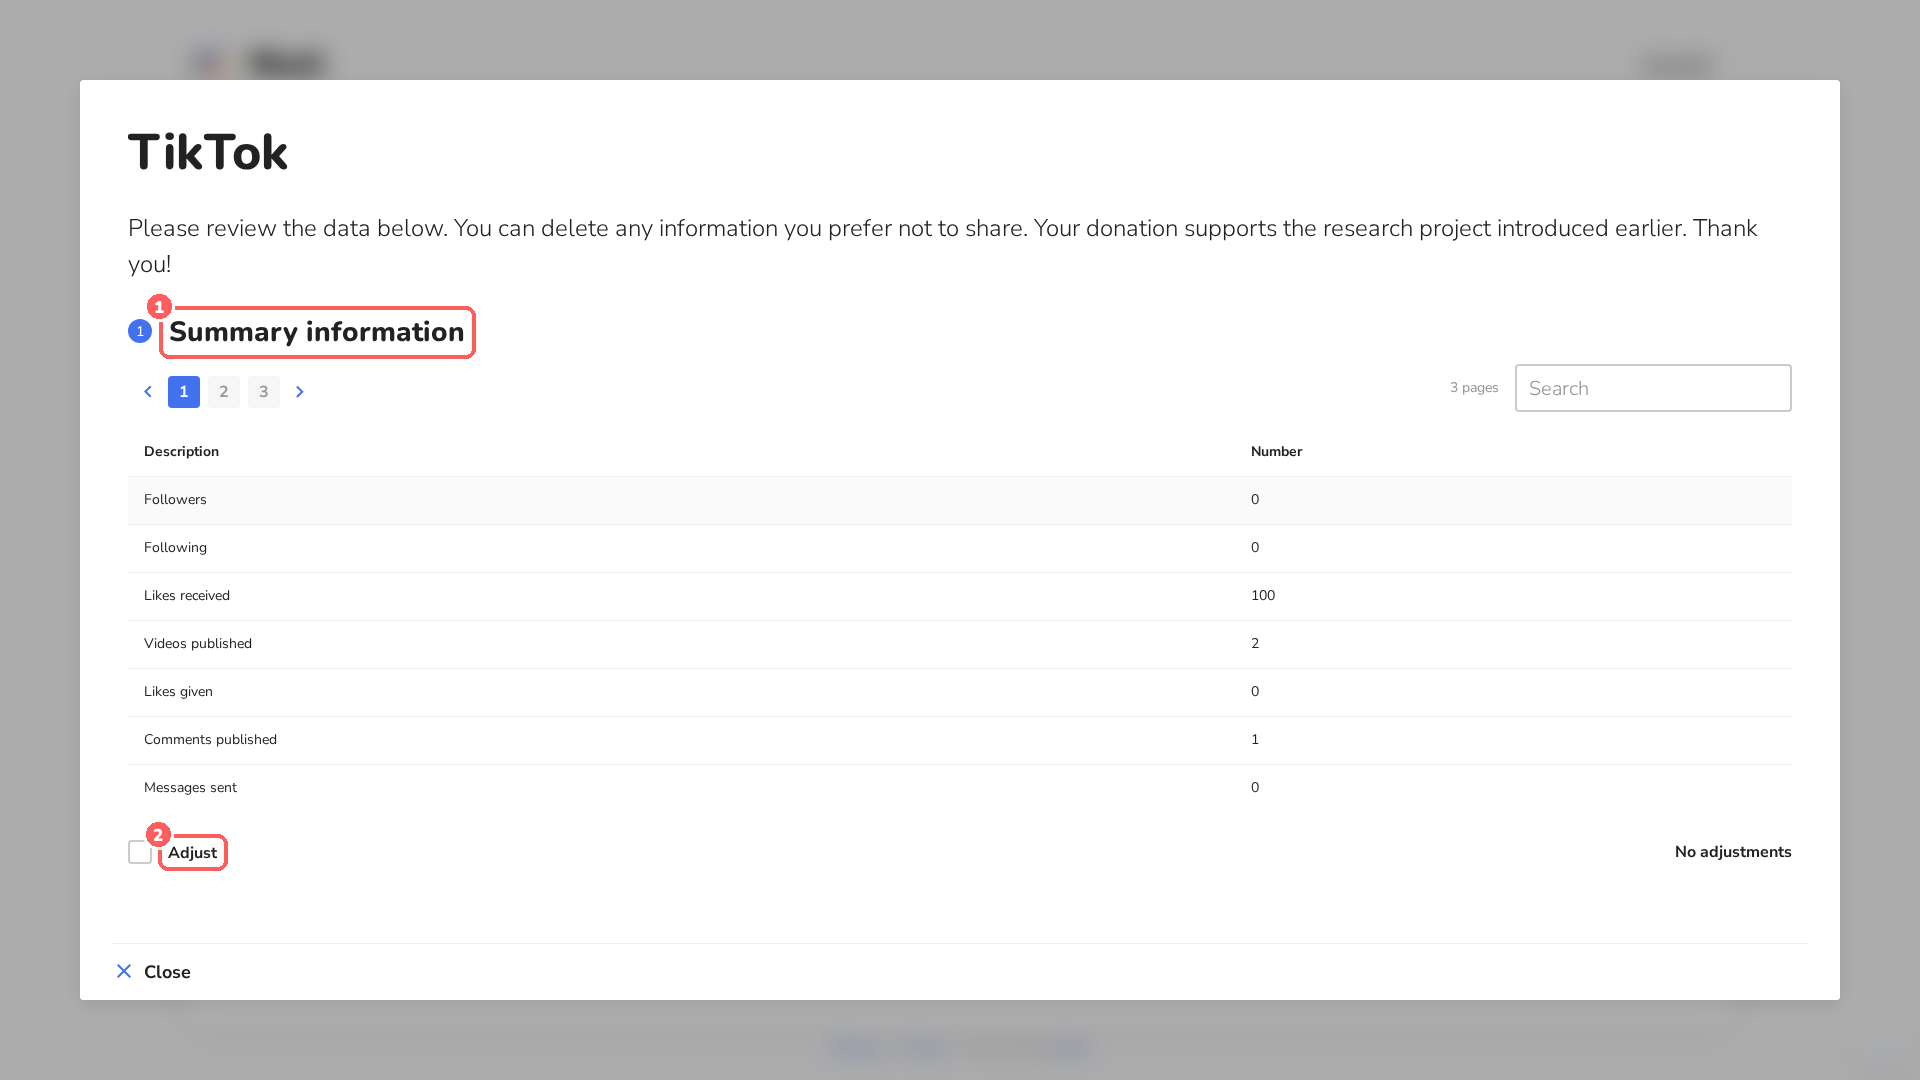
Preview remembers your progress. The next time you open Preview, you continue where you left off (the About and Consent pages are not shown again).
Data you donate in Preview is stored in your project's Files tab, with participant=preview in the file name.
9Monitor
Once your study is running, the Monitor tab shows whether the workflow works as expected.
- 1Progress report: download the progress per participant.
- 2How many participants started, finished or declined consent.
- 3Progress per task, compared to the expected number of participants.
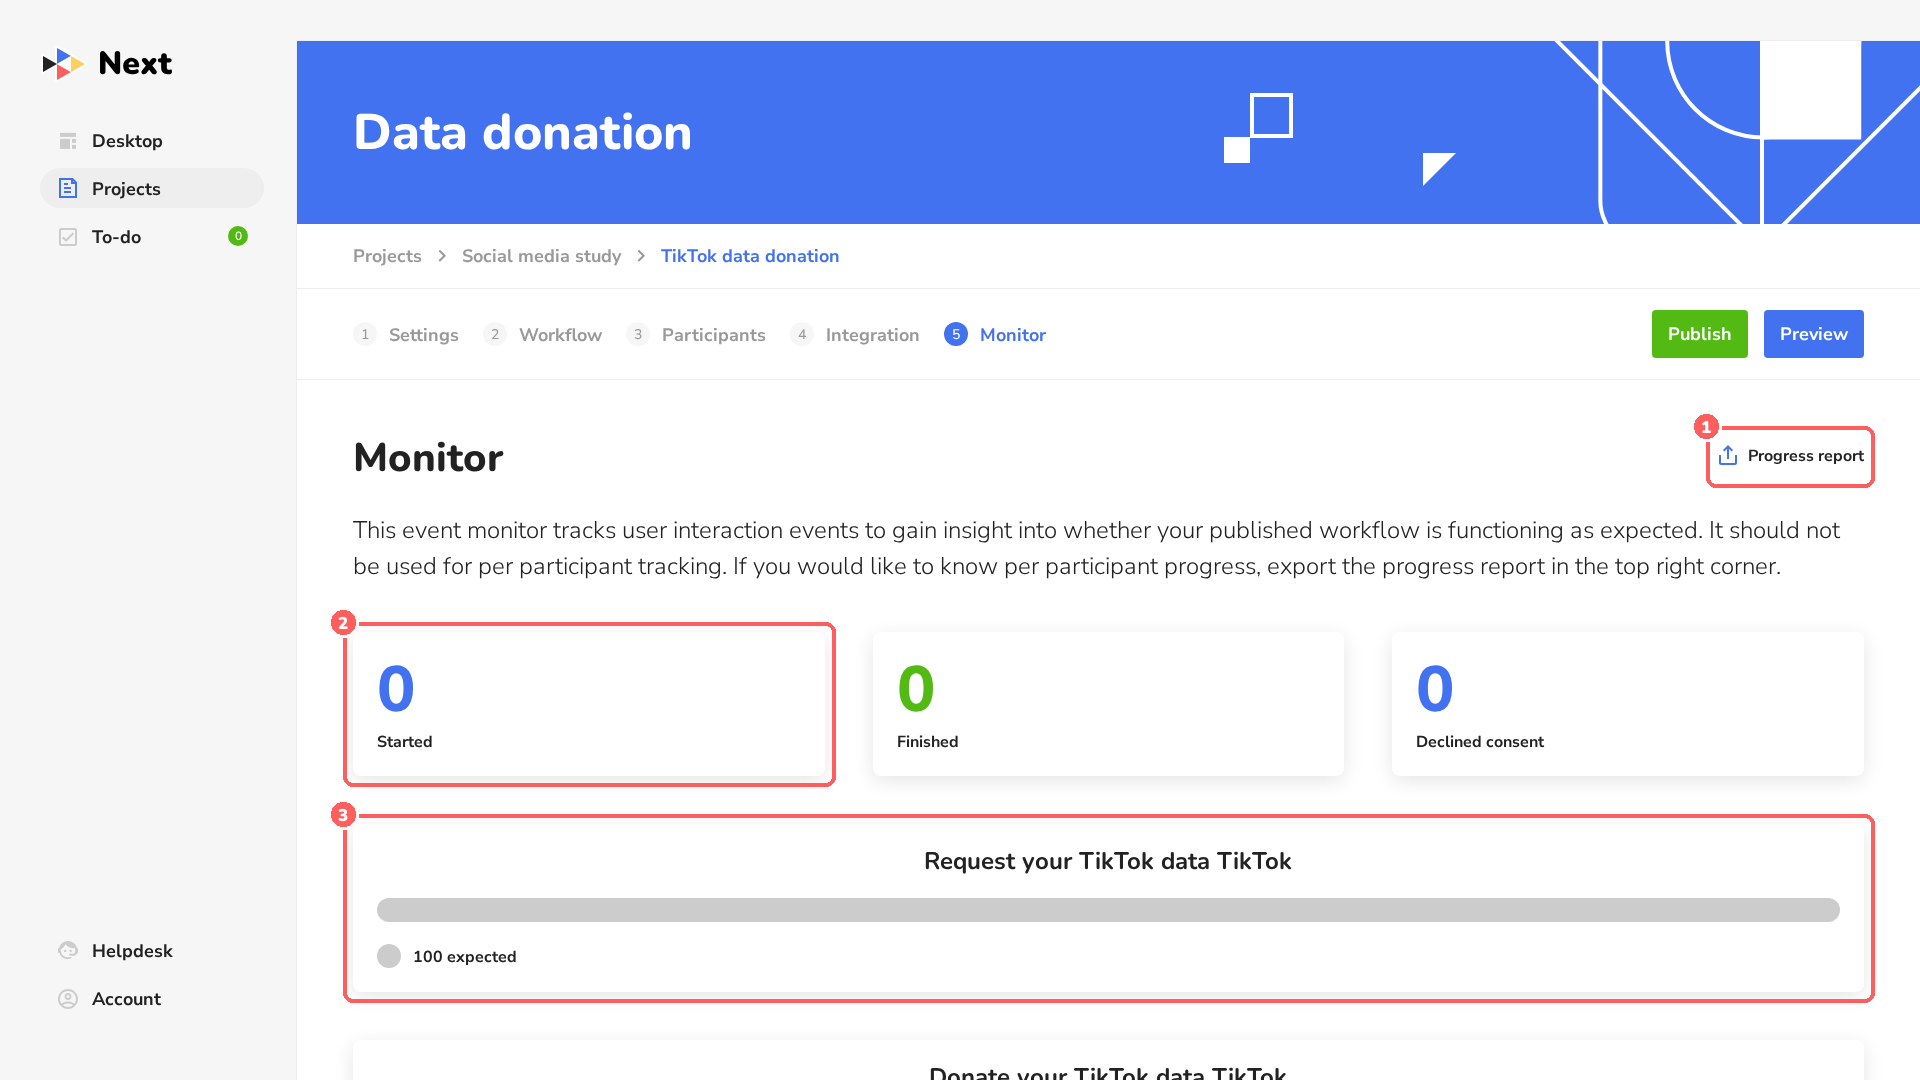
The numbers on this page are overall totals. To follow individual participants, use the progress report.
10Publish
When everything is set up and tested, click Publish at the top right of the item page. After publishing, the invite link works for participants.
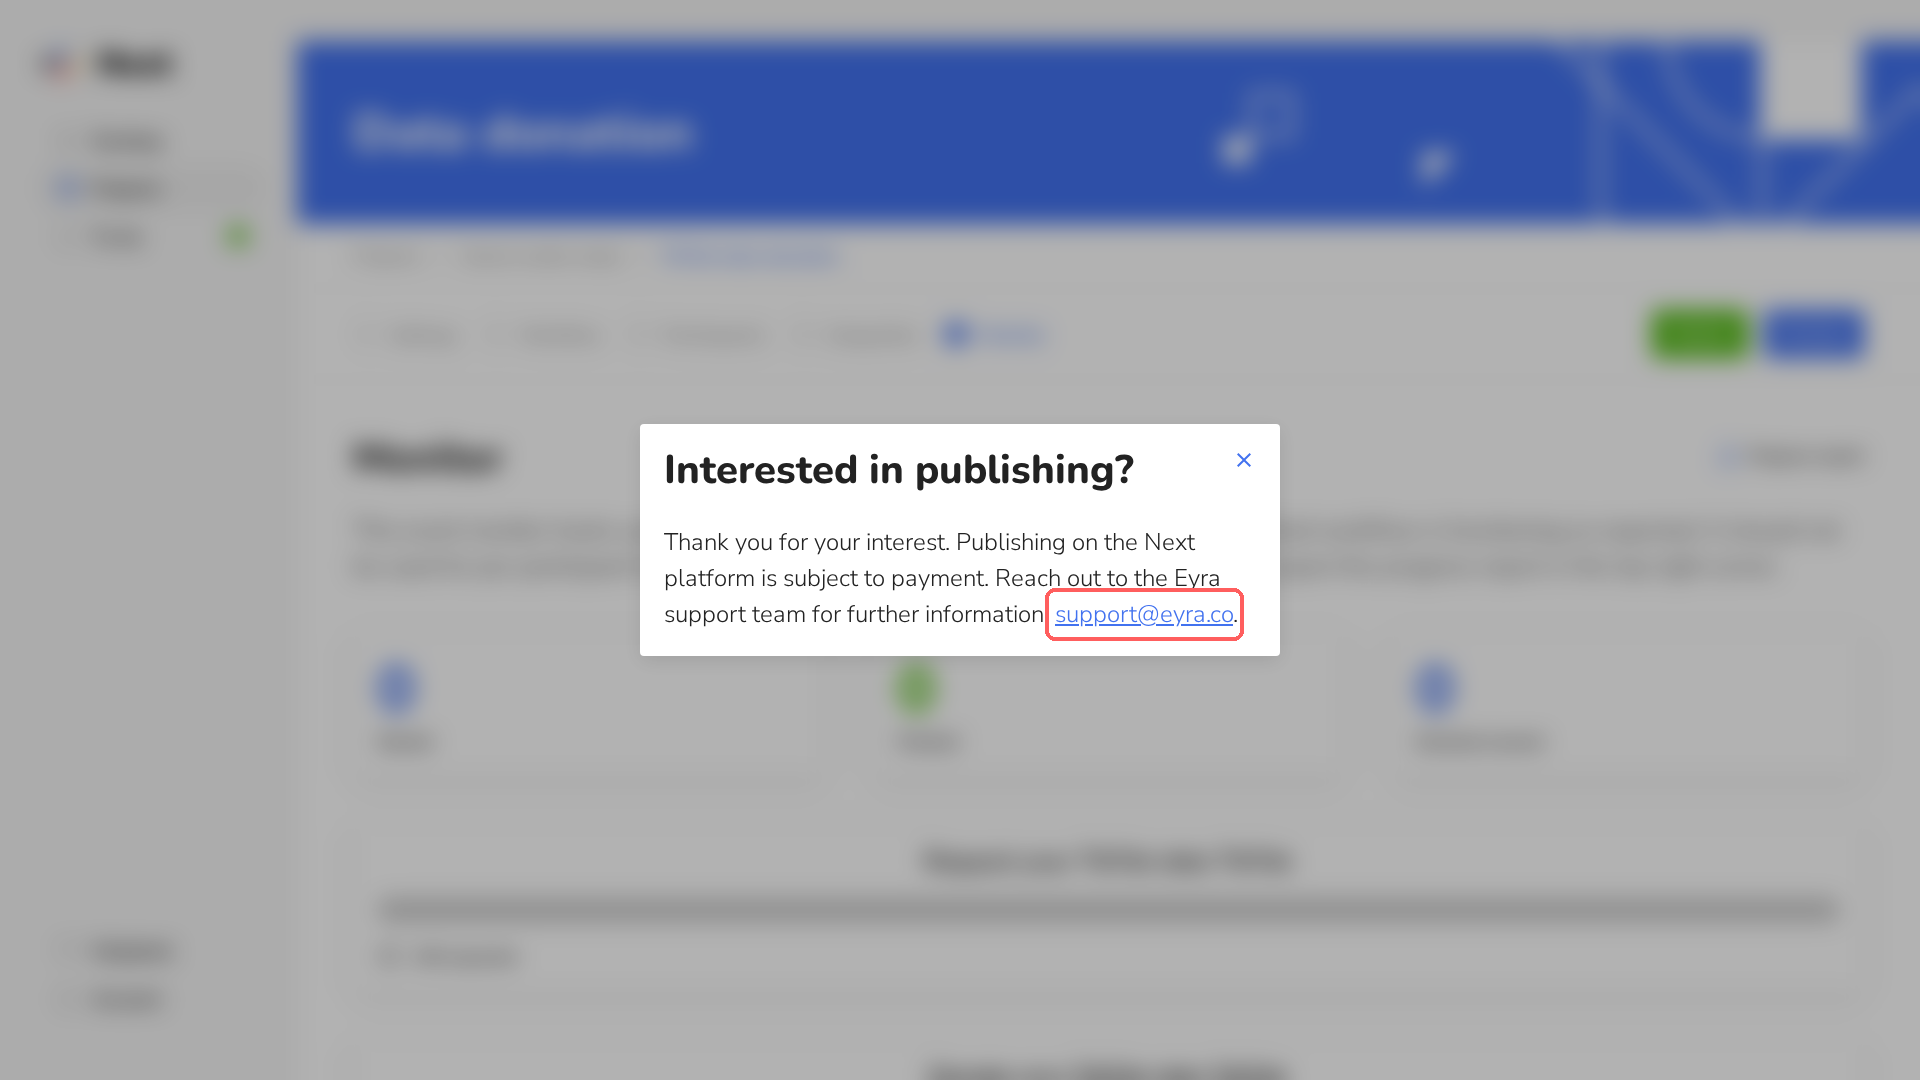
Publishing on Next is a paid service. If your account does not have publishing enabled yet, you see the message below. Contact Eyra support at support@eyra.co to arrange it.
11Download the donated data
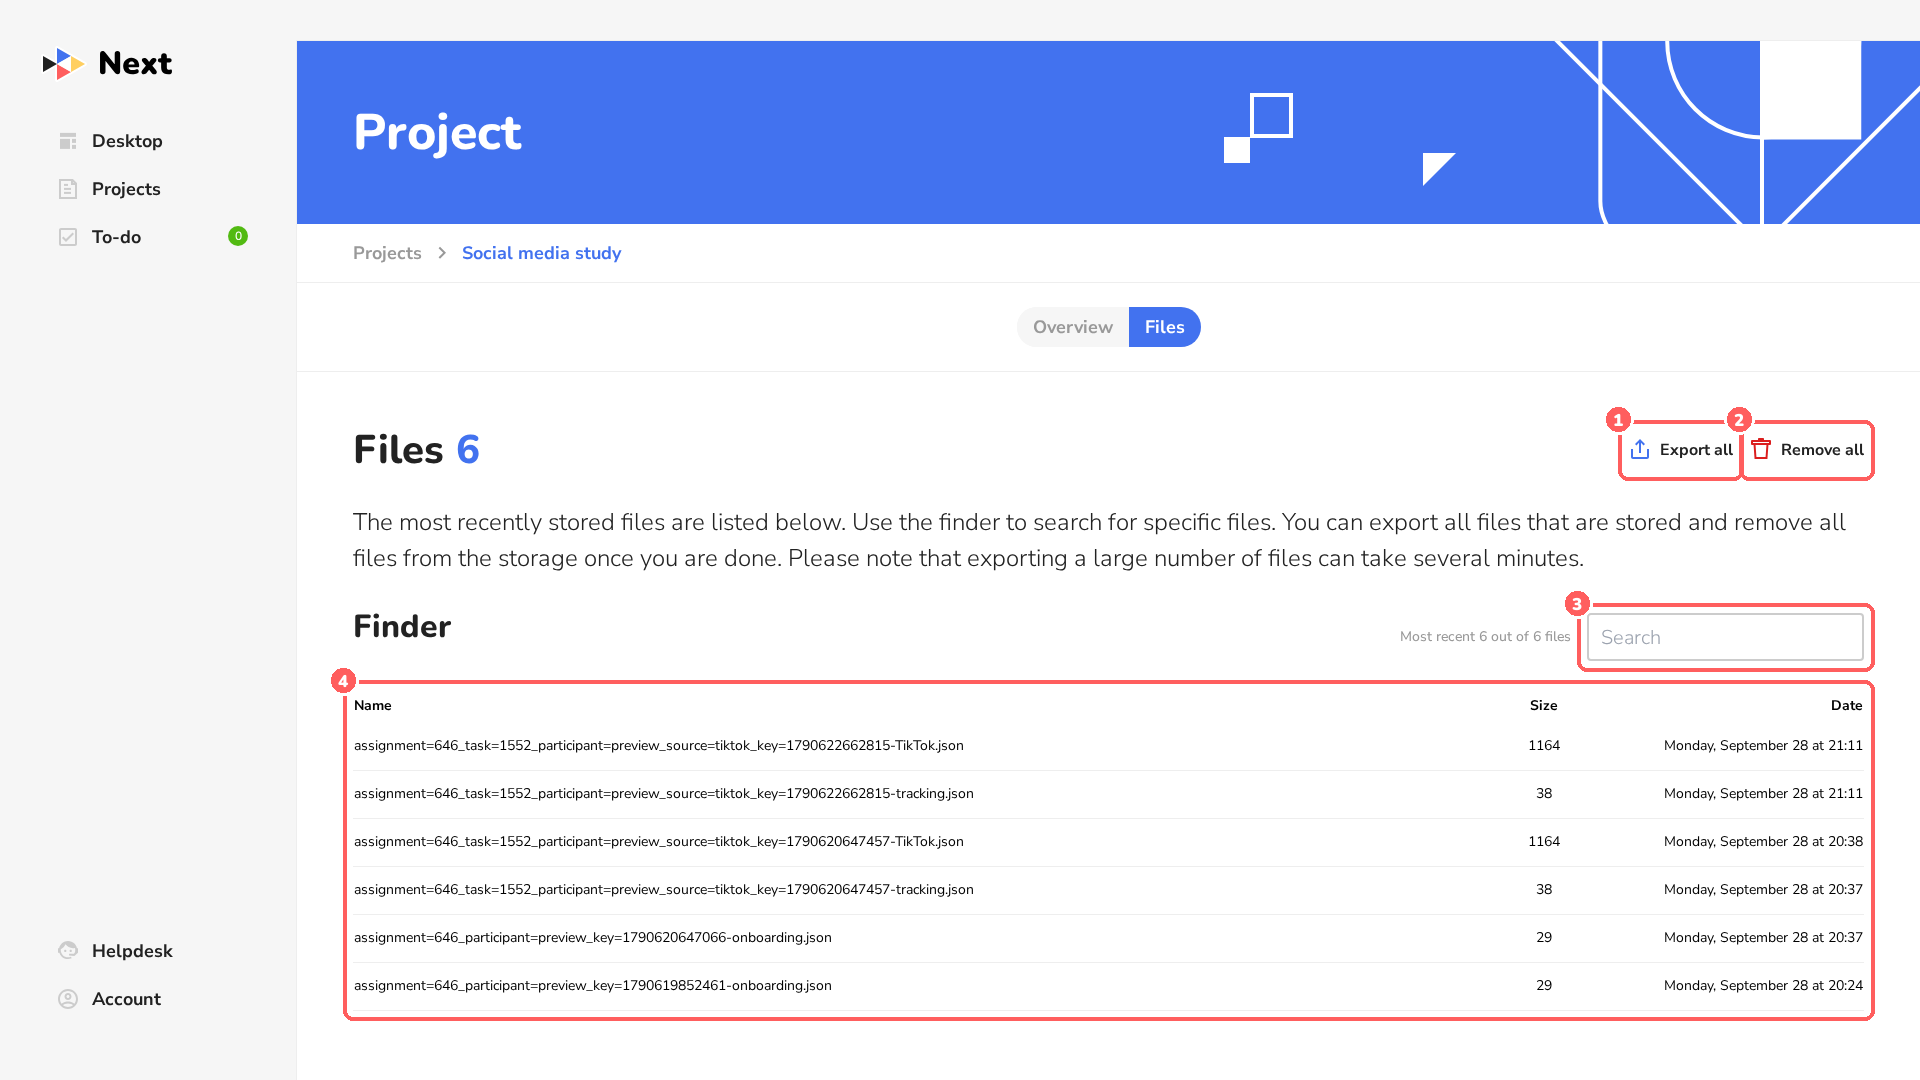
Donated data is stored per project. Open your project and go to the Files tab (next to Overview).
- 1Export all: download all stored files.
- 2Remove all: delete all files from the storage, e.g. when your data collection is finished and you have exported everything.
- 3Search: find specific files, e.g. by participant ID.
- 4The most recently stored files.
What is in the file names?
Each file name tells you where the data comes from, for example:
assignment=646_task=1552_participant=P0001_source=tiktok_key=1790622662815-TikTok.json
| Part | Meaning |
|---|---|
| assignment | The data donation item. |
| task | The task in the workflow (e.g. the Donate task). |
| participant | The participant ID from the invite link (preview for your own tests). |
| source | The data source of the task, e.g. tiktok. |
| ending | -TikTok.json contains the donated data. Files ending in -tracking.json or -onboarding.json contain technical events of the flow, which can help with troubleshooting. |
Remove all permanently deletes all stored files of the project. Always export and check your data first.